Get in Touch With Us
For business inquiries, collaboration, jointly work or want to say hi, Contact us by Email: [email protected]
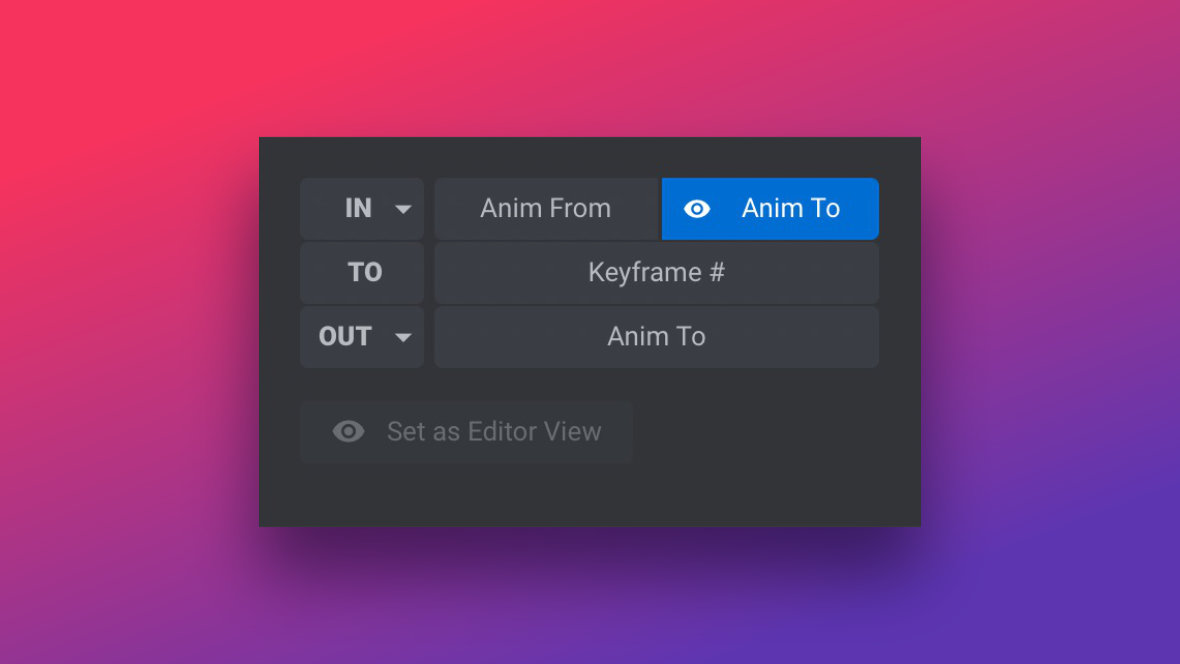
Slider Revolution [?] has a uniquely straight forward system for defining animations. All you have to do is pick a Layer [?] and decide what you want to animate it From and To.
Some examples of how this approach can be used when creating animations:
All you need to do is define the animation’s From and To states by configuring layer settings. Slider Revolution will then automatically handle transitioning between the two keyframes. For example, the following animation shows all the transitions described above applied to a text layer:
Each animation strip on a track [?]represents one of these From through To transitions for a layer:

The blue strip shown in this image is the ‘Animation Strip.’
In the case of the first animation strip on a track, click somewhere on the left half of a strip to see the settings of its From state in the advanced panel of the Animation settings. (Refer to The Fundamentals of Animation in Slider Revolution for how to access these settings):
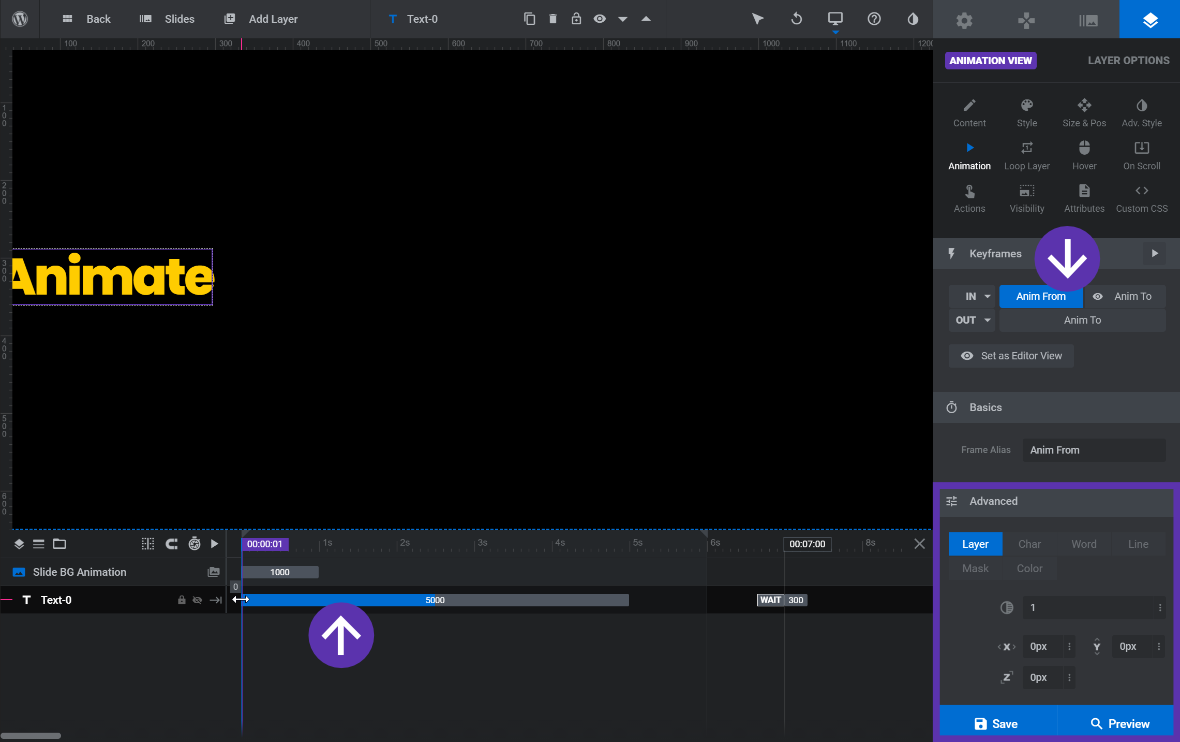
Click the left half of the animation strip or the Anim From button to display the animations settings in the Advanced panel.
Note: Clicking the Anim From button performs the same function as clicking on the left half of the first animation strip.
Click the right half of the strip to see the settings of the To state:
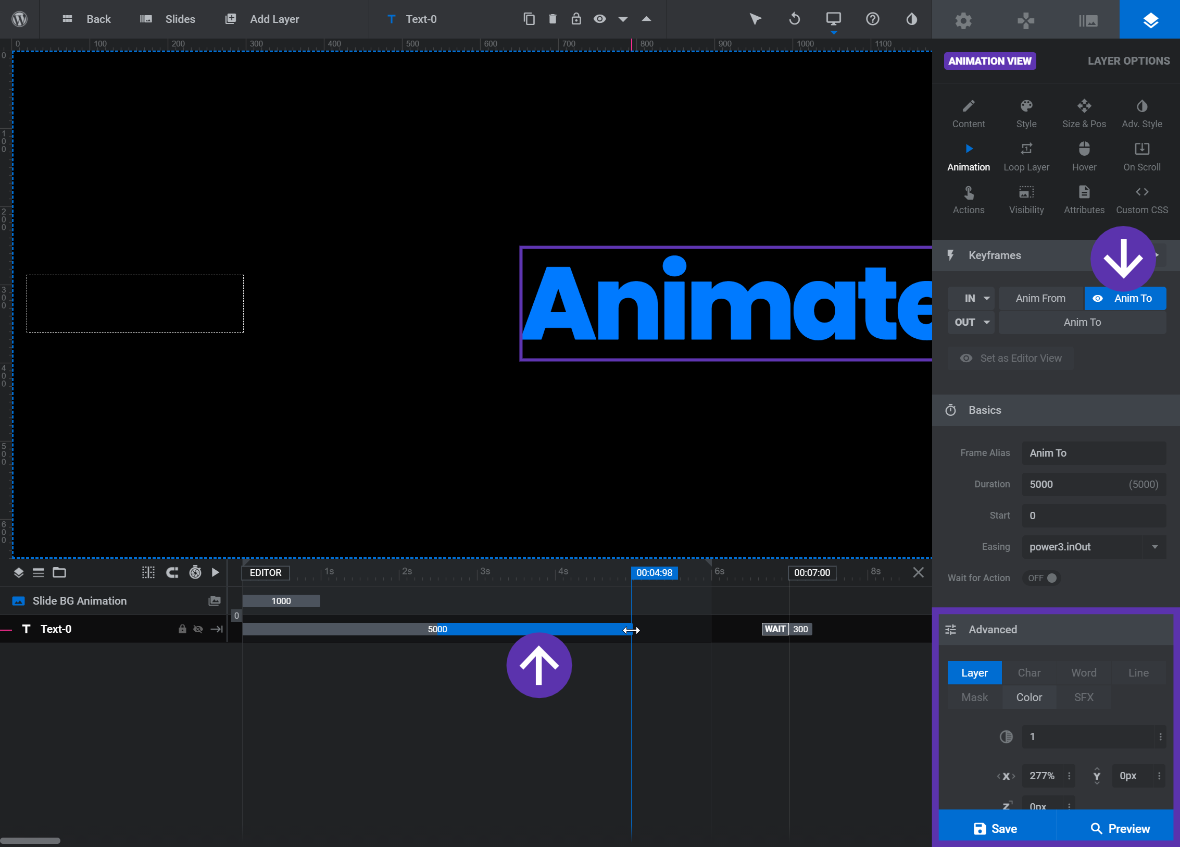
Note: We’ll learn more about configuring these settings in the “Animation State Settings” section below, but for now let’s focus on understanding how animation strips represent transitions.
When the animation is played and the playhead passes across that strip you will see the transition between its From and To states happen on the canvas.
Wherever the left edge of the strip is positioned on the timeline determines when the transition begins, and the right edge of the strip determines when the transition ends:

Accordingly, the length of the strip corresponds with the duration of the transition:

When you click on the second animation strip on a track, or any after it, you will only see the settings of its To state:
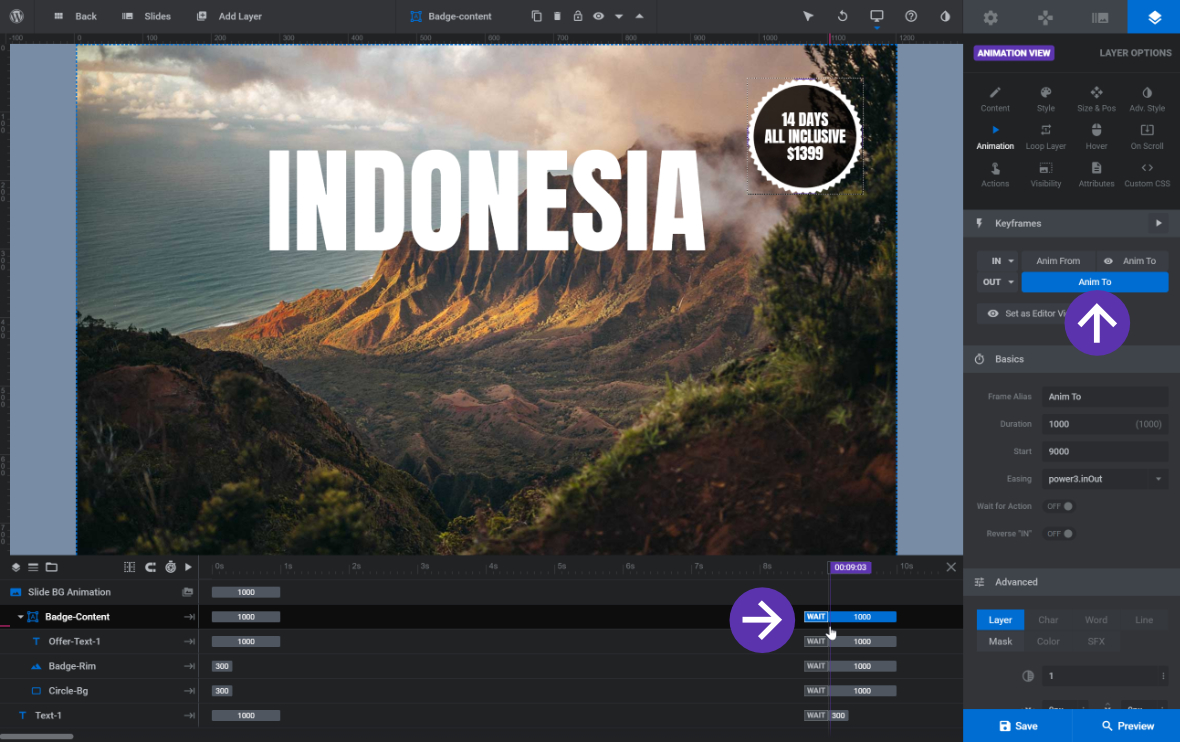
Click the second or subsequent animation strips on a track and you will only see the settings of its To state.
The reason it doesn’t need it’s own From settings is it will transition the layer from the state in which the previous animation left it.
In short, whatever state the previous animation transitioned To, will automatically also become the From state for the next animation.
For example, you may have a first animation that is yellow in its From state and blue in its To state. You then may have a second animation that is red in its To state.
In this case the first animation will transition From yellow through To blue, and the second animation will transition From blue through To red:
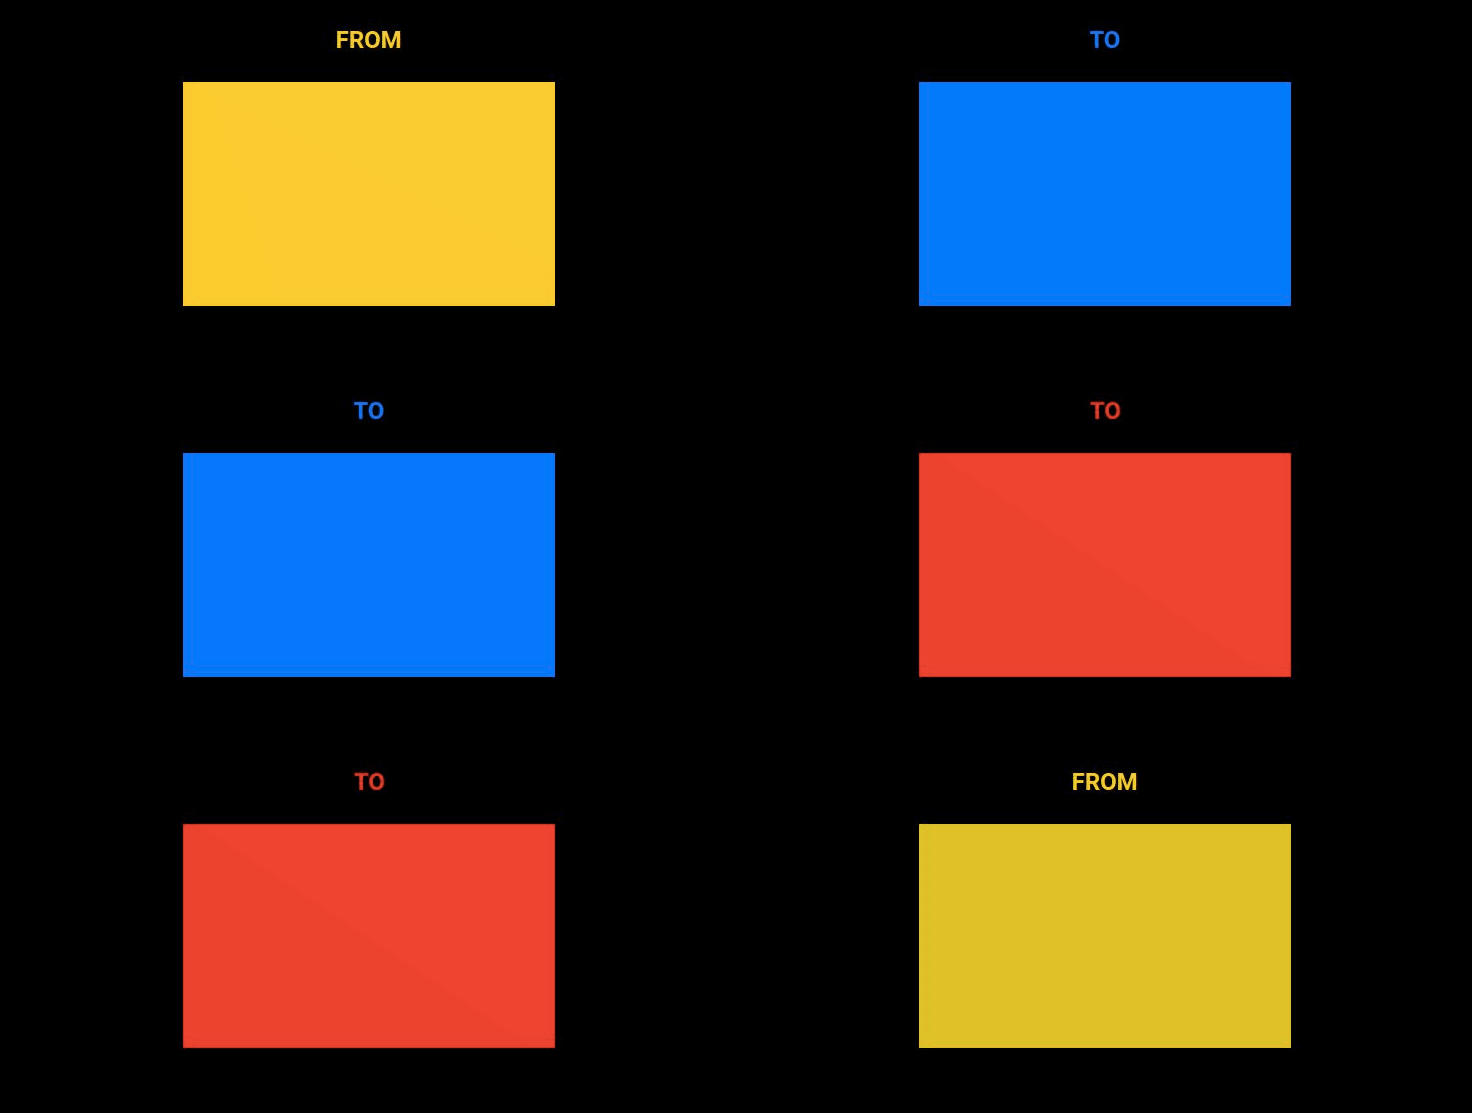
All of the configuration of animation states happens in the Advanced panel. Within that panel you will see seven tabs, each of which groups up a number of animatable properties for the selected layer:

The settings you configure here define each of the From and To states Slider Revolution will transition your layer between.
We’ll get into detail on the setting of each tab as we move further into the manual, but for now we’ll talk briefly about the two tabs you’ll use most often: the Layer and Color tabs.
The Layer tab controls the size, positioning and opacity of a layer:
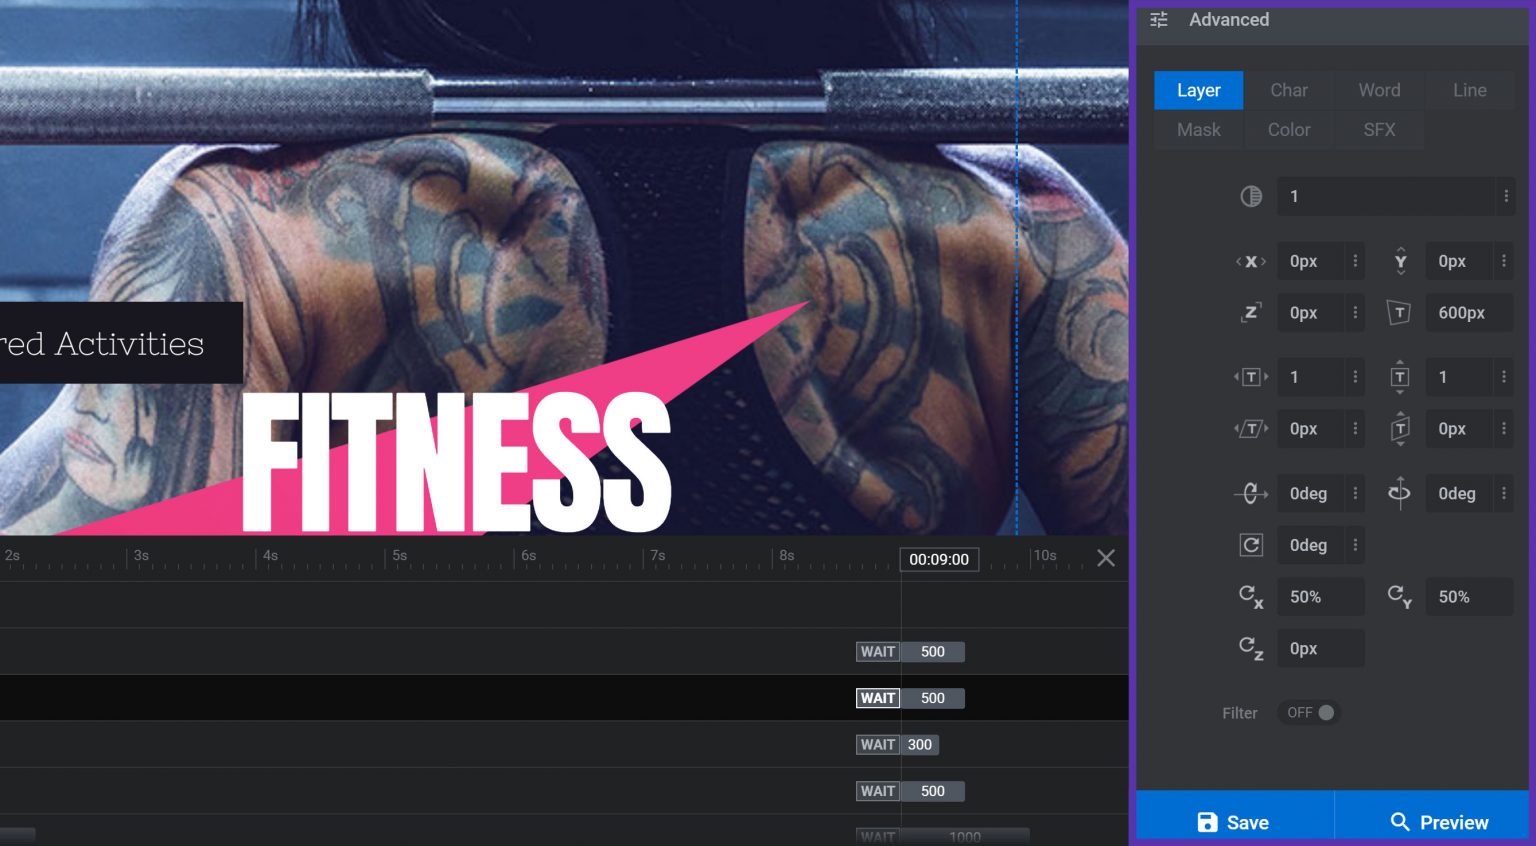
There are a lot of settings here. If you’re not sure what a particular setting does, you can activate help mode by clicking the question mark icon in the top toolbar, then hover over any setting to see what it controls:
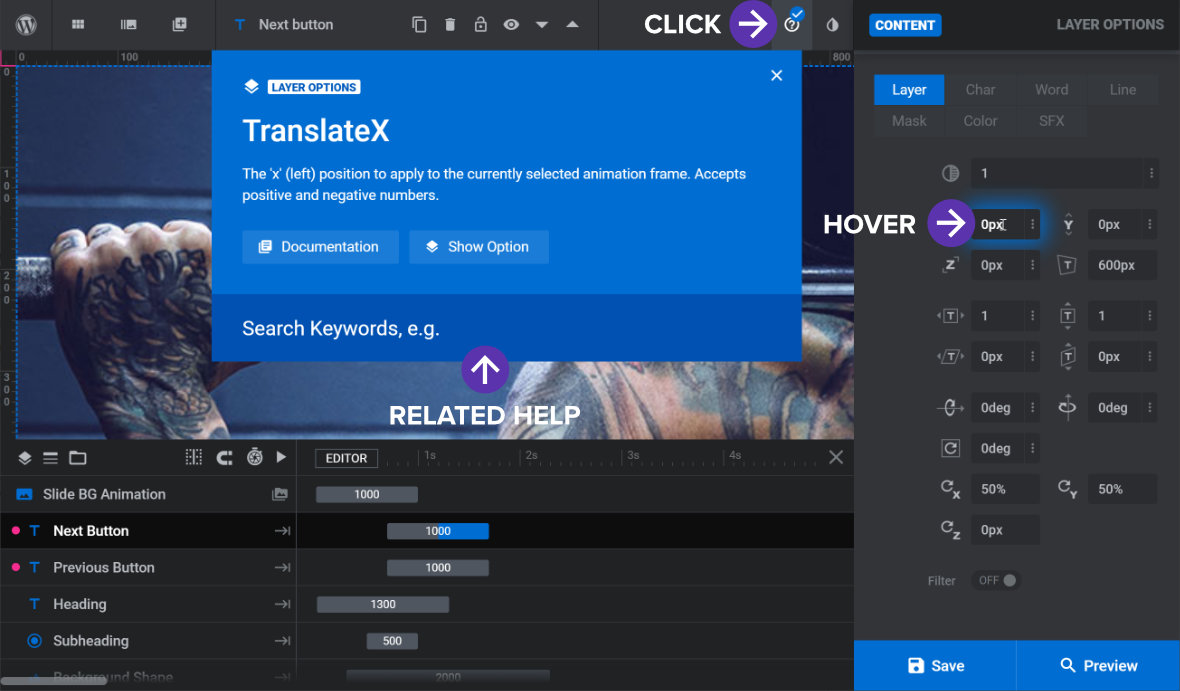
Note: Be sure to click the question mark icon a second time to turn the help function off once you’ve obtained the help you need.
The Color tab controls the text and background color of a layer:
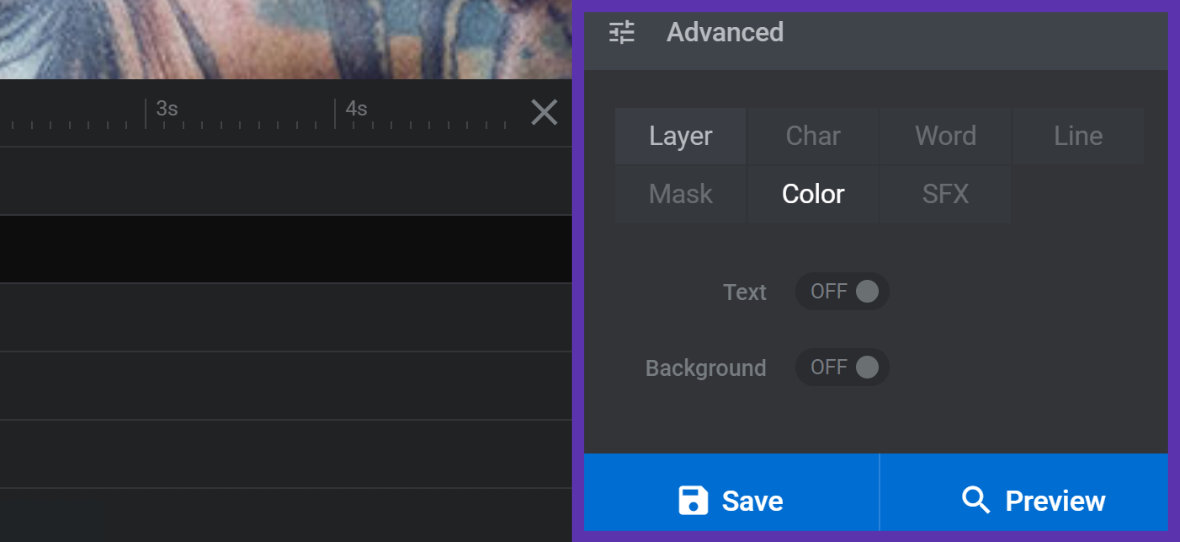
In the Basics panel you can directly enter timing settings to control exactly when and how each animation plays:
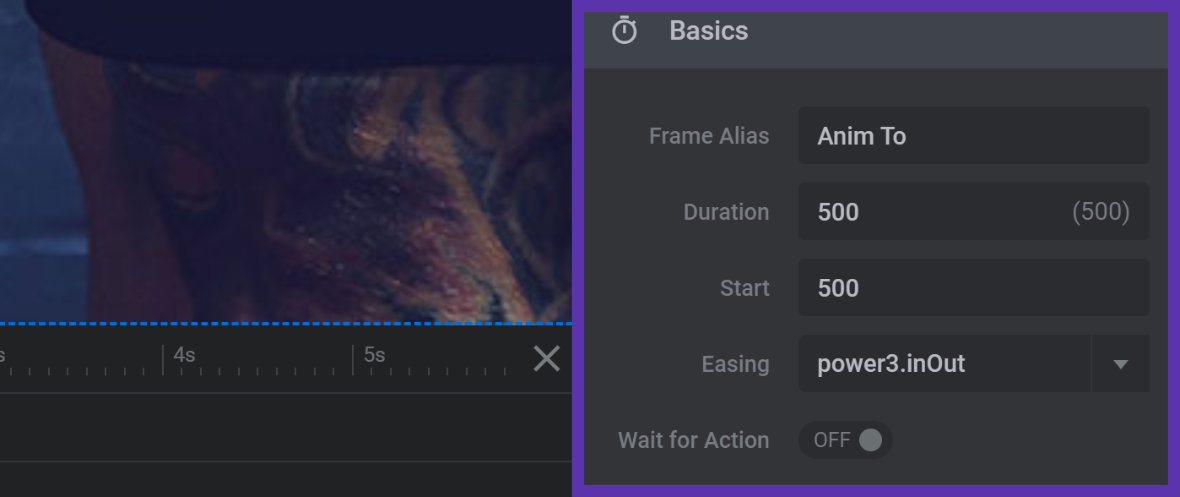
Again, there are a couple of settings here that we’ll get into later in the manual. For now, let’s focus on the two you’ll use most often: Duration and Start.
In the Duration field you can directly enter the duration an animation transition should last. The value is in milliseconds. For example, if you want a transition to last 3.5 seconds you would enter 3500 in this field:

The Duration field also corresponds with the visible length of the related animation strip. When you change the value of the field, the length of the strip will change.
Conversely, clicking and dragging the edge of the animation strip will change its length and the Duration field will update to match:
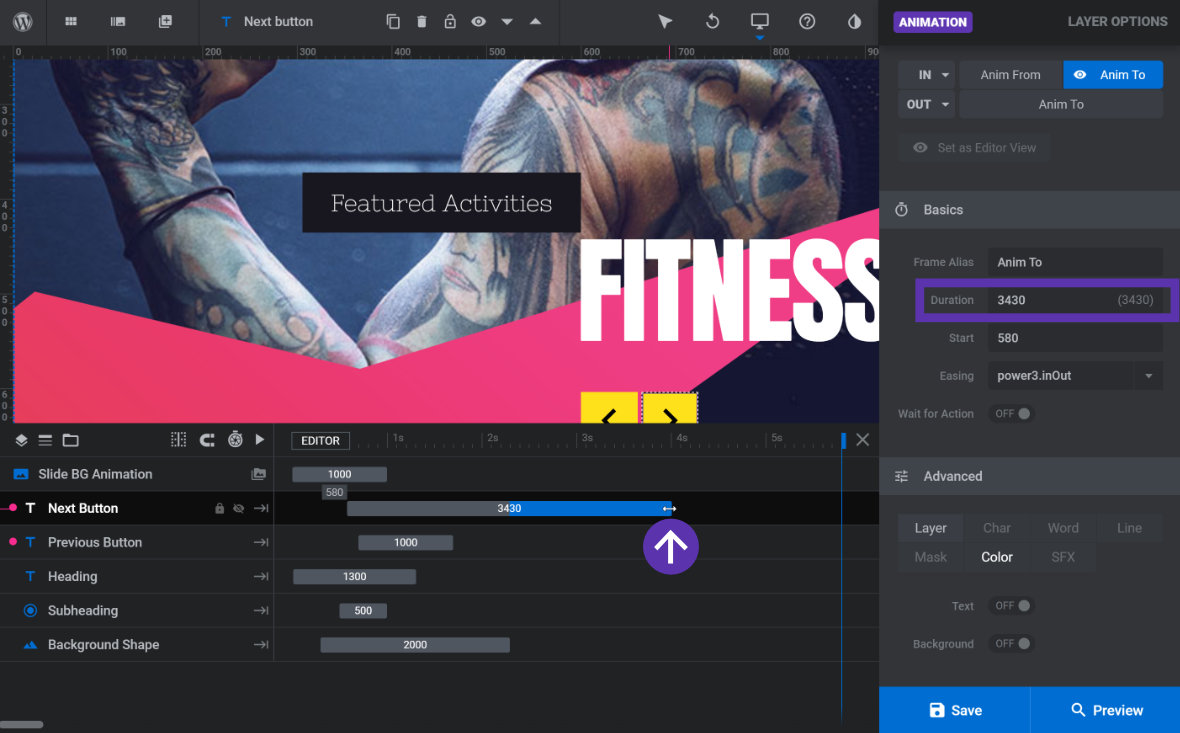
The Start field determines when the transition will start playing, and corresponds with the left edge of the related animation strip.
Changing the value in the Start field will automatically shift the animation strip to a new starting point that matches the time entered:

You can also hold your cursor over the left most edge of the animation strip, then click and hold your mouse button to drag the strip left or right. Dragging the animation strip updates the Start field with the correct start time value based on the position you drag it to:

Note: If while attempting to drag the animation strip you accidentally click inside the left side of the animation strip, you will notice the Basics Panel that displays the Start field will no longer be visible. You can continue to drag the animation to your desired start point as the Start field will automatically update to match the value you see in the small grey box directly above the beginning of the strip.
Now that you know how From and To states make up animations, on the next page of the manual we’ll take a look at the two animations added to every layer by default: the IN and OUT animations.
For business inquiries, collaboration, jointly work or want to say hi, Contact us by Email: [email protected]