Inserting “TO” Animations Between the “IN” and “OUT” Animations
Learn how to create as many additional animations as you need.
As well as the IN and OUT animations you get on every layer [?]
, you can also add extra animations between them, known as TO animations. You can think of this sequence of animations as a layer coming IN, moving TO a state, then TO another state, then moving OUT.
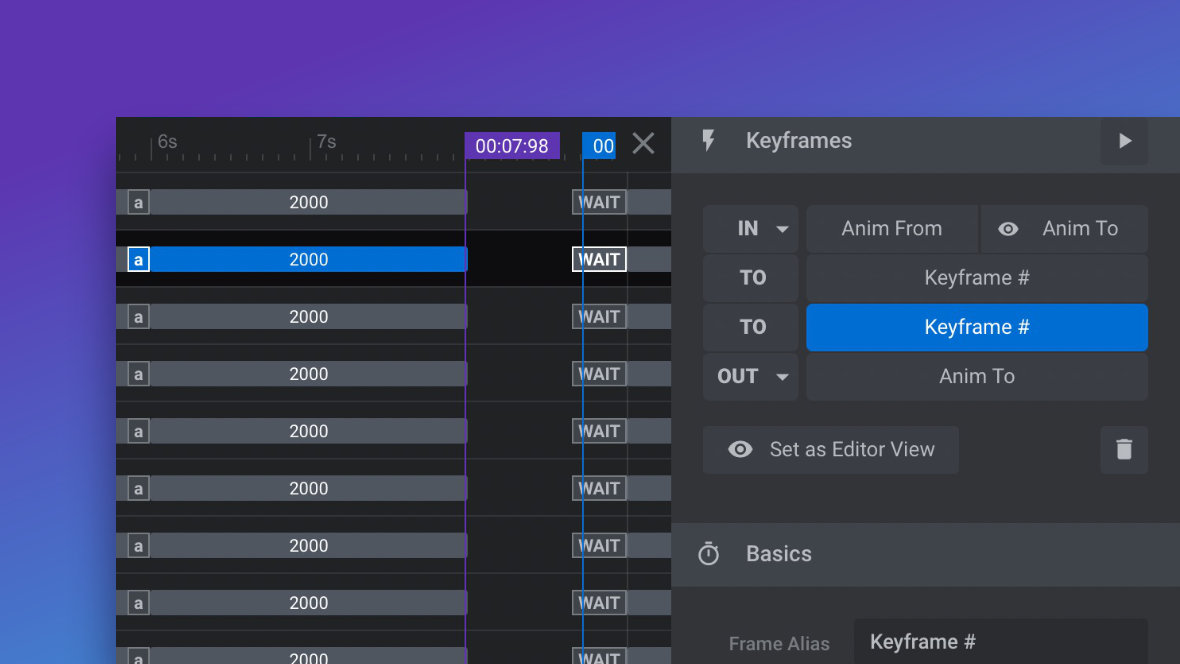
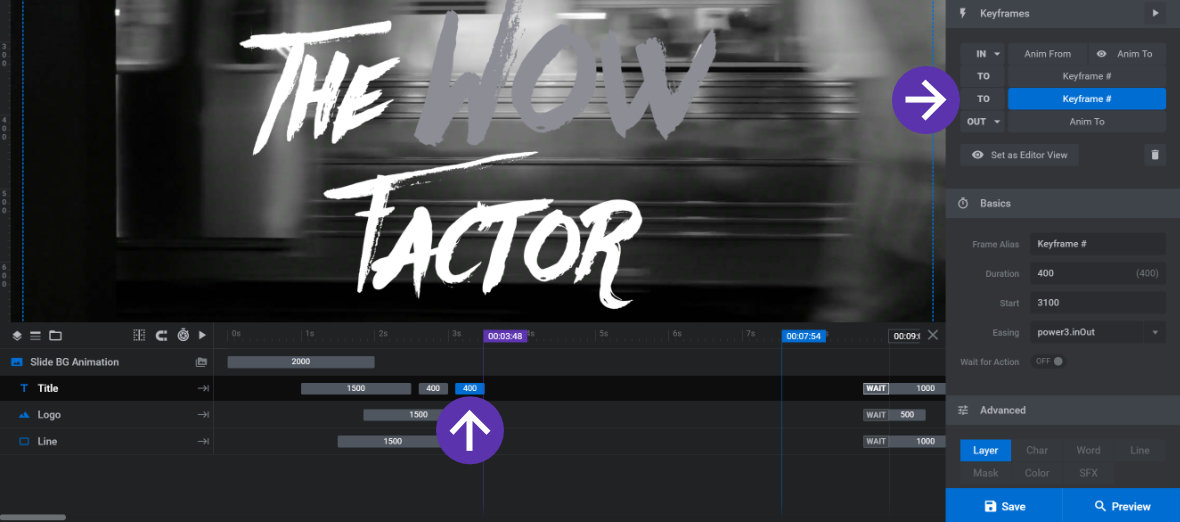
The part of the editor used to add extra animations between the IN and OUT animations isn’t visible by default. In order to see it, first make sure you are in the Animation settings for your layer, looking at the Keyframes panel. (Refer to The Fundamentals of Animation in Slider Revolution for how to access these settings).
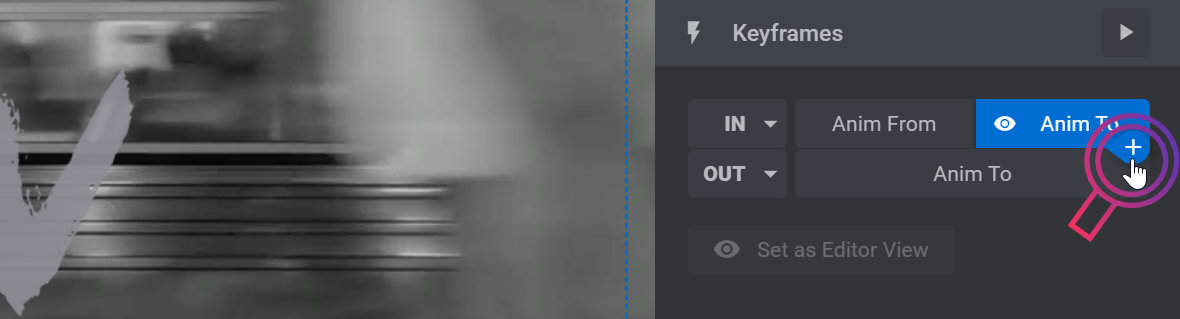
Then hover over the Anim To button of the IN animation. You will see a small blue button with a “+” symbol on it:
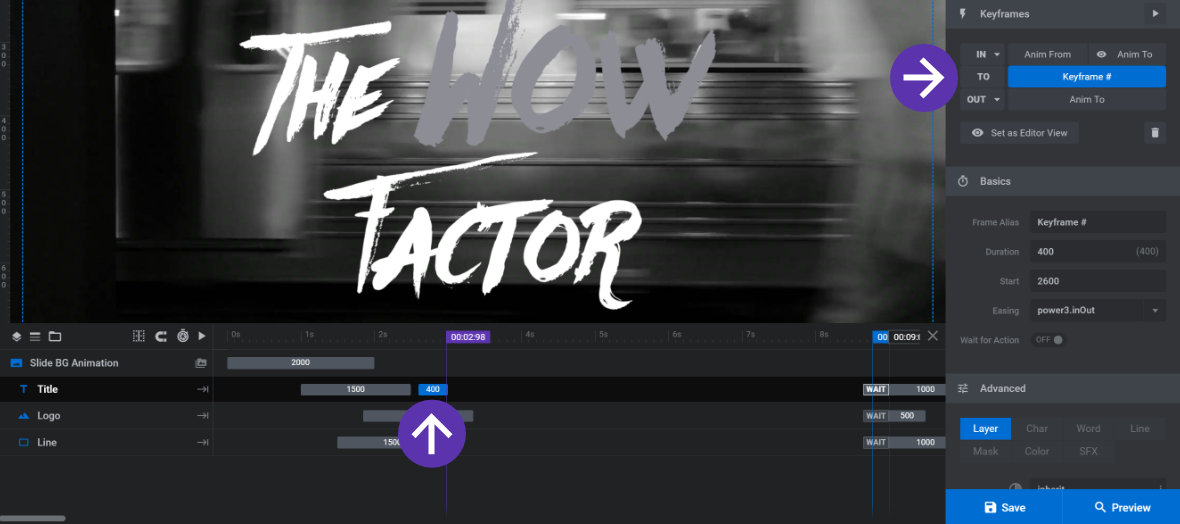
Click the “+” button and a new animation will be added between the IN and OUT animations, with the word TO on its left side (default name is “Keyframe#”). You will also see it appear on your timeline [?]
, a little to the right of the IN animation:
The new animation is added, visible in the Keyframes panel and on the timeline.
TO animations are like OUT animations, in that they define only one state. The layer will transition from the TO state of the previous animation.
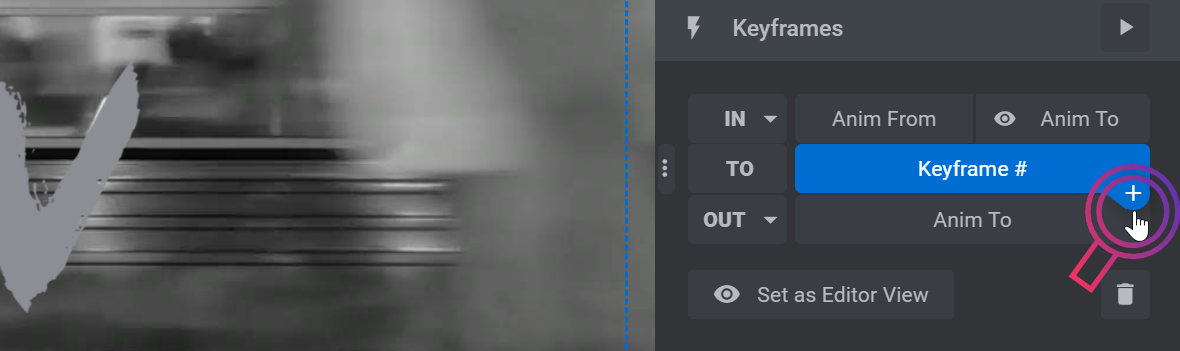
To add more TO animations, after any existing TO animation, hover over its button in the Keyframes panel and you’ll see the blue “+” button again”:
Clicking it will add another TO animation after the one you hovered over, below it in the Keyframes panel, and to its right in the timeline:
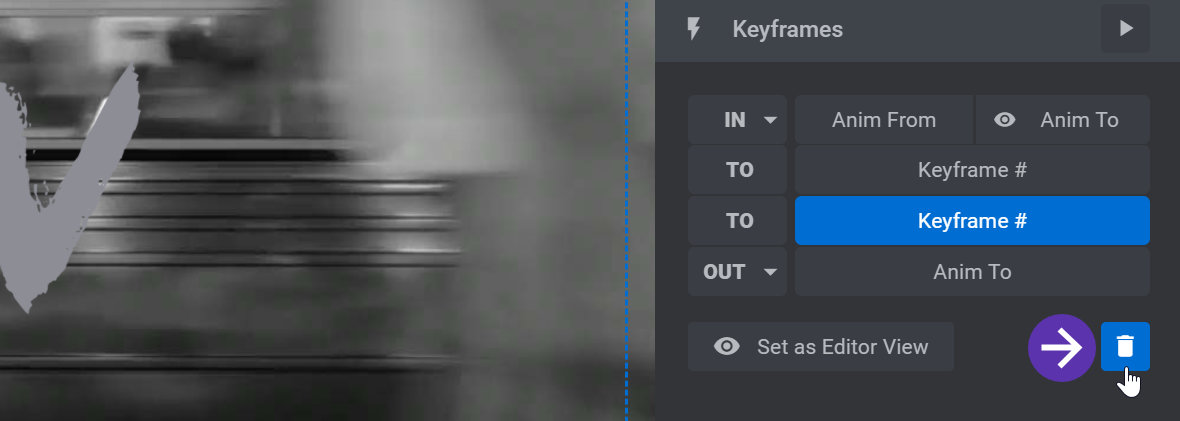
To delete a TO animation, click it in the Keyframes panel to select it then click the little bin icon at the bottom of the panel:
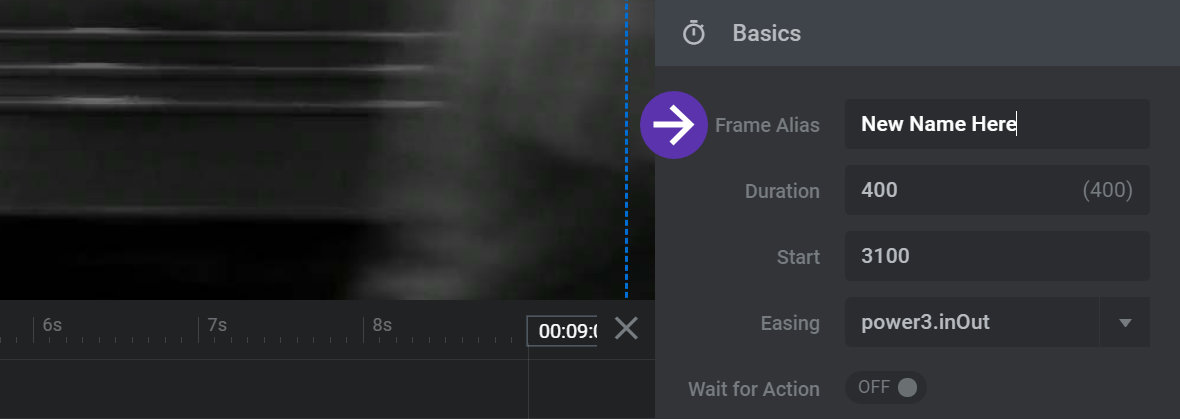
To rename a TO animation, click it in the Keyframes panel to select it, go to the Basics panel, then click in the Frame Alias field and type the name you would like:
Next: Create Animations Quickly with Presets
Animations can be created by manually configuring their state setting, but they can also created very efficiently by choosing from a collection of premade animations. We’ll learn how to apply these presets on the next page.