This section is all about learning the most important basic editing techniques for working with Slider Revolution.
Note that in this section of the manual we’re not going to be making any modules[?] from scratch. Instead, we’ll focus on learning the core skills needed to take one of Slider Revolution’s 200+ templates[?] and modify it for your own purposes.
These skills will definitely be useful when you start making designs from scratch but for now we’re going to focus on editing premade modules so you can get them published on your site quickly.
There are five sections in this part of the manual. Let’s take a quick look at what you’ll learn in each one.
Selecting Layers
First, you’ll learn the various ways to select layers[?] : via the canvas[?] , timeline[?], and top toolbar tools. You’ll also learn how to select multiple layers at once.
Editing Text
Learn how to modify text content in premade modules, as well as how to change font family, size, weight and color
Editing Links
Learn how to work with links, first editing existing links and then adding new links.
Editing Images
Learnhow to replace images in template-based modules, either with your own images or with those included in the object [?] library. You’ll also learn how to modify the size of these images.
Editing Backgrounds
Finally, we’ll round out the basic editing section by learning how to modify backgrounds[?] . You’ll see how to change colored backgrounds as well as how to swap out image backgrounds.
Time to Start Editing
These upcoming five guides are all fairly brief so you’ll be publishing modified templates in no time. Let’s begin with Selecting Layers.
Selecting Layers via the Canvas or Timeline
Here you’ll learn the various ways to select layers via the canvas, timeline and top toolbar tools. You’ll also learn how to select multiple layers at once.
Before you can make any edits to any module [?] content you’ll need to select the layers [?] you want to modify. There are a few ways you can go about doing this.
First up, we’ll look at the ways to select layers one at a time.
Selecting Layers via the Canvas
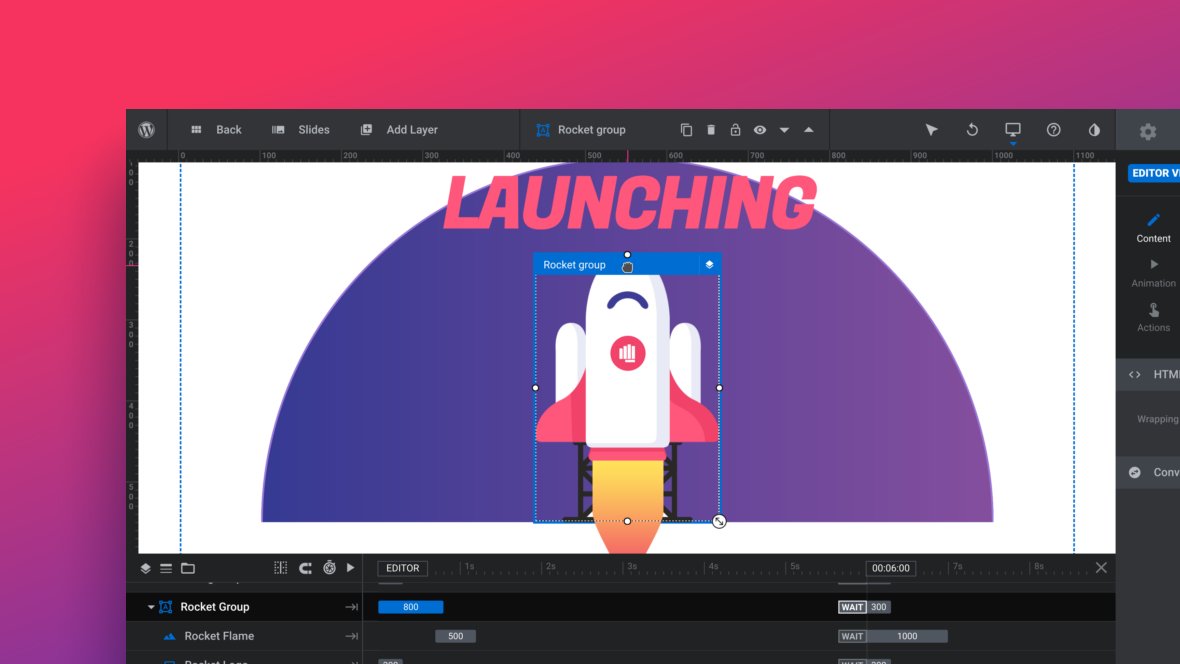
The most straight forward way to select a layer is to click it with your mouse pointer on the canvas [?]
.
When you do this you will see the settings related to that layer appear in the sidebar.
Layer Selection Indicators
You’ll know when a layer is selected because you’ll see two things in the module editor [?] interface:
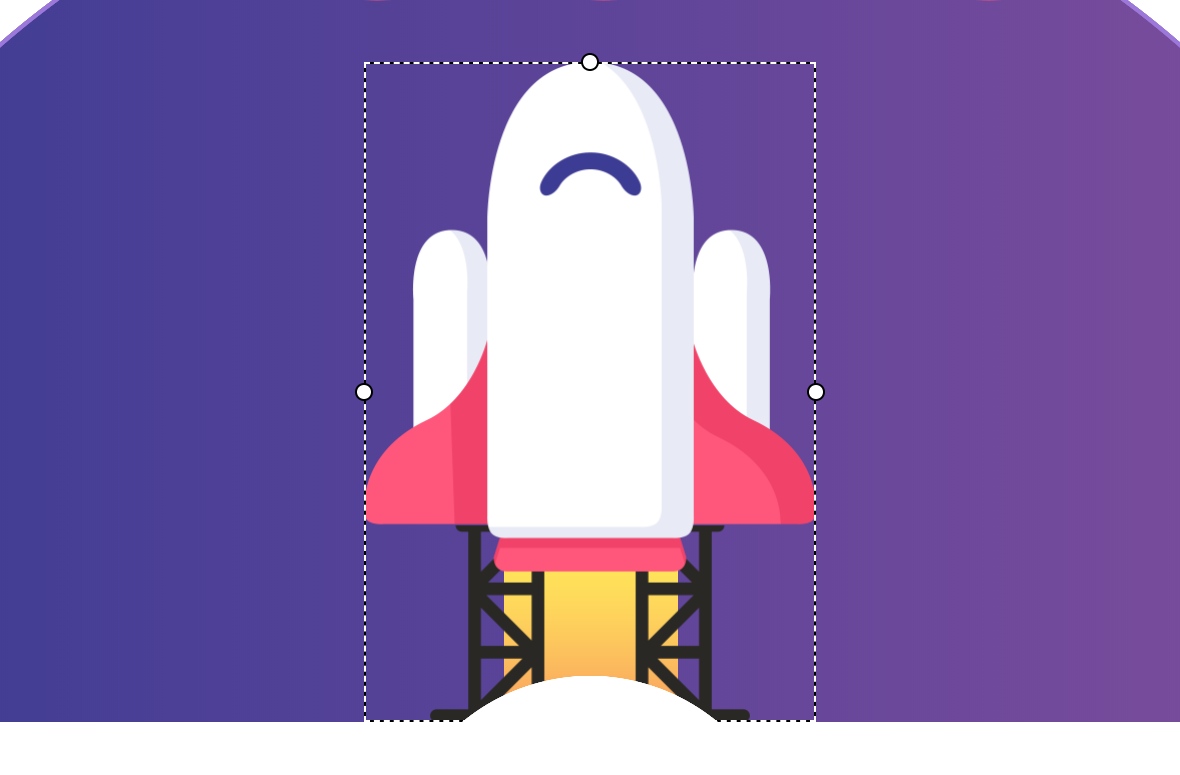
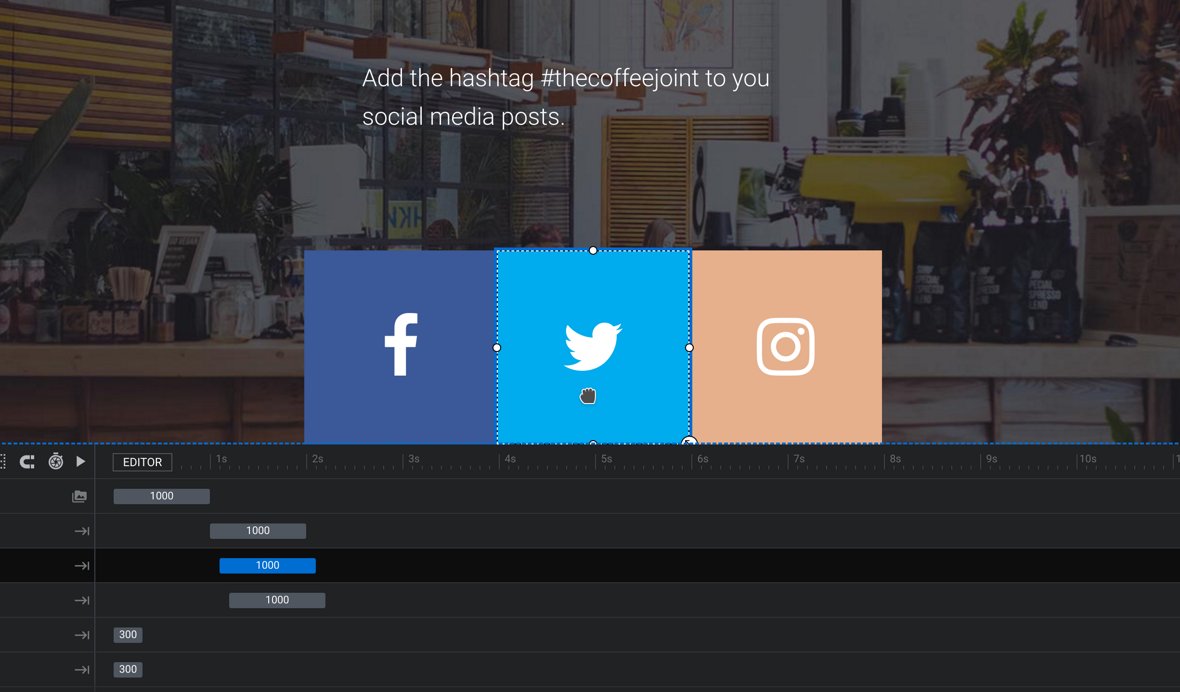
1. A “marching ants” highlight box around the layer on the canvas.
“Marching ants” refers to the dotted lines you can see above.
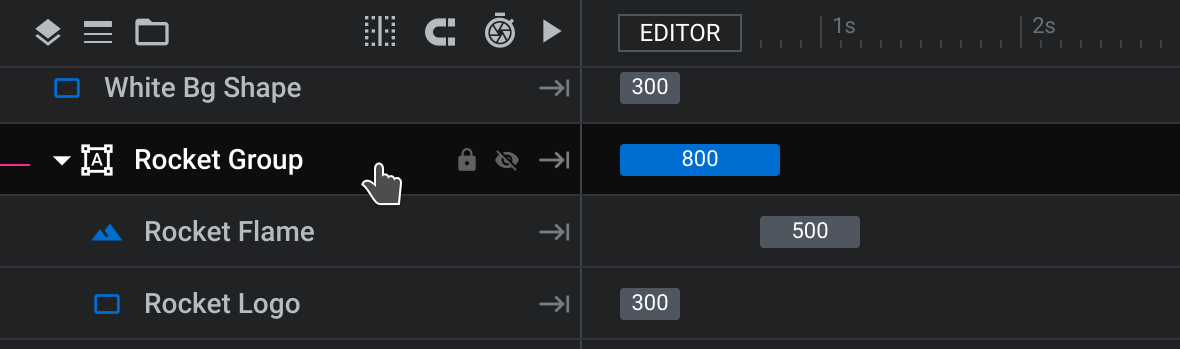
2 The layer’s track[?] in the timeline[?] will turn black.
Selecting Layers via Tracks on the Timeline
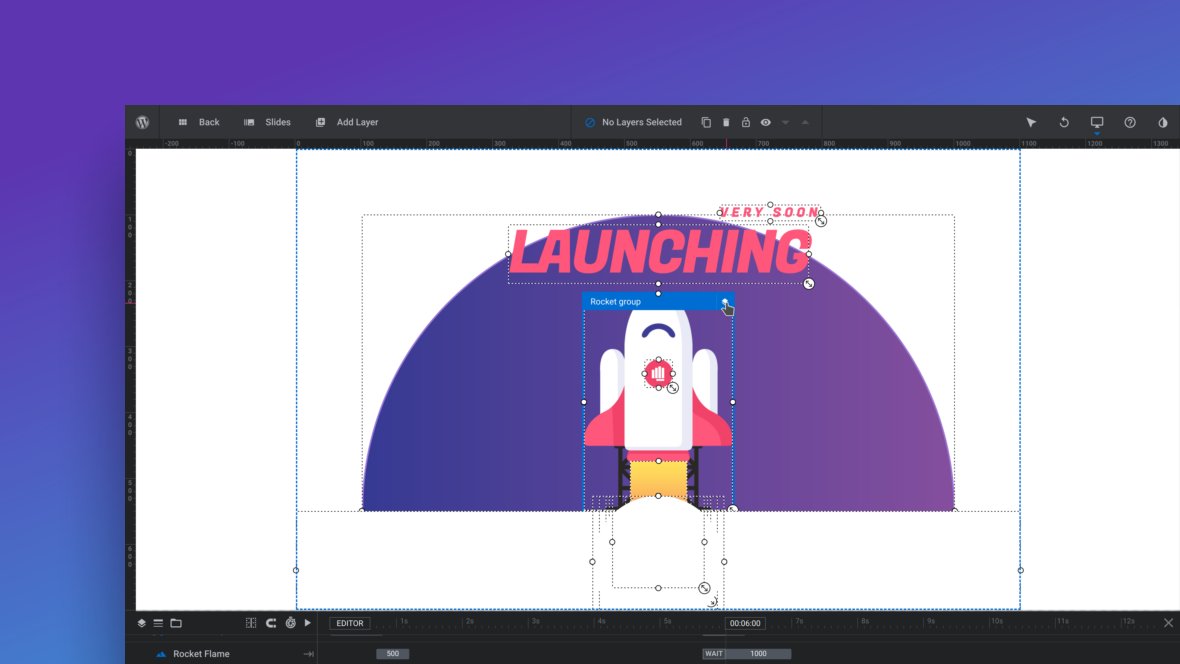
Sometimes it can be difficult to directly select layers on the canvas, such as when there are several layers very close to one another that may overlap. In this case, you may find it easier to select layers via their tracks on the timeline.
Hovering over a layer’s track will highlight the associated content on the canvas with a blue box, and clicking on the track will select the layer.
Selecting Multiple Layers
Sometimes you need to select more than one layer at a time, for example, you may want to move multiple layers at once or resize them in unison.
To select multiple layers start by selecting one layer, then hold down the CTRL/CMD key on your keyboard and select another layer.
When using this method of selecting multiple layers it doesn’t matter whether you’re going via the canvas or the timeline, both means of selecting layers will be equally effective.
Drag to Select Layers
Another way of selecting multiple layers at once is to draw a box around all the layers you want to select. You can do this by holding down the SHIFT key on your keyboard and dragging out a box with your mouse on the canvas.
When you release the mouse, any layers inside the box you drew will be selected.
Top Toolbar Selection Tools
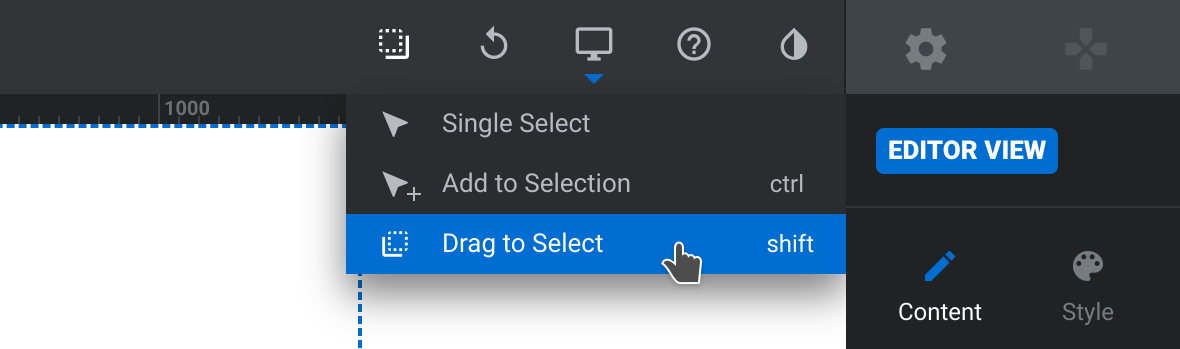
Instead of using the CTRL and SHIFT keys as described above, you can alternatively switch between the selection tools found in the top toolbar.
To switch into “Add to Selection” mode, choose this tool from the top toolbar:
And to switch into “Drag to Select” mode, choose this tool from the top toolbar:
Up Next: Editing Text
Let’s move on to the next part of our basic editing section where we’ll learn how to modify the content and style of text in premade module templates.
Editing Text from Template Modules
Here you’ll learn how to modify text content in premade modules, as well as how to change font family, size, weight and color.
In this guide we’ll show you how to make simple changes to placeholder text in template [?] based modules [?] , allowing you to add in your own business name, branding colors and so on.
First up, let’s look at how you can edit the content of text layers, after which we’ll move on to modifying their appearance.
Changing Text Content
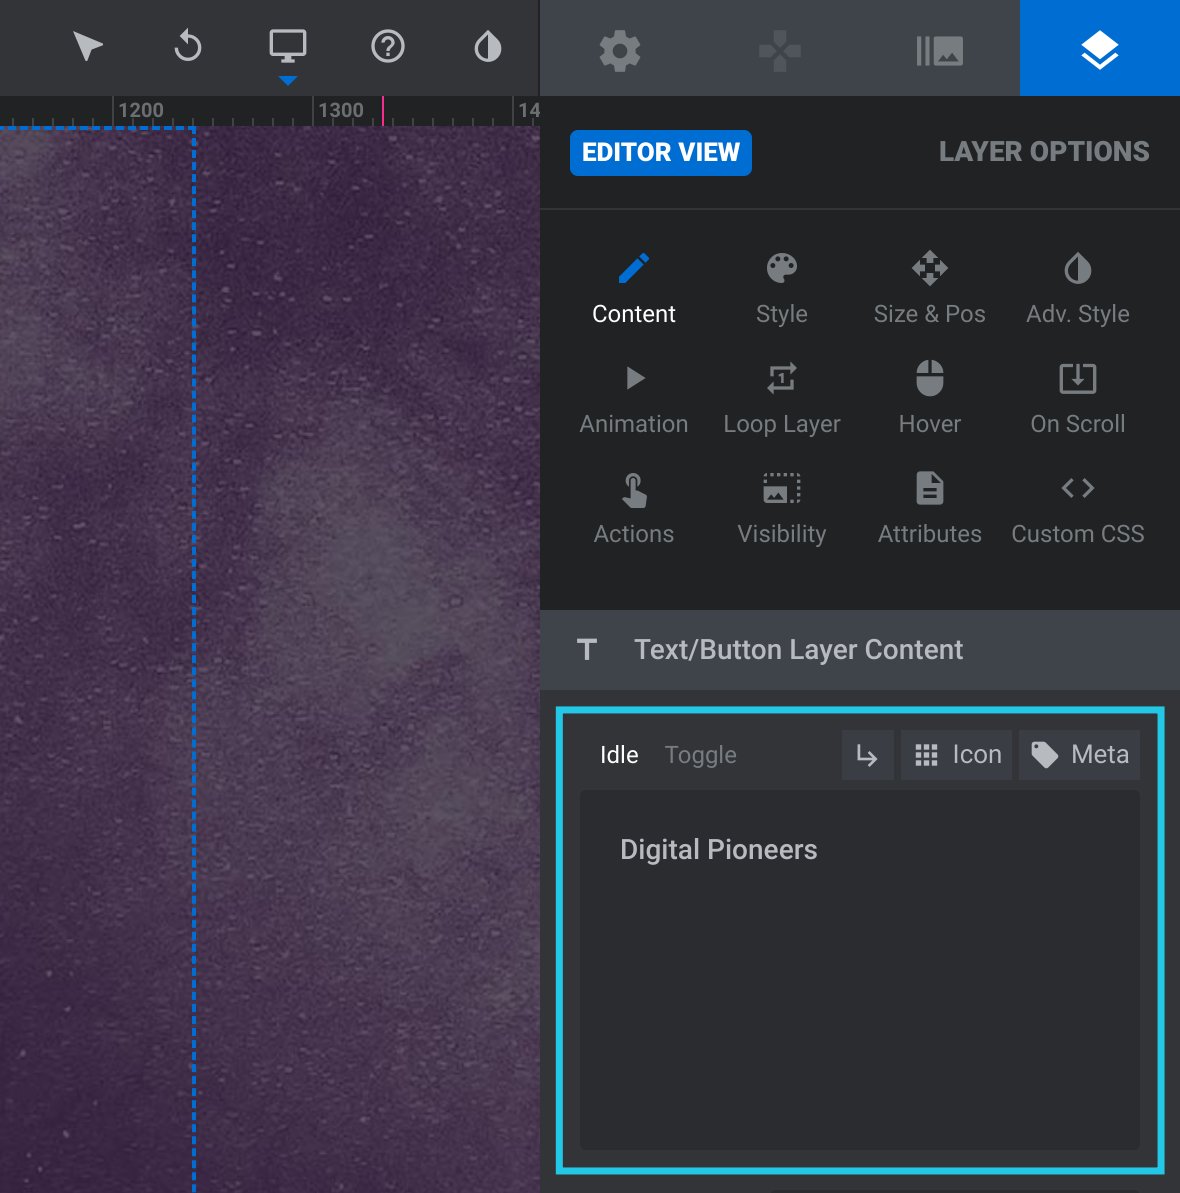
To change text content, start by selecting the layer you want to modify. This will automatically open the Layer Options tab in the sidebar. Click the Content sub-section where you will see a field containing the layer’s [?]
text content.
Click in this field and modify the text to change the layer’s content.
Resizing Text
There are two ways you can resize text: via setting a font size directly or by resizing the text layer on the canvas[?]
.
1. Editing Font Size
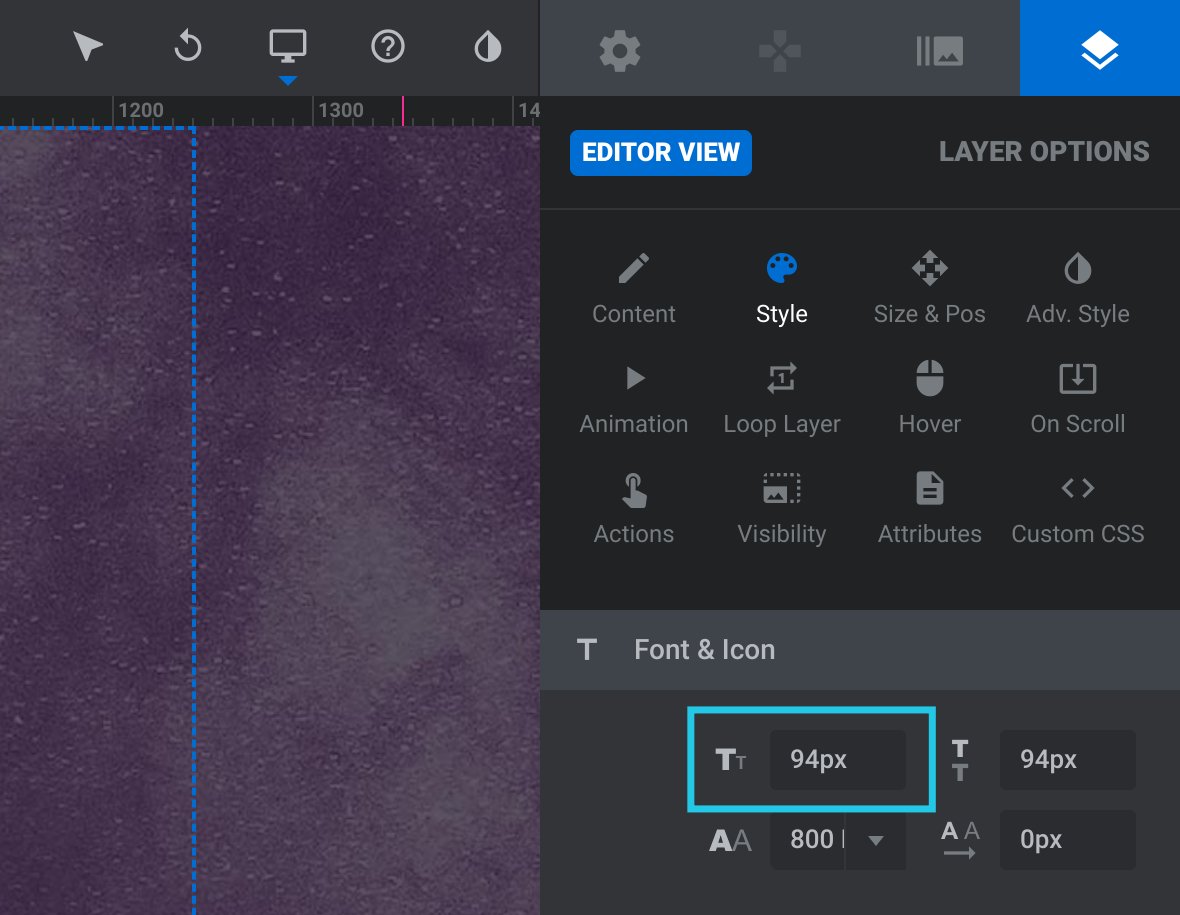
With the text layer you want to modify selected, make sure you are in the Style sub-section of the Layer Options tab in the sidebar. In the panel labeled Font & Icon look for the field with a label that looks like two letters T’s next to each other.
In this field type the number representing the font size you would like, then press Enter to apply your changes.
2. Resizing via Bounding Box
If you’re not sure what font size to use you can resize your text visually on the canvas. Select your text layer and you will see a bounding box appear around it with a handle on the bottom right corner, visible as a circle with a double-ended arrow inside.
Click and drag on this handle to resize your text.
Changing Text Styling
There are a number of ways you can modify text styling in Slider Revolution but we’ll start here by covering the three you will most commonly use.
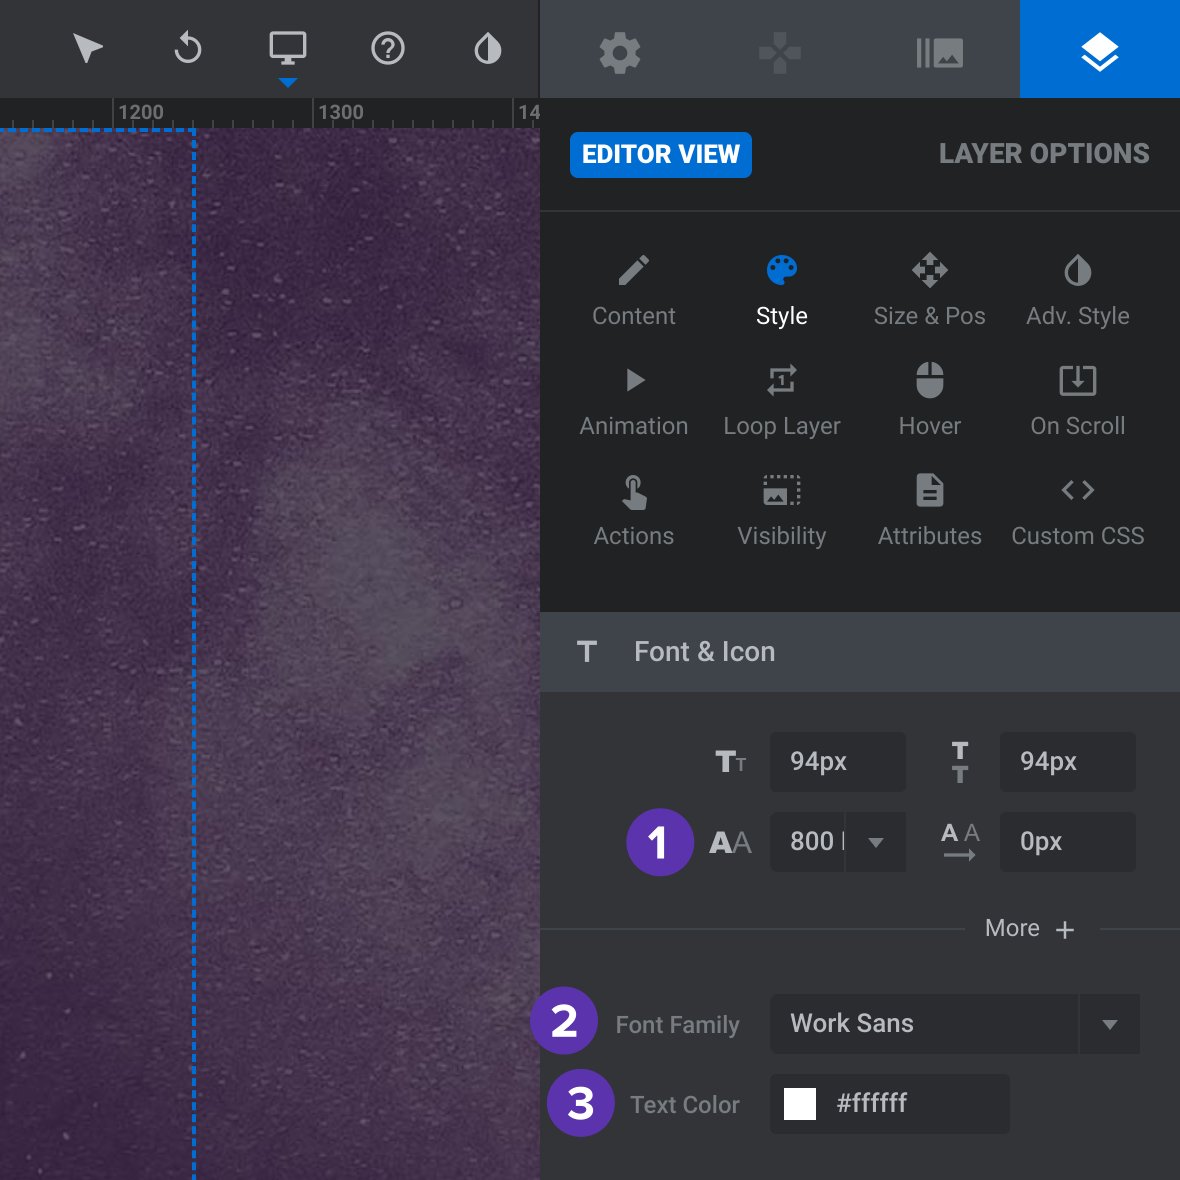
Note, once your textlayeris selected each of these three types of styling can be changed in the Style sub-section of the LayerOptions in the sidebar, via the panel labeled Font & Icon.
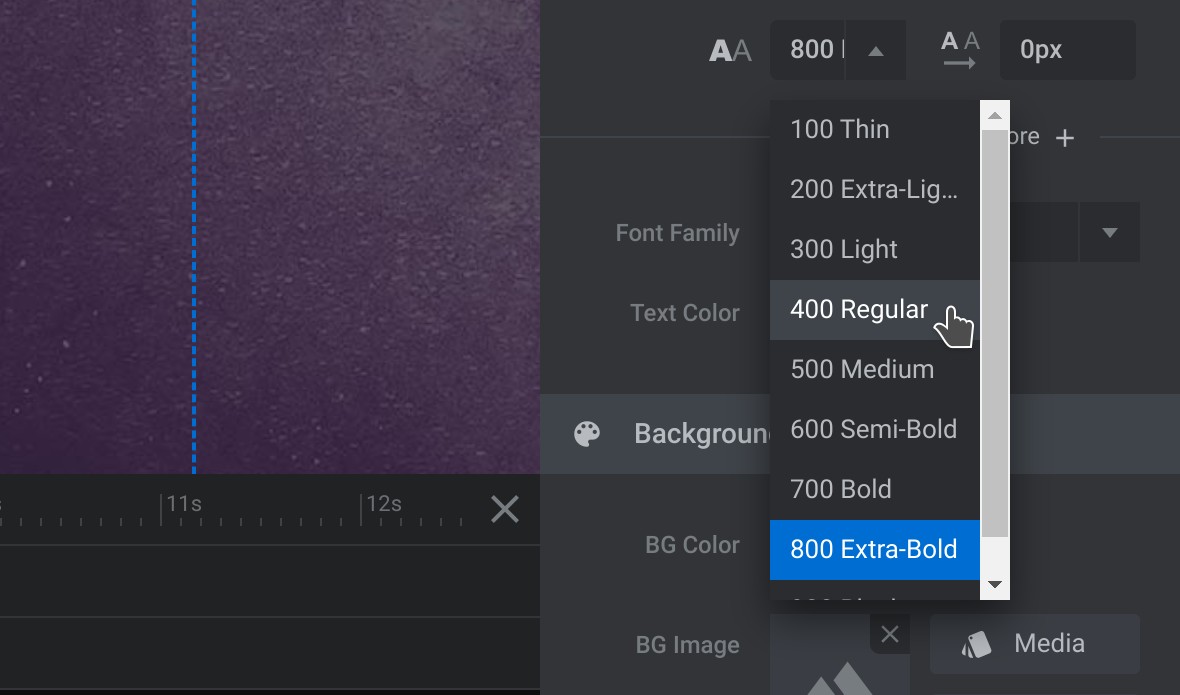
1. Editing Font Weight
Look for the field with the label that looks like two letter A’s next to each other. When you click on this field you’ll see a drop-down with several numbers, each a multiple of 100. The higher the number the thicker your text will become.
Select from the available options to modify your font weight.
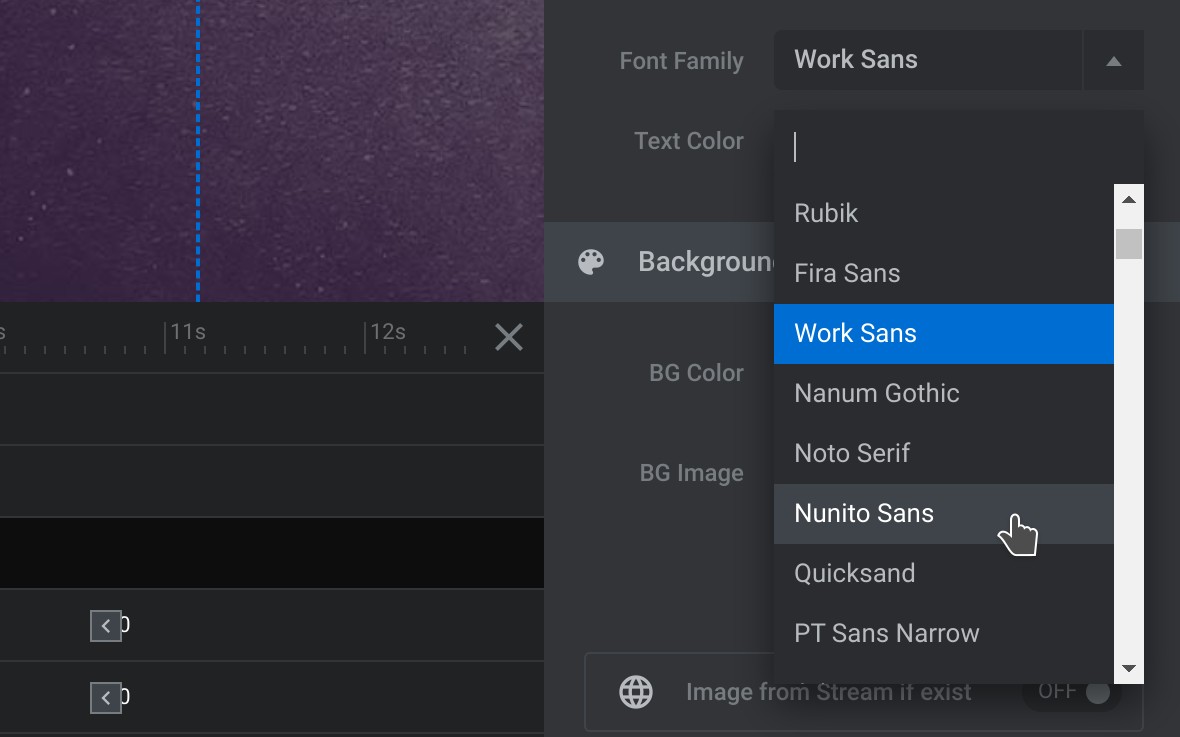
2. Editing Font Family
Locate the field labeled Font Family, click it, and you will see a scrollable drop-down list of all the fonts that are available for you to choose from.
Select any item on this list and your text layer’s font family will be updated.
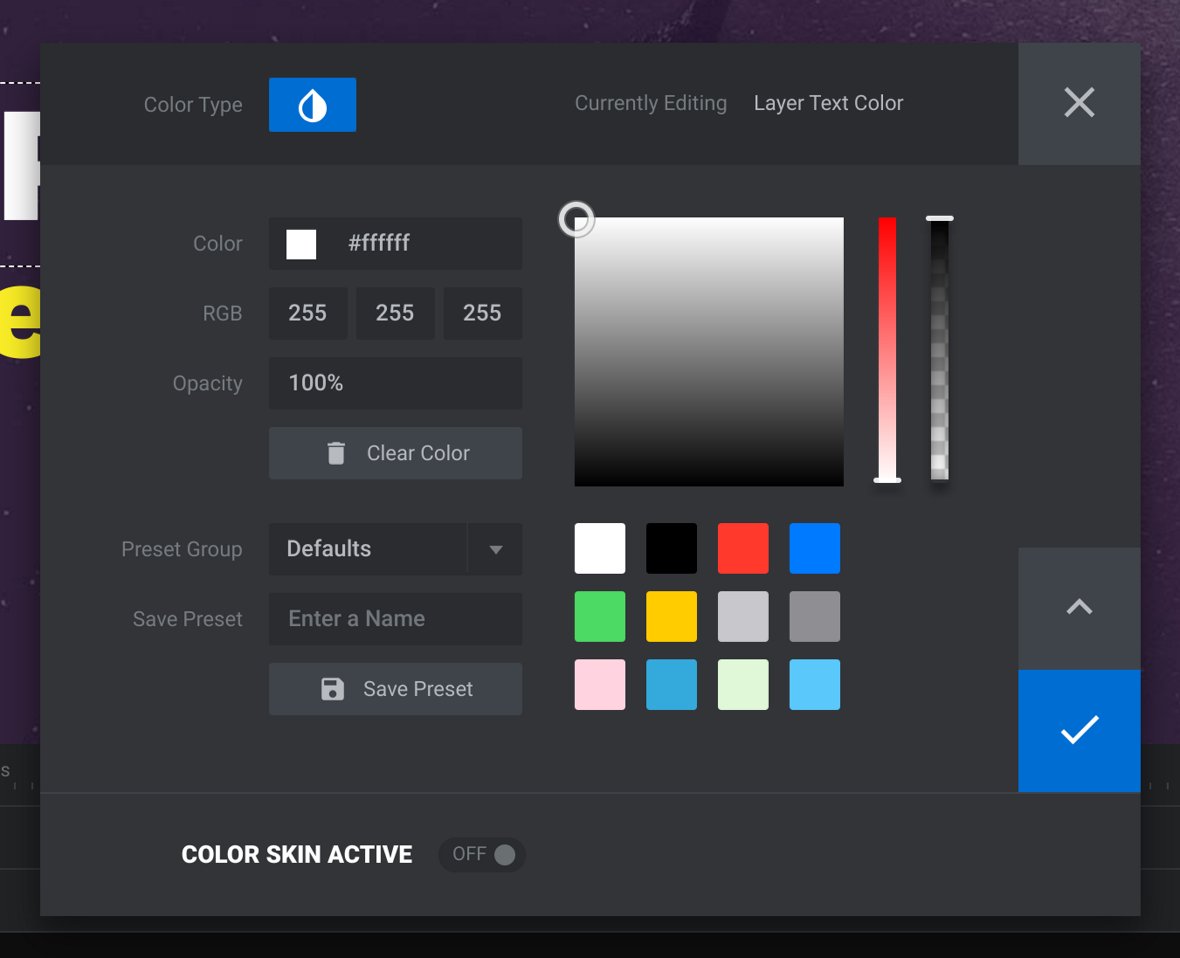
3. Editing Font Color
Find the field labeled Text Color and click on the small colored square next to it.
This will open a color selection dialogue box.
From here you can select a new color to apply to your text, then click the large blue tick-box to commit your changes.
Next: Editing Links
Learn how to edit existing links and add new links in the next part of our basic editing section, Editing Links in Template Modules.
Editing Links in Template Modules
In this guide you'll learn how to work with links, first editing existing links and then adding new links.
How to Edit Existing Links
Select the layer [?] that has the link on it you wish to edit. For example, you may wish to edit the link on a button such as a social media icon:
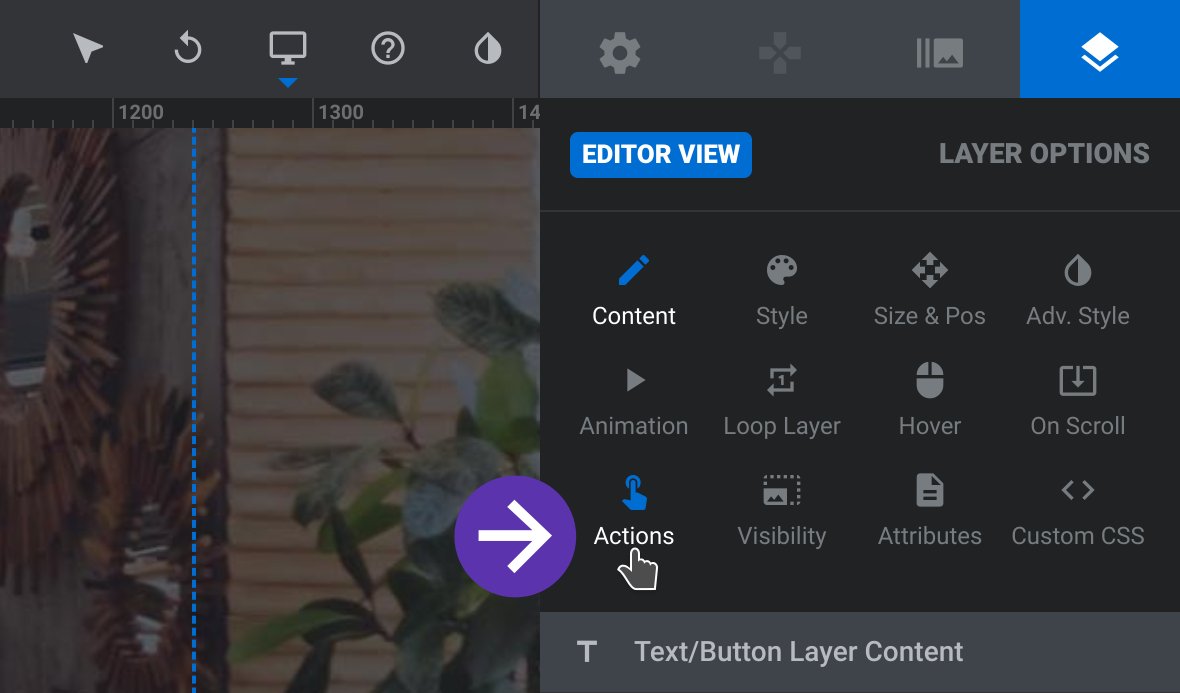
Once the layer is selected, the Layer Options tab will automatically open in the sidebar, under which you can click the Actions button:
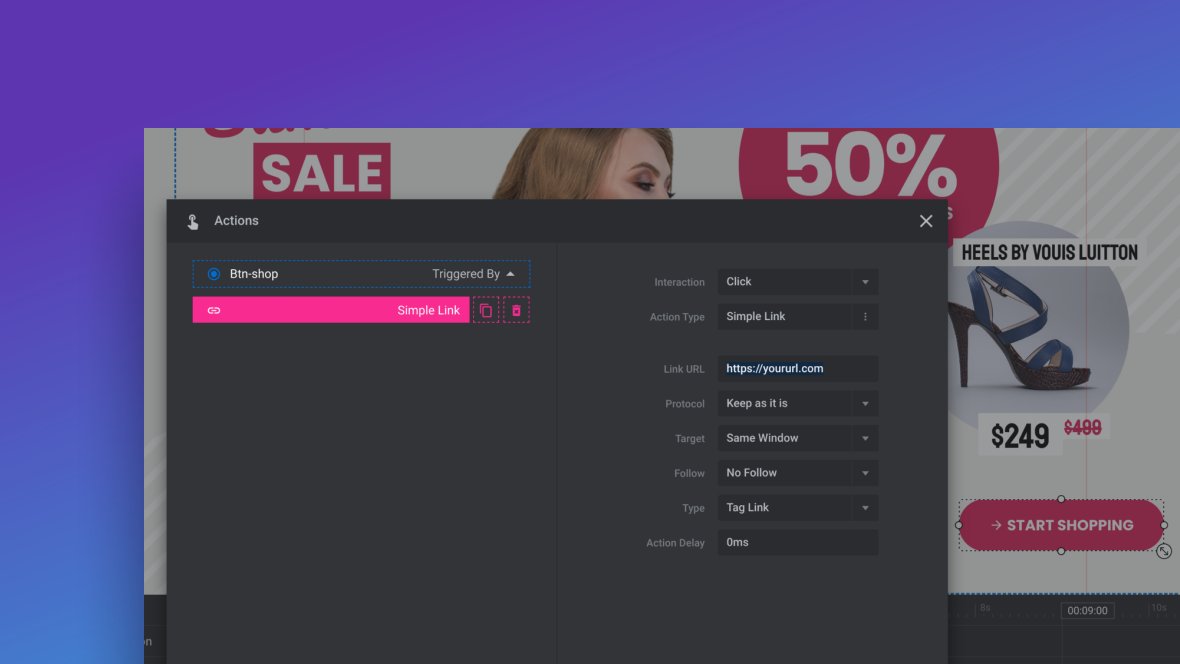
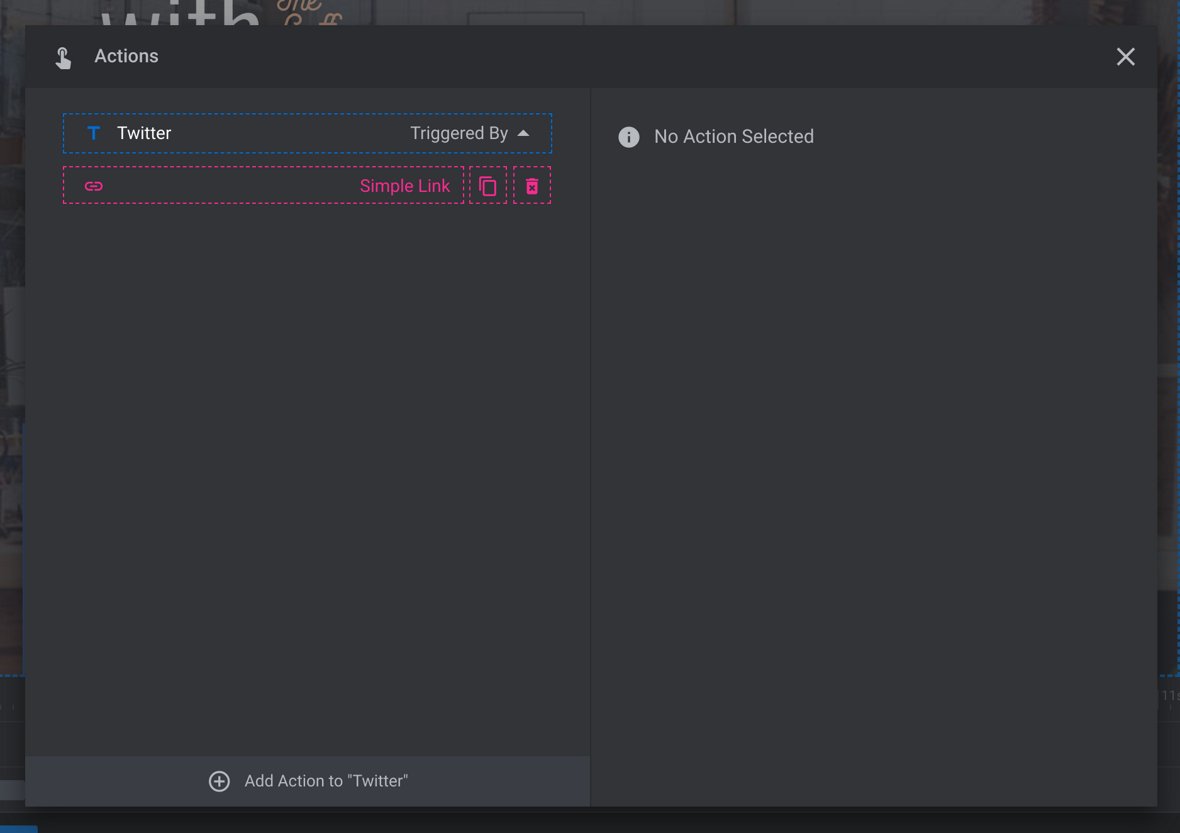
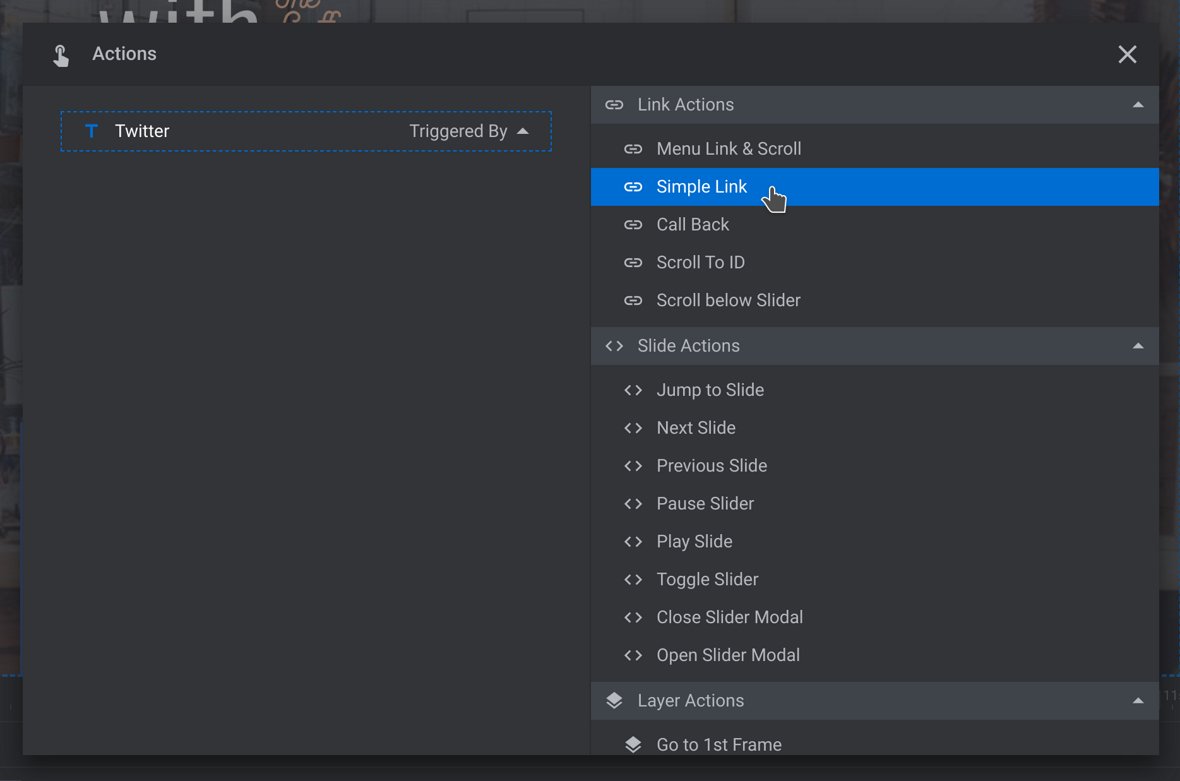
The Actions dialogue box will automatically open:
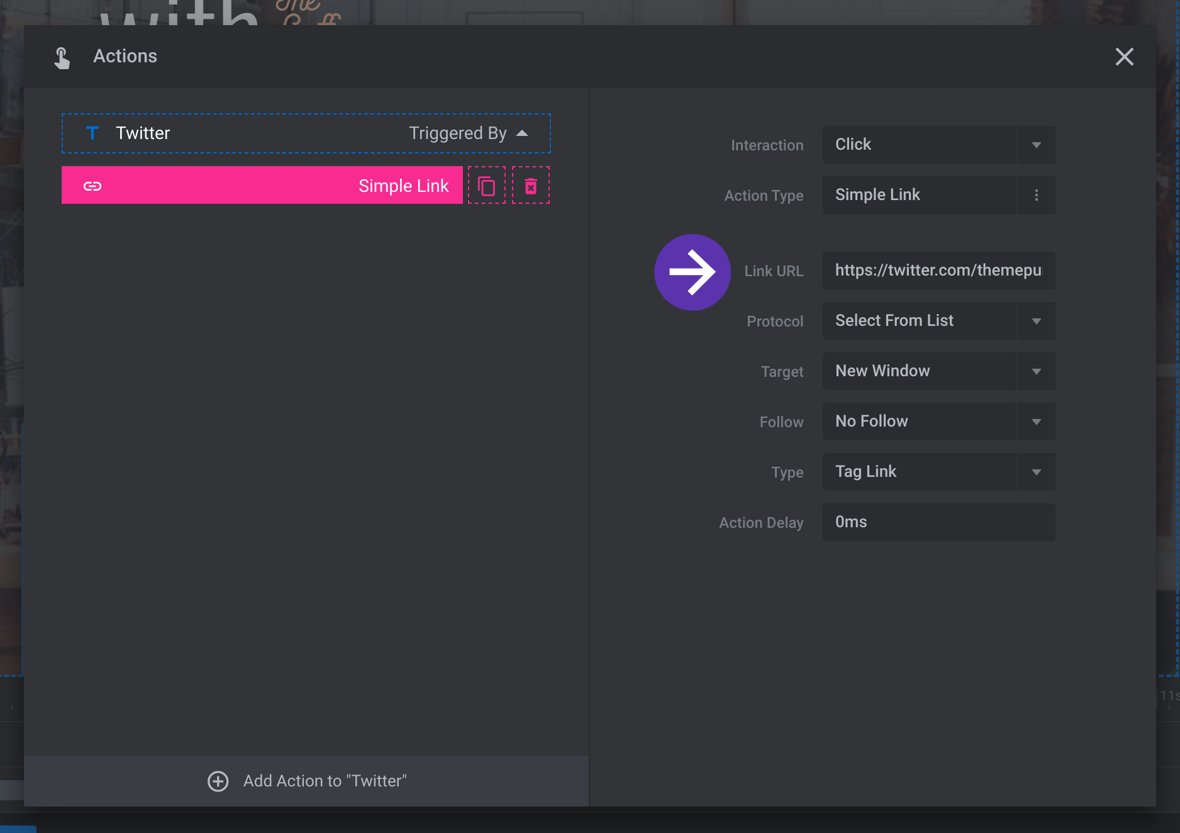
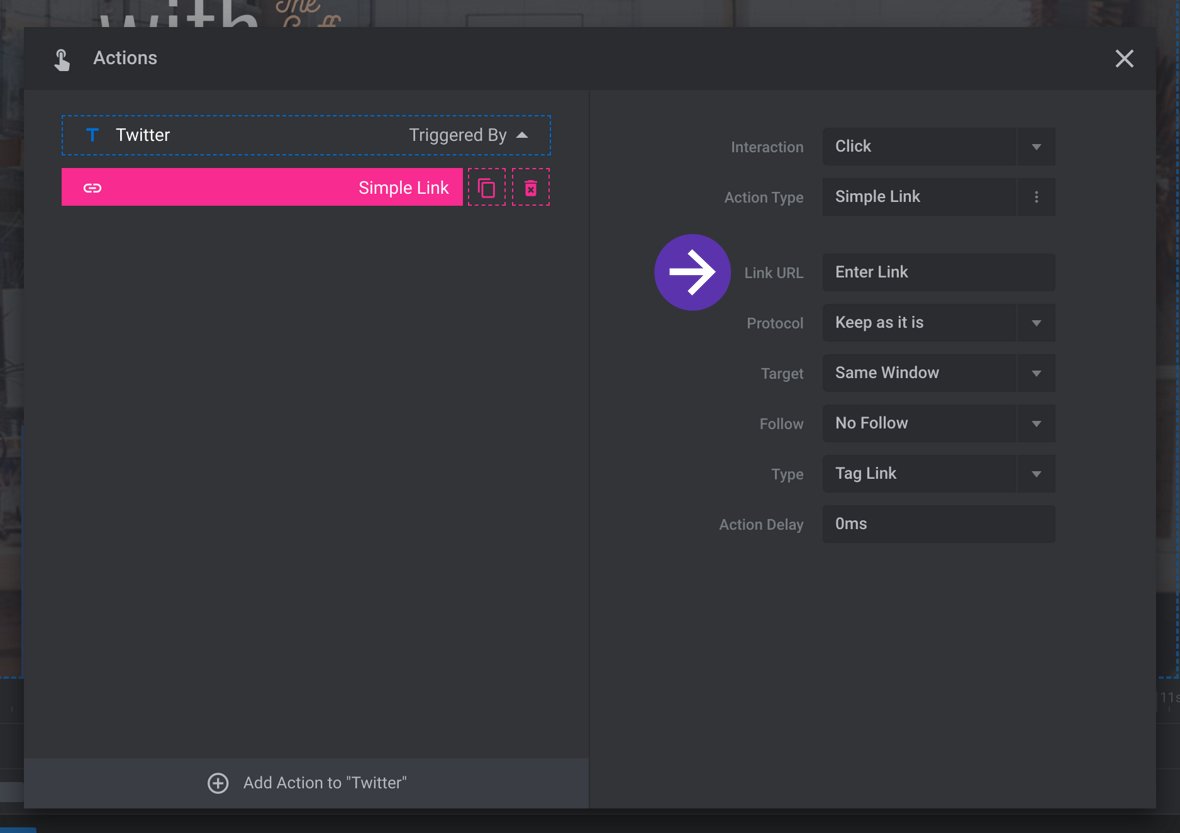
On the left side of the Actions dialogue box click the pink item labeled Simple Link. This will make a series of fields appear on the right side of the dialogue box. To replace the link, edit the contents of the field labeled Link URL.
Once your new link has been entered, click the “X” button at the top right to close the dialogue box. The change to the link you made will be applied automatically.
How to Add a New Link
Select the layer you want to apply a link to, then in the Layer Options tab click the Actions button to open the Actions dialogue box.
Under Link Actions on the right, click the Simple Link button:
This will automatically add and open a new Simple Link item. Enter your link in the field labeled Link URL:
Click the “X” button at the top right to close the dialogue box. Your new link will be applied automatically.
Next Up: Editing Images
In the next guide you’ll learn how to replace images in templates, either with your own images or with those included in the object library. You’ll also learn how to modify the size of these images.
Editing Images in Template Modules
In this guide you'll learn how to replace and resize images in template-based modules.
Replacing an Image with a New One
To replace an image, start by selecting its layer[?] :
Once your image has been selected, make sure you’re in the Content sub-section of the Layer Options tab in the sidebar. From here you have two options:
1
Click the Media Library button to replace the selected image with one of your own.
2
Click the Object Library button to replace the selection with one of Slider Revolution’s bundled images.
The Media Library and Object Library buttons are found under the Image Layer Content panel.
1. Replace from Media Library
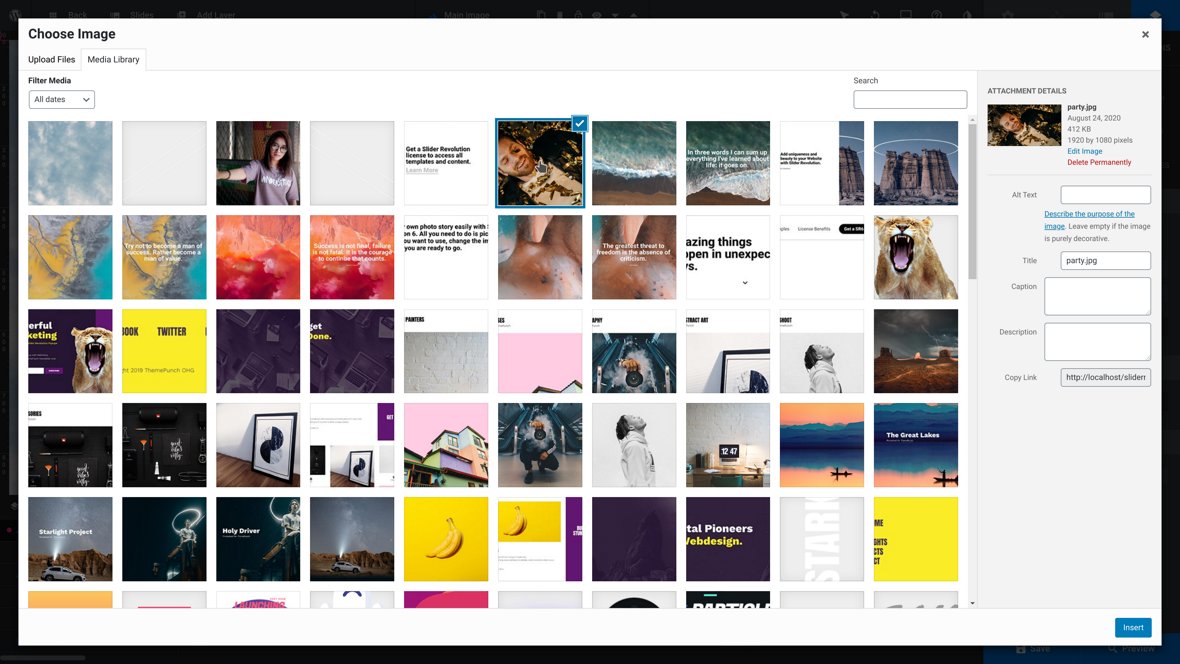
After clicking the Media Library button the WordPress Choose Image dialogue box will open.
In the Media Library tab you can browse for images you have already uploaded, or alternatively you can click the Upload Files tab to upload a new image.
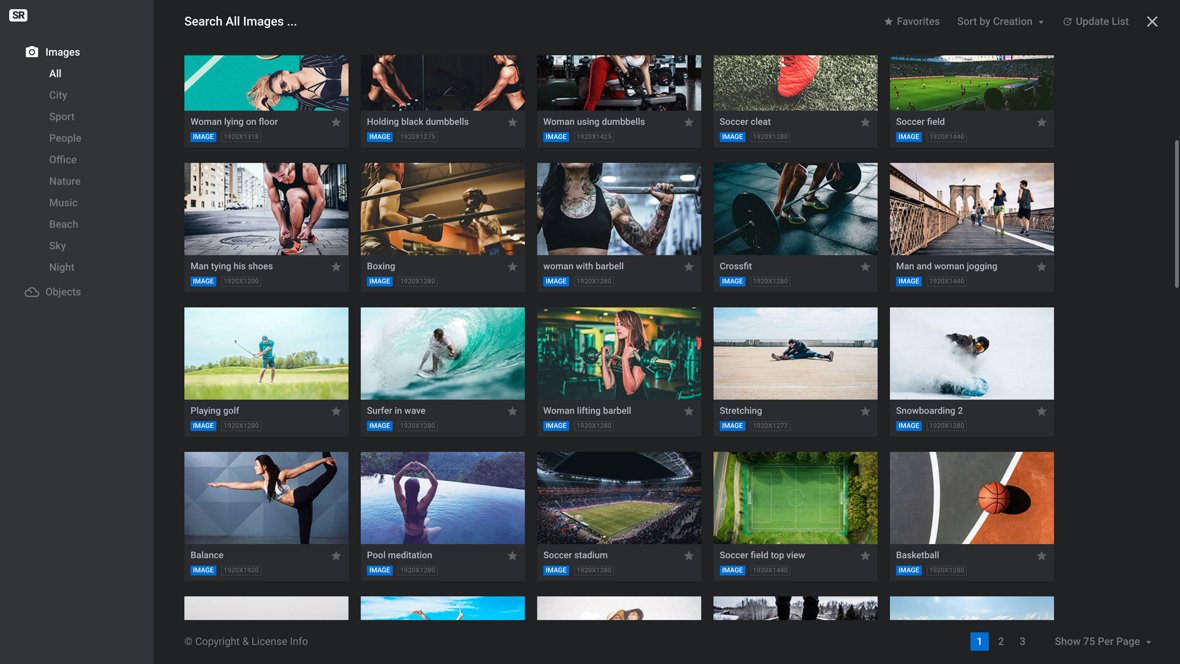
2. Replace from Object Library
After clicking the Object Library button, the Object Library will open displaying a collection of over 180 images to choose from.
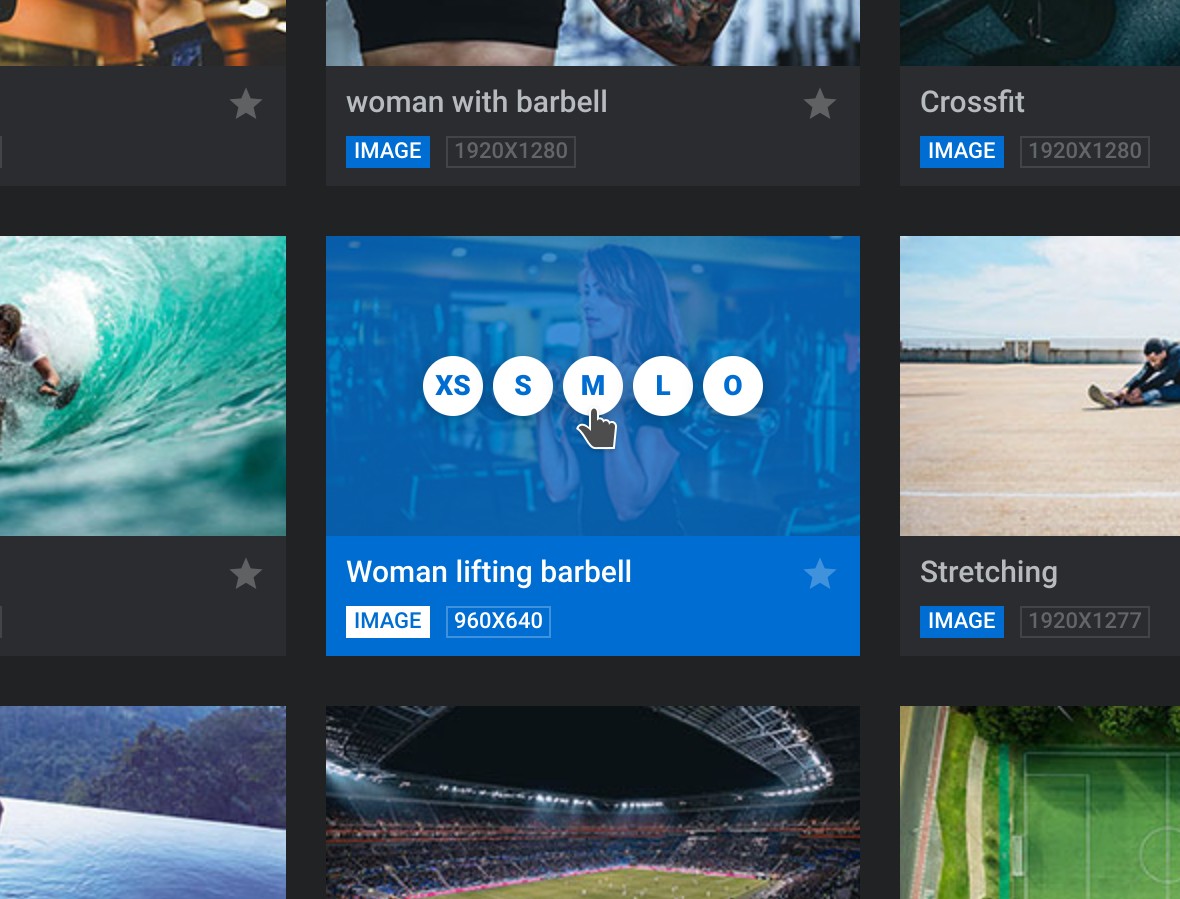
When you hover over a thumbnail in the gallery you’ll see five circular icons, each representing one of five different sizes available for that image:
Example of hovering over the M icon in the thumbnail above, showing the 960×640 size available for that image.
Hover over any of these circular icons to see what that size represents in pixels. Try to choose a size that closely matches the size of the original image, then click on the corresponding icon to insert the new image.
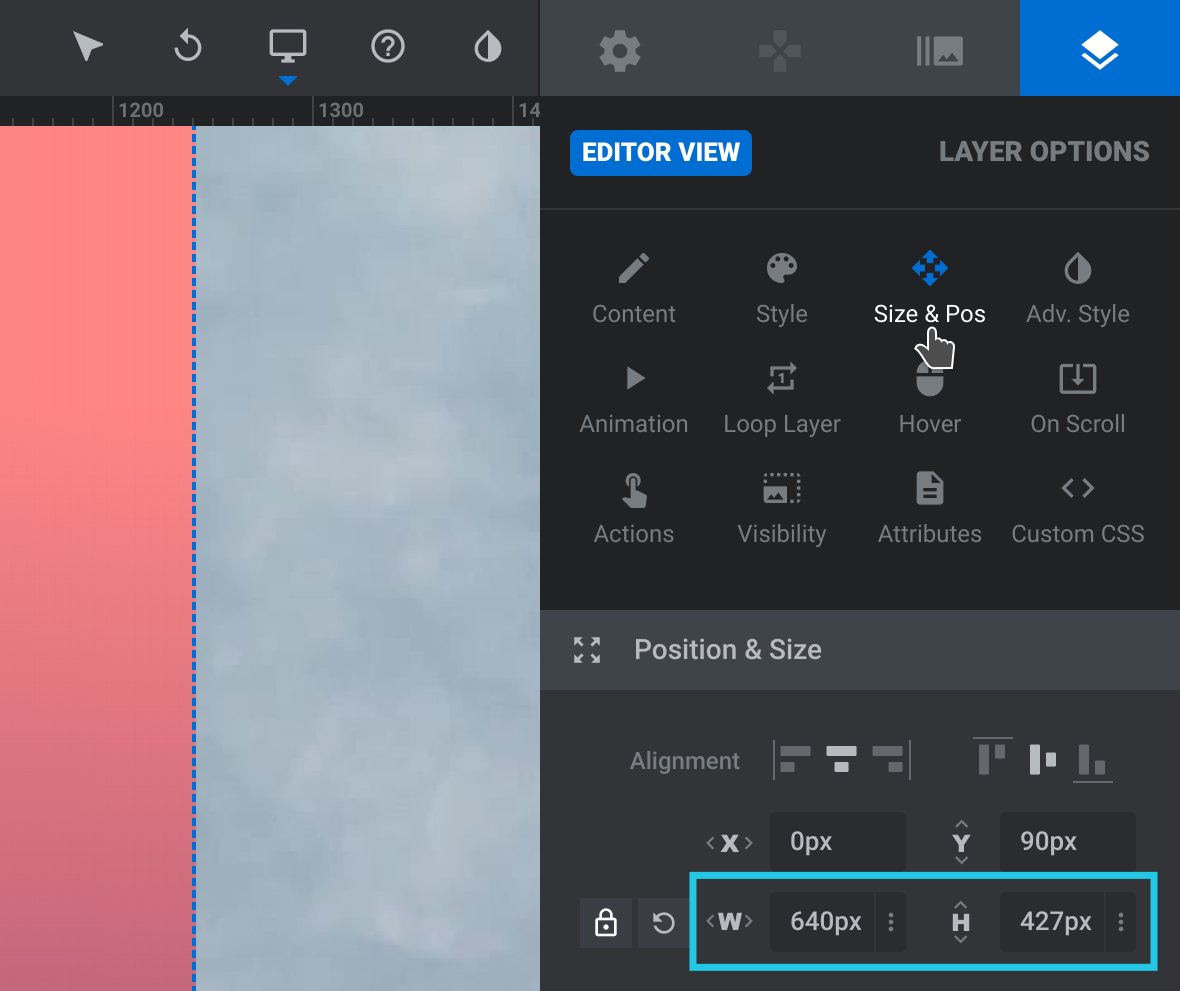
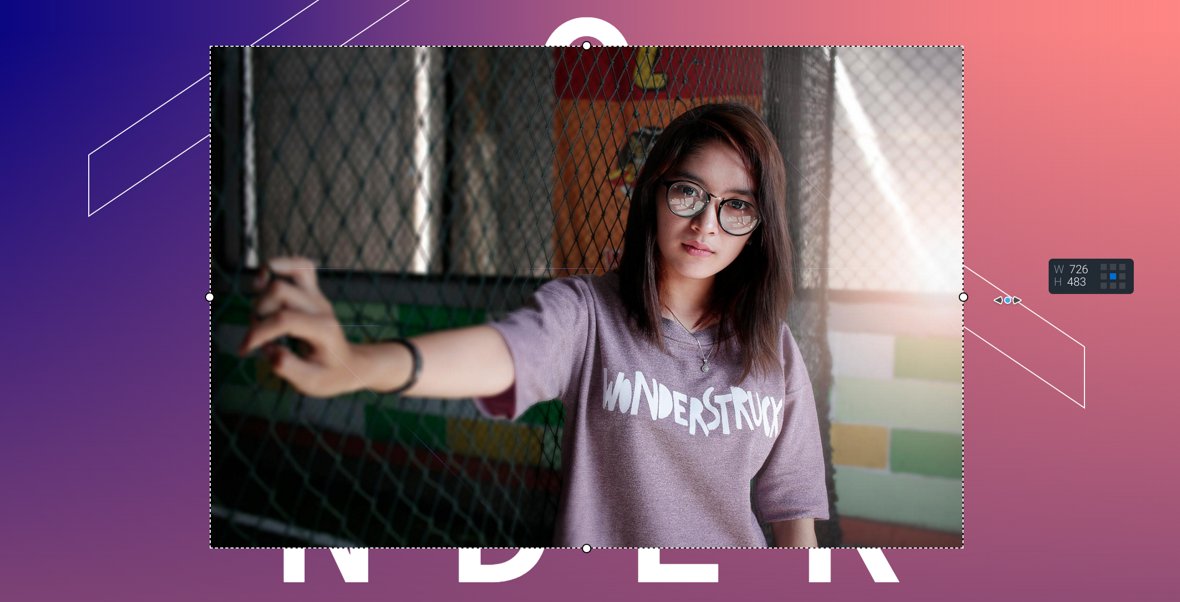
To check the size of the image you’re replacing, select its layer, go into the Size & Pos sub-section of the Layer Options tab in the sidebar, then under the Position & Size panel inspect the width and height values, represented as W and H respectively.
Under Position & Size, the width of your image is found next to the W, and the height is the value next to the H.
How to Resize Images
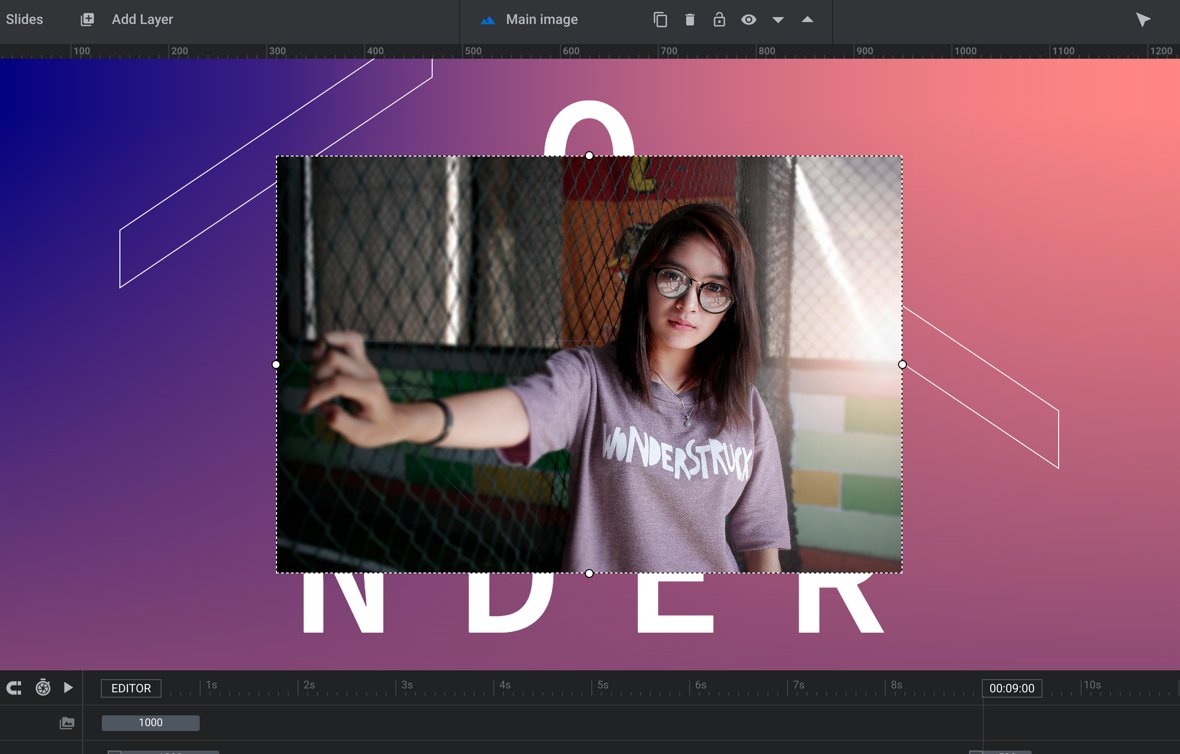
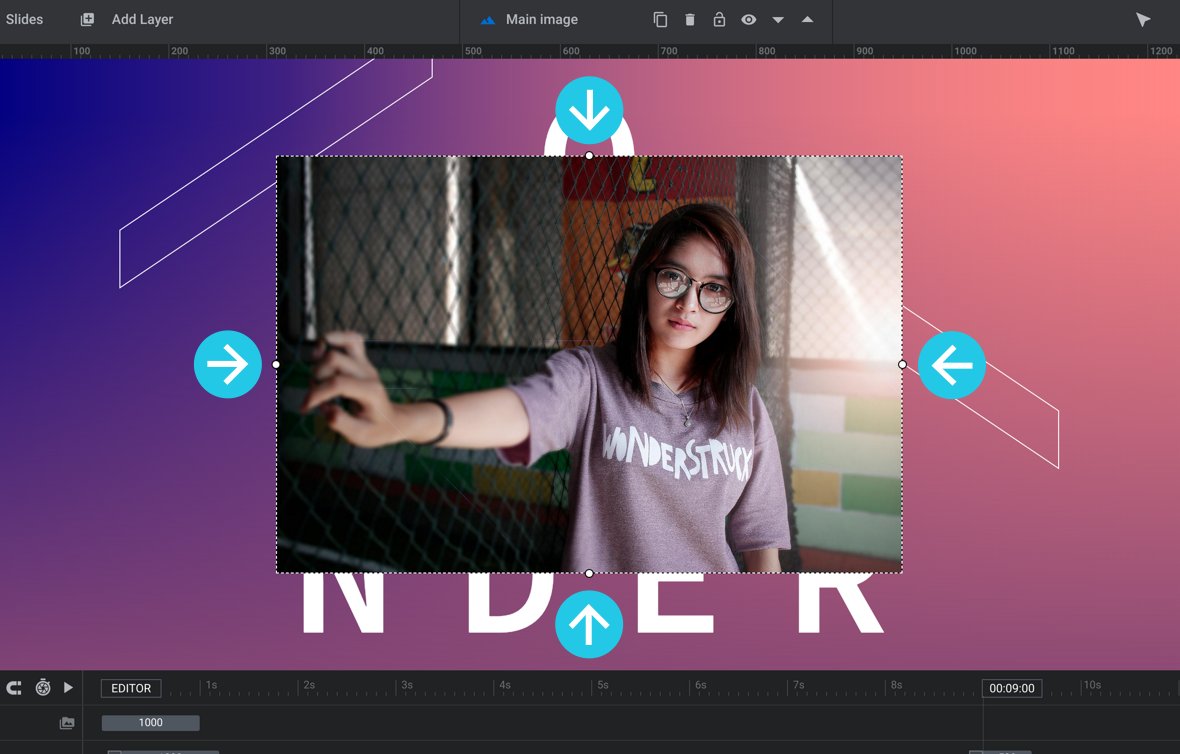
To resize an image, start by selecting its layer. You will see a bounding box appear around it with small circular white handles on each side:
Click and drag any of the four handles to increase or decrease the image’s size:
Unlocking Aspect Ratio
Images have their aspect ratio locked by default. As such, if you modify the width of an image its height will proportionally update, or if you modify the height its width will proportionally update. If you want to adjust height and width separately you will need to unlock the aspect ratio.
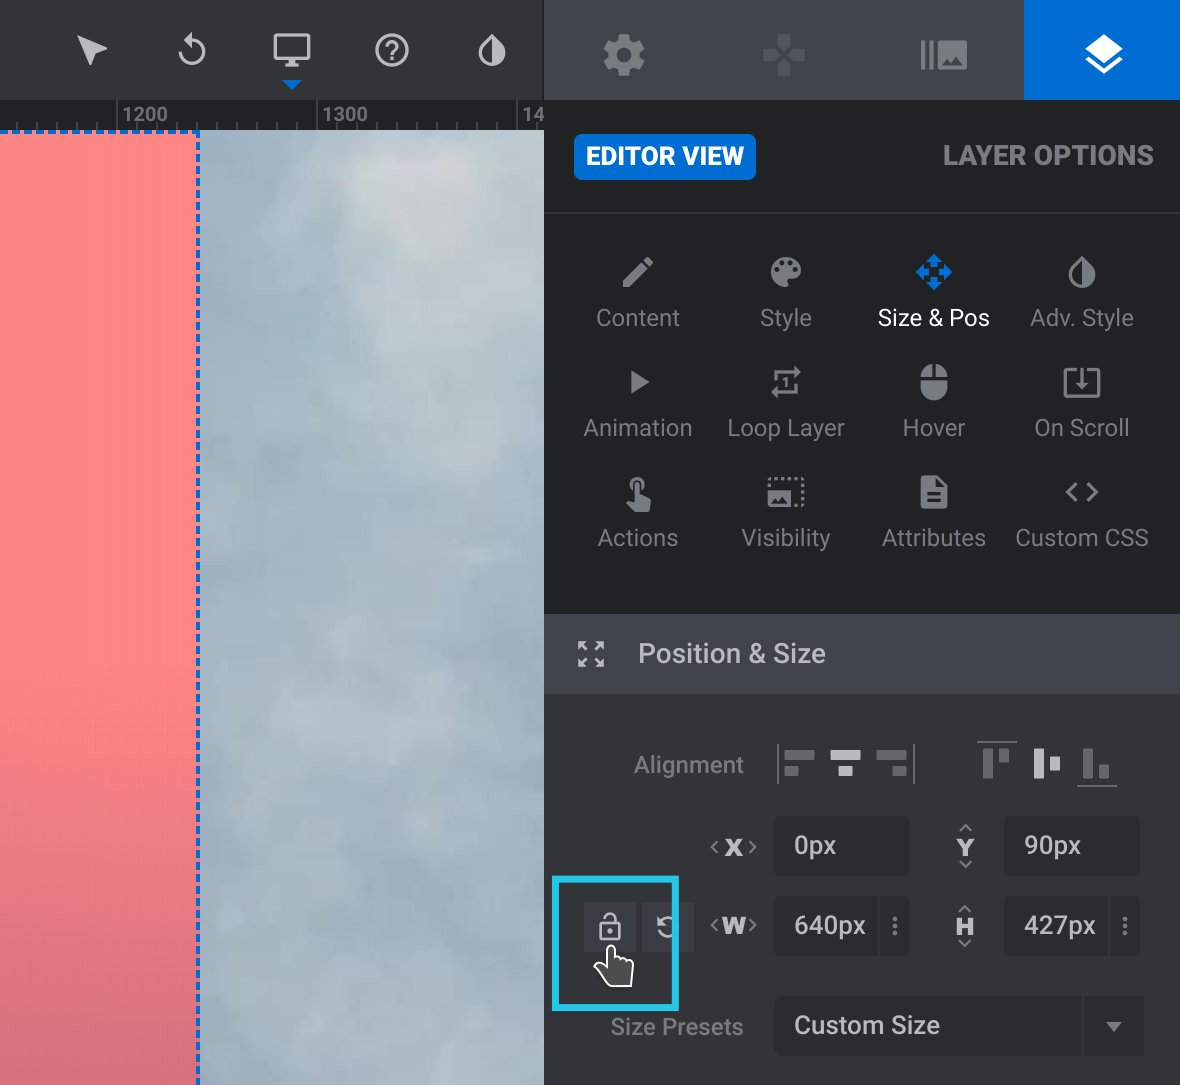
With the image’s layer selected, go to the Size & Pos sub-section of the Layer Options tab in the sidebar, then in the Position & Size panel toggle the small padlock icon.
When aspect ratio is unlocked, the icon turns from white to grey and the padlock appears unlocked.
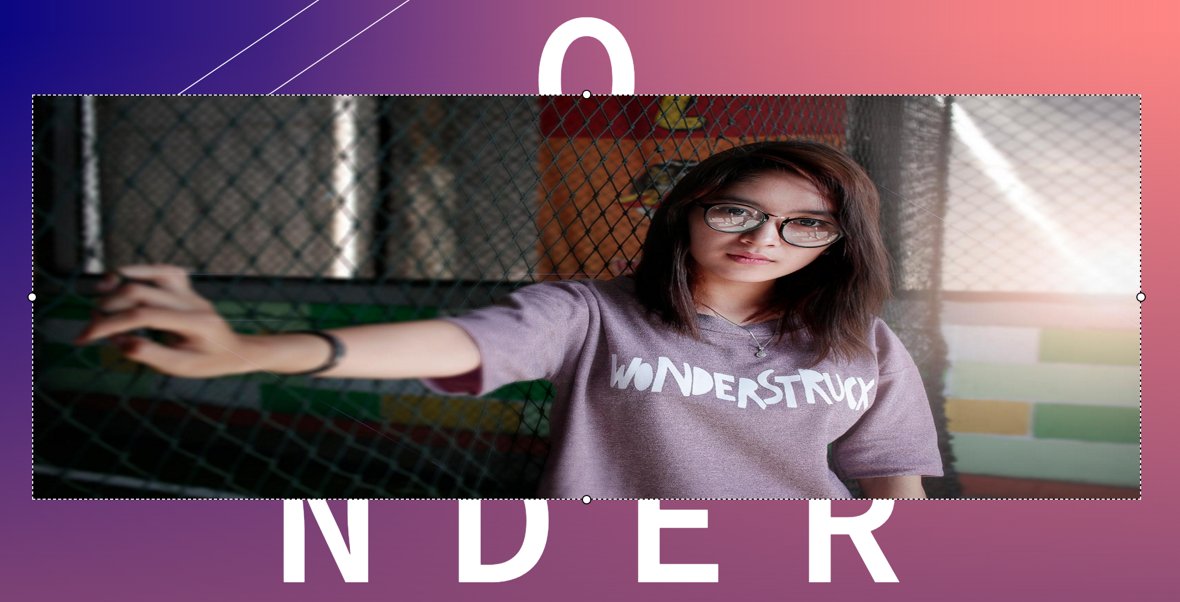
Once the image’s aspect ratio is unlocked, its height and width can be set independently.
Example of an image that has been resized with an unlocked aspect ratio.
Directly Enter Dimensions
Instead of dragging handles to resize an image, you can directly enter a specific width and height into its options.
With the image’s layer selected, go to the Size & Pos sub-section of the Layer Options tab in the sidebar, then in the Position & Size panel enter the desired width into the W field, and height into the H field.
Note: If the aspect ratio is locked, entering a value into one field will automatically proportionally update the other.
Next: Editing Backgrounds
In the next guide we’ll round out the basic editing section by learning how to modify backgrounds. You’ll see how to change colored backgrounds as well as how to swap out image backgrounds.
Changing Template Background Colors and Image
In this guide we’ll learn how to make basic changes to backgrounds.
Here in the final guide of our basic editing section we’ll be looking at making modifications to background [?]
colors and images.
Note: Slider Revolution also allows you to use videos for backgrounds, but because there are a couple of more advanced steps in modifying video backgrounds we’ll be covering how to do that later in the manual.
Accessing Background Settings
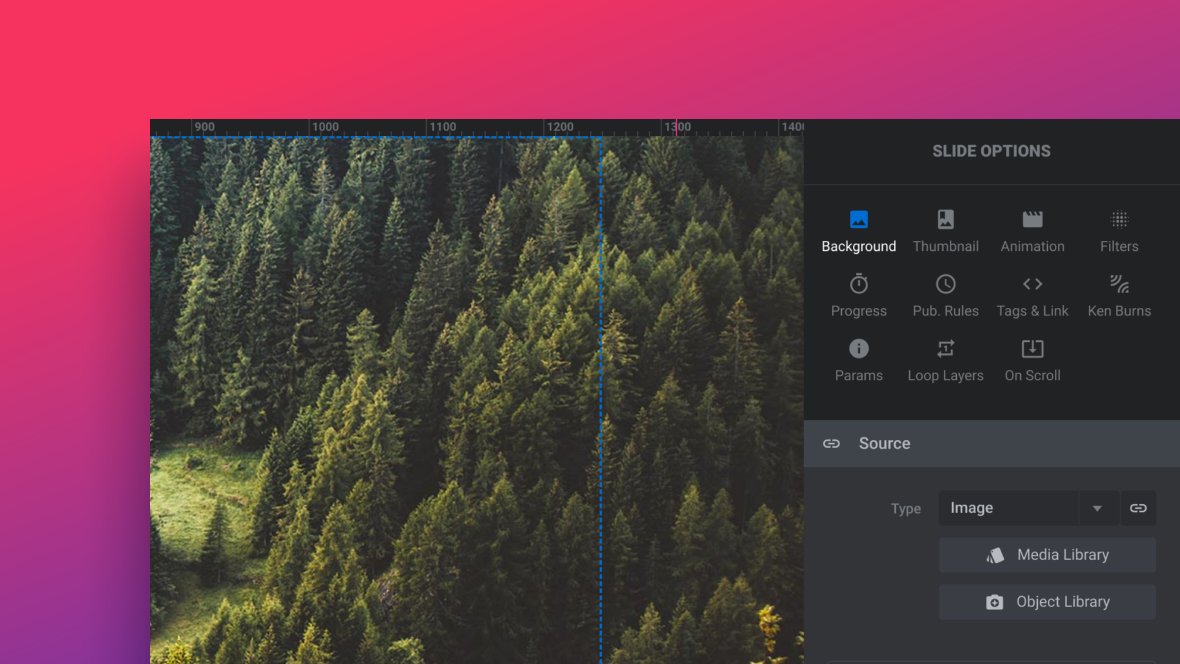
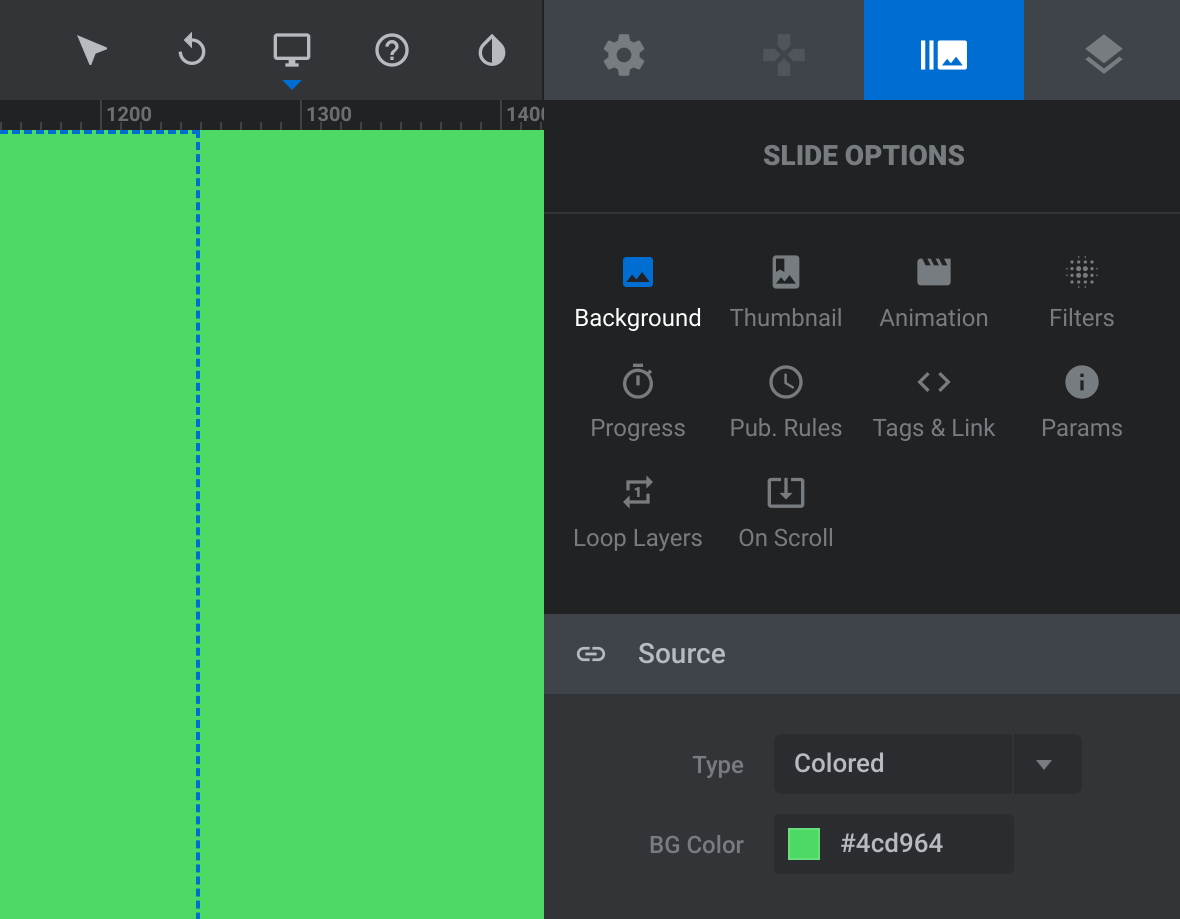
To access background settings, go into the Slide Options tab in the sidebar, then into the Background sub-section and Source panel.
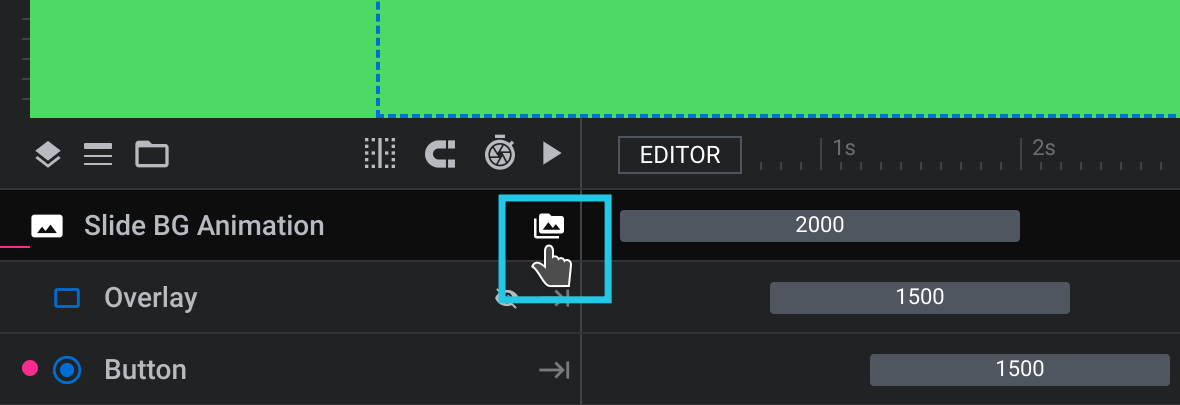
Alternatively, to jump straight to this location in the timeline [?]
, make sure you have scrolled to the top track (named “Slide BG Animation”), then click the folder icon to the right of its name.
Changing Background Color
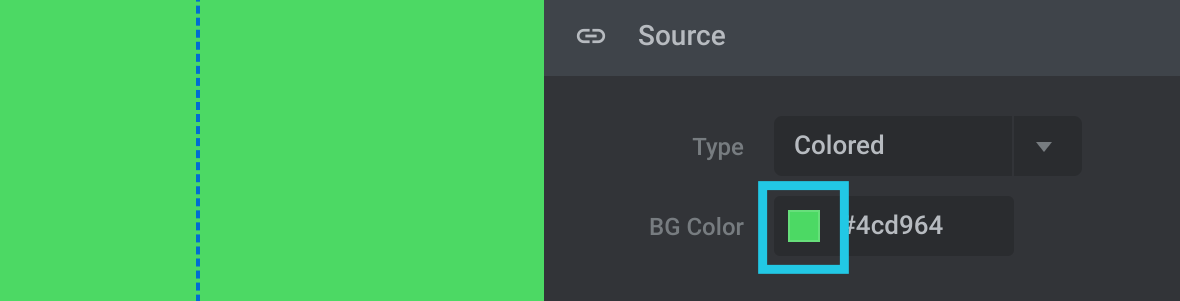
If the template [?]
has a background of the type Colored, you can modify it by clicking the small colored square:
This opens the color selection dialogue box:
Select a new color or gradient, then press the blue tick button to apply.
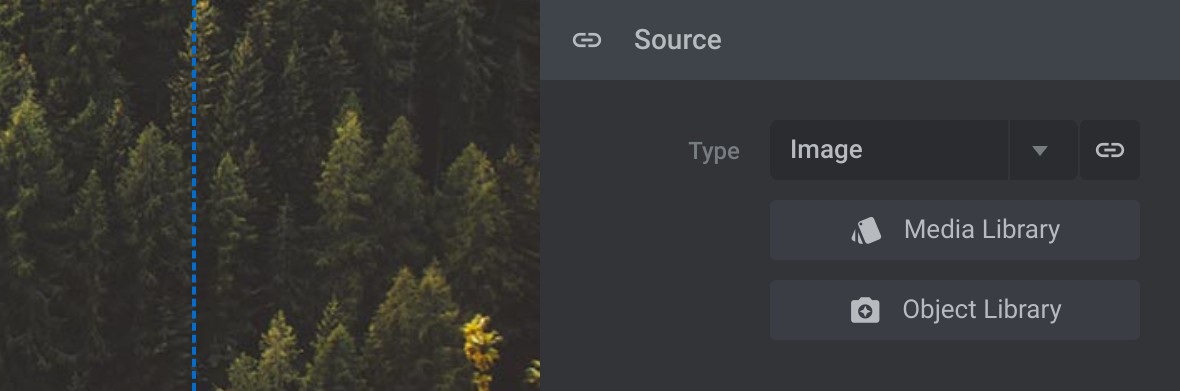
Changing Background Images
If the template has a background of the type Image, you can modify it by clicking either Media Library to replace with your own image or Object Library in exactly the same way as we have already seen in EditingImages in TemplateModules.
Note: If you are choosing a background image from the ObjectLibrary always choose the original size. This will mean the image is as large as possible ensuring it is big enough to fill the background.
Next Up: Publishing Modules
That wraps up our basiceditingsection.
Now we’re ready to move on to the last part of our module editing basics, where you’ll learn how to publish modulesusing the Slider Revolution block, shortcodes, and the blank page template that comes built-in with the plugin.