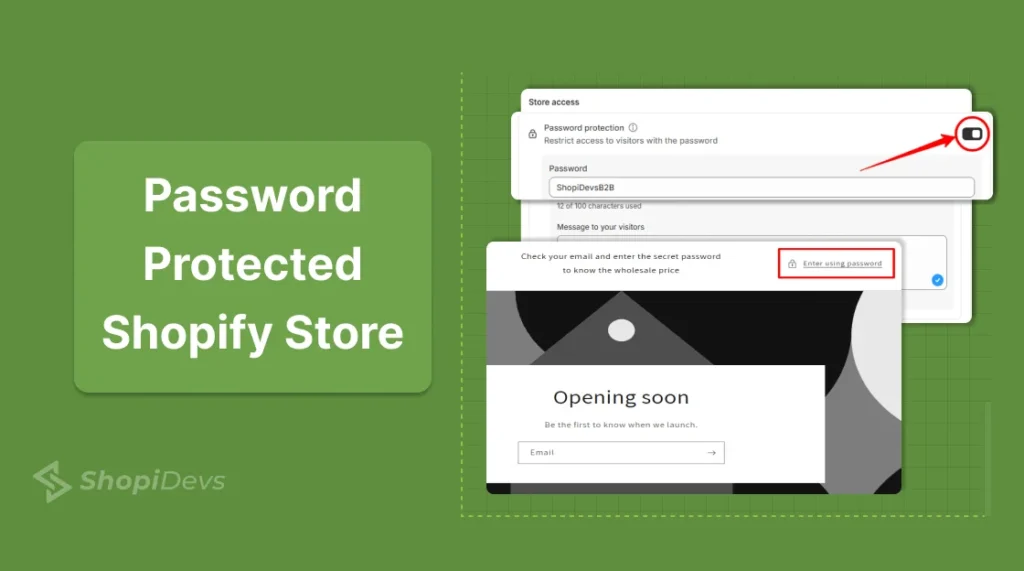
Your Shopify store is under development. Or you’re running a B2B catalog that only wholesale buyers should see. Either way, Shopify’s built-in password protection handles it in under 60 seconds. No apps, no code, no monthly fees.
This guide covers how to enable it, how to customize the password page to match your brand, how to add an email capture form, and when to use page-level protection for more granular control.
To password protect your Shopify store, go to Admin → Online Store → Preferences → Restrict store access, toggle on Enable password, enter your password, and click Save. Done in under 60 seconds.
- Admin → Online Store → Preferences
- Scroll to Restrict store access → toggle Enable password
- Enter a password → add a visitor message → Save
To disable it and go live, you need an active paid Shopify plan. Free trial stores cannot remove the password.
Key Takeaways
- Password protection is built into every Shopify plan. No app required.
- The password page includes a built-in email signup form you can activate for pre-launch capture.
- You must be on a paid Shopify plan to remove password protection and go live.
- For page-level or product-level restrictions, use an app like Locksmith or Easy Lockdown.
- Enabling password hides your store from all search engine crawlers including Googlebot. Remove it before launch to protect your Shopify SEO.
How to Enable Password Protection on Your Shopify Store
Follow these 6 steps to put your store behind a password:
- Log in to your Shopify admin: Go to admin.shopify.com and sign in with your Shopify ID. If you manage multiple stores or partner accounts, see how to navigate the Shopify Partner Dashboard login.
- Go to Online Store → Preferences: In the left sidebar, click Online Store, then select Preferences from the submenu.
- Find “Restrict store access” and enable the toggle: Scroll down to the Restrict store access section (some plan/UI versions label it Password protection). Toggle on Enable password.
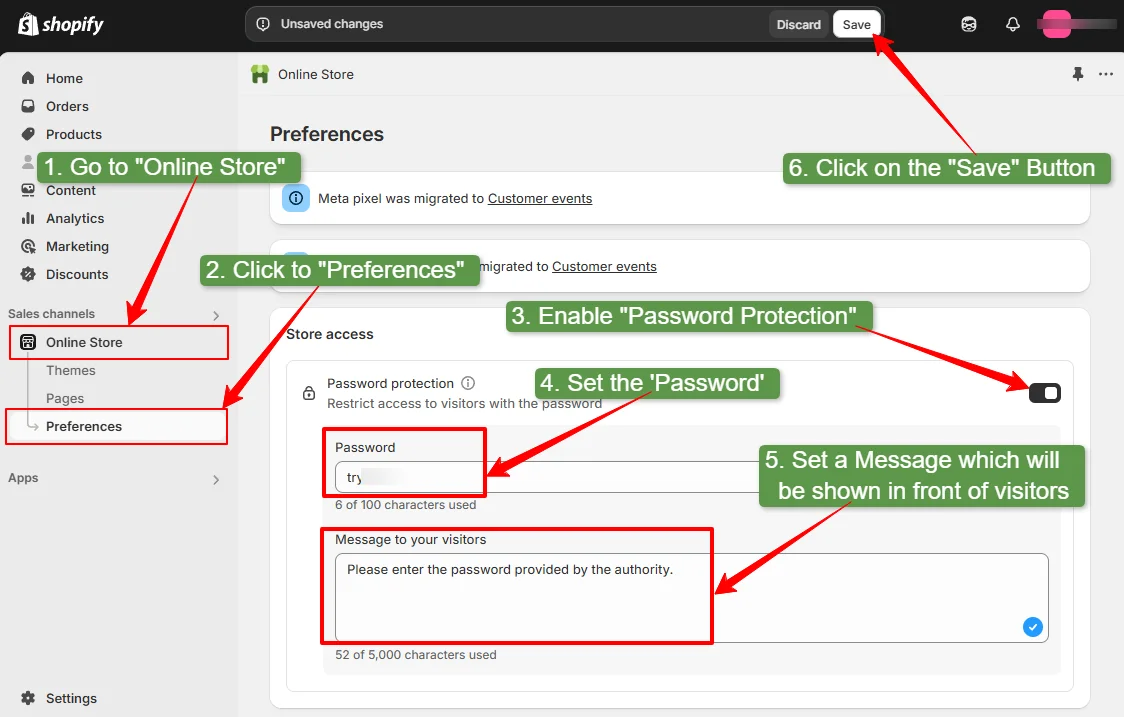
- Set a secure password: Enter a password in the field. This is what visitors enter to access your store. Share it only with team members, clients, or wholesale buyers you want to grant access.
- Add a visitor message (recommended): Write a short message that appears on the password page. Tell visitors when you’re launching, or add context like “This store is for approved wholesale buyers only.”
- Click Save: Your store is now password-protected. Visitors see your password page instead of the storefront. Search engine crawlers also cannot access your store while this is active.
When to Use Password Protection vs When to Disable It
Not every situation calls for a password. Here is the full decision framework:
| Situation | Use Password? | Why |
|---|---|---|
| Store is under development or design | Yes | Hide incomplete pages from the public and search engines. |
| Pre-launch coming soon phase | Yes | Build hype and capture emails before the store opens. See coming soon page templates. |
| Seasonal or limited-access store | Yes | Restrict access during off-season or member-only events. |
| B2B / wholesale pricing only | Yes (whole store) | Prevent B2C customers from seeing trade-only pricing. |
| Major maintenance or migration | Temporary | Avoid showing broken pages during updates. |
| Store is live and open to customers | No | Password blocks customers and Google from reaching your store. |
| You only want to hide specific pages or products | No | Use page-level protection apps instead. |
How to Customize Your Shopify Password Page
The default Shopify password page is functional but bare. You can customize it from the theme editor without touching any code. Here is how:
Step 1: Access the Theme Customizer
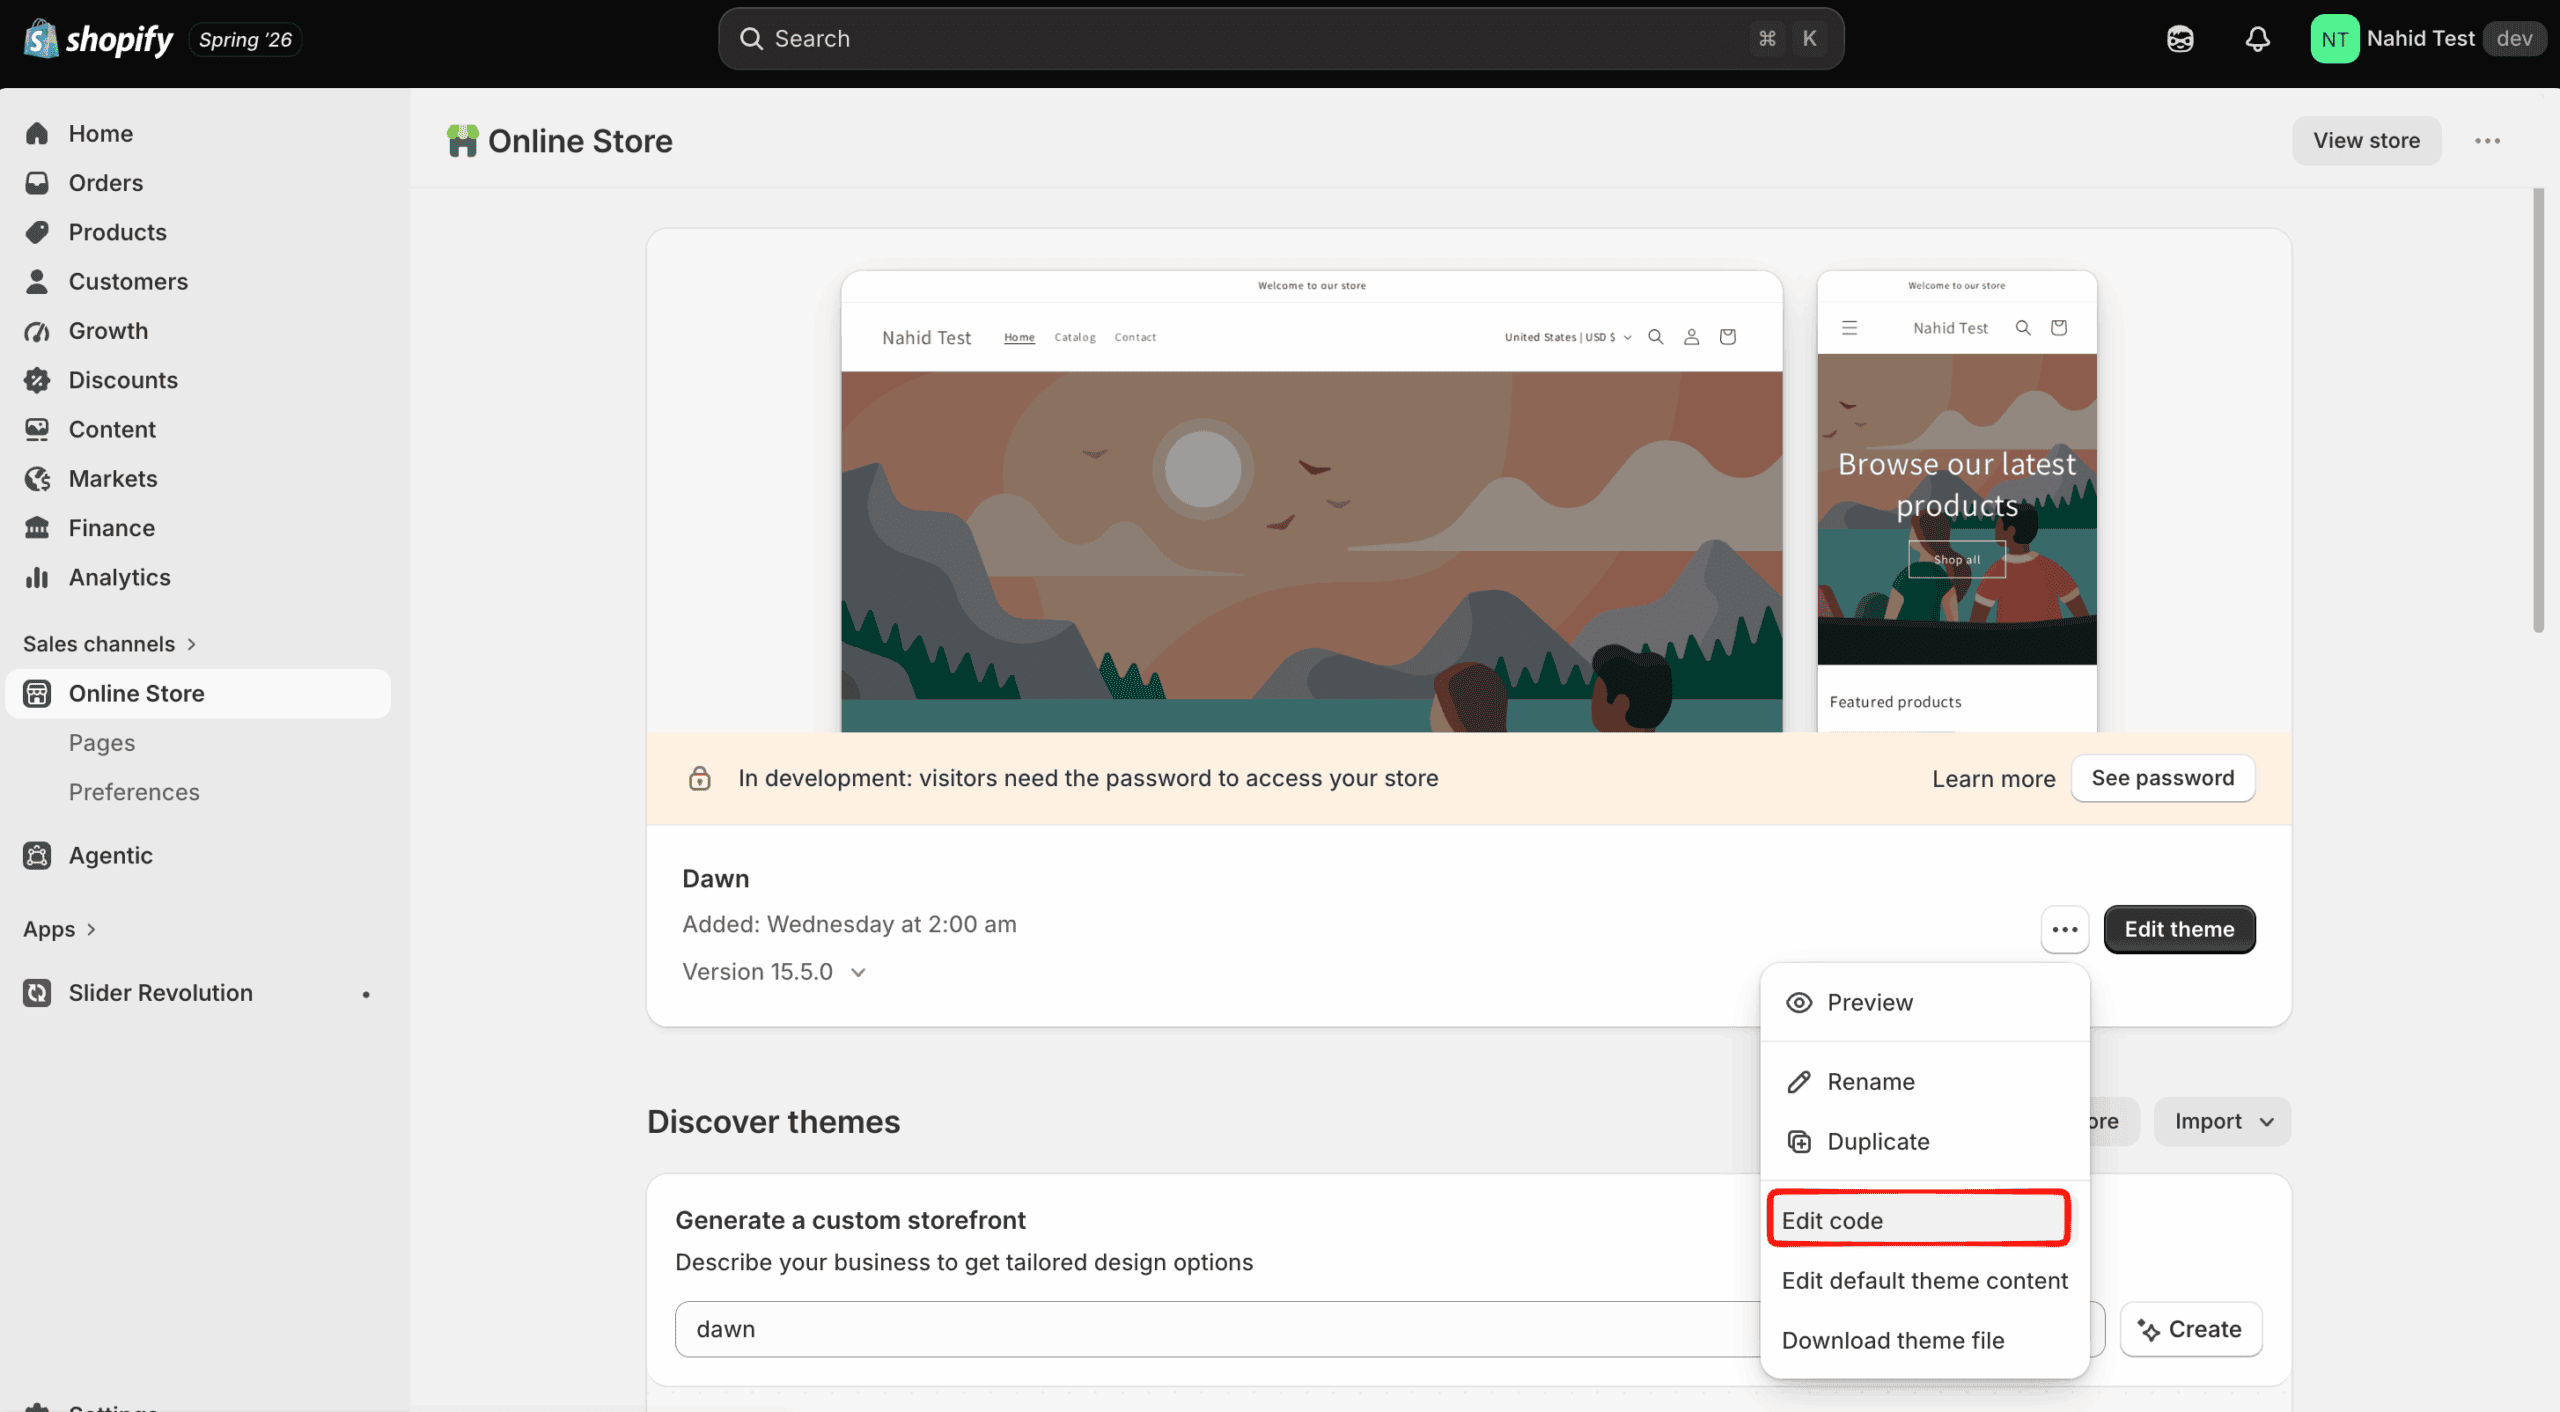
From your Shopify admin, go to Online Store → Themes. Find your active theme and click Customize.
Step 2: Navigate to the Password Page
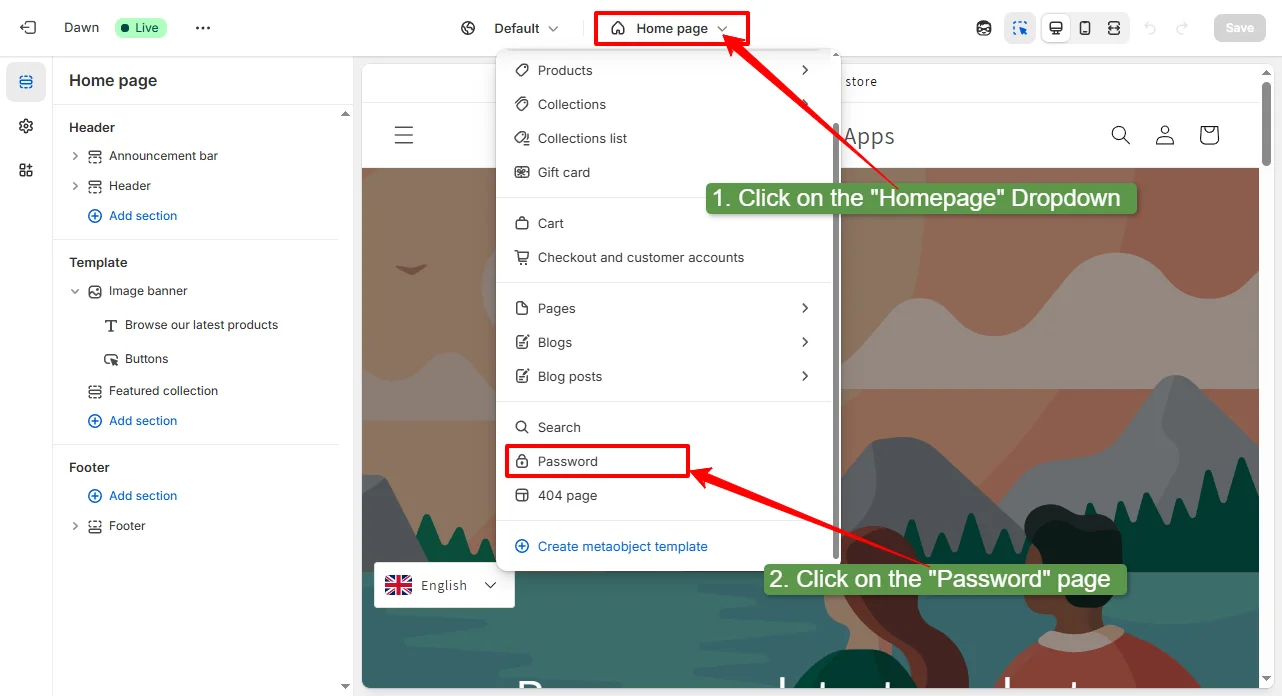
At the top of the customizer, click the Home page dropdown, scroll down, and select Password. If you do not see it, make sure password protection is enabled in Preferences first.
Step 3: Edit Sections
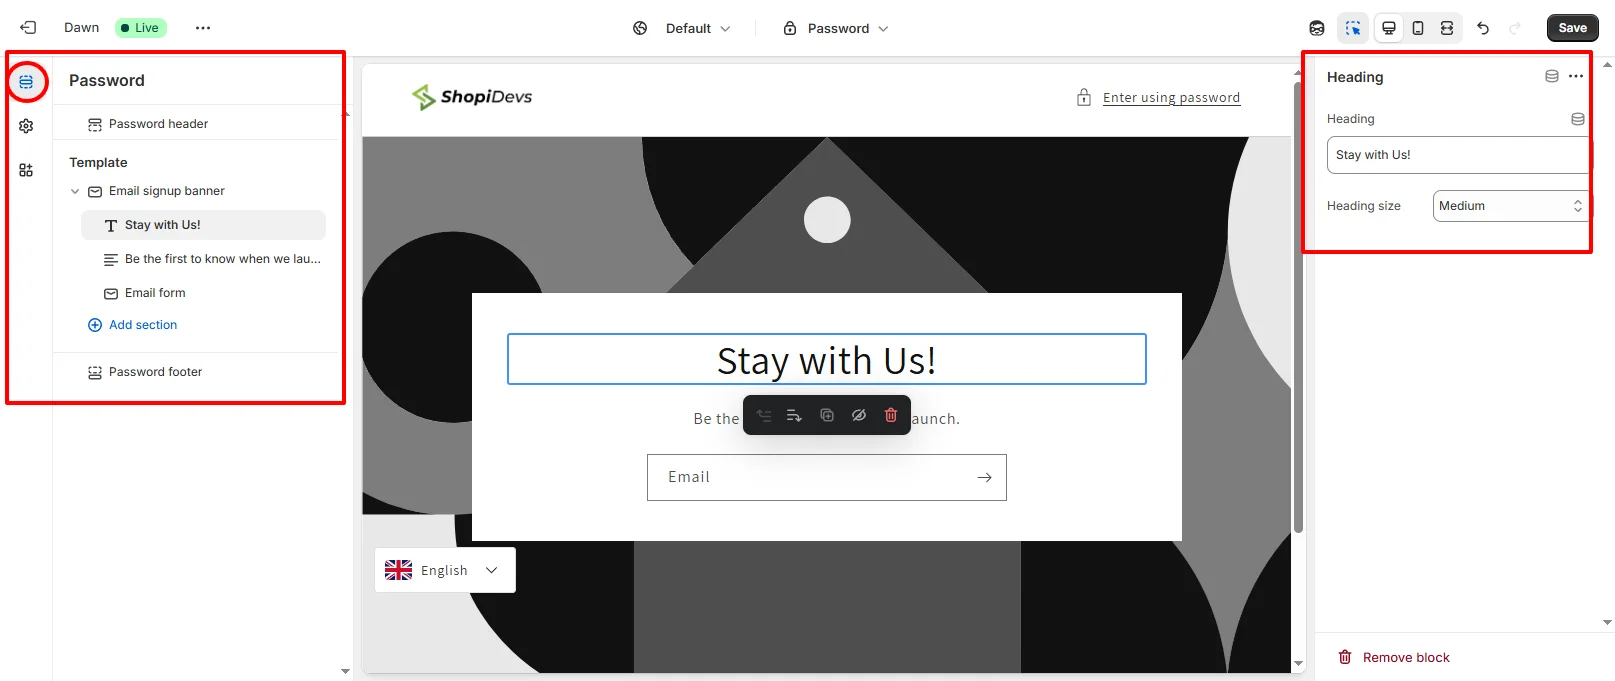
In the Dawn theme and most OS 2.0 themes, you can edit the header, main content block, and footer. Update your logo, headline, subtext, background image, and brand colors. For more visual ideas, check Shopify website design tips or explore free Shopify themes with better password page layouts.
Step 4: Adjust Theme Settings and Save
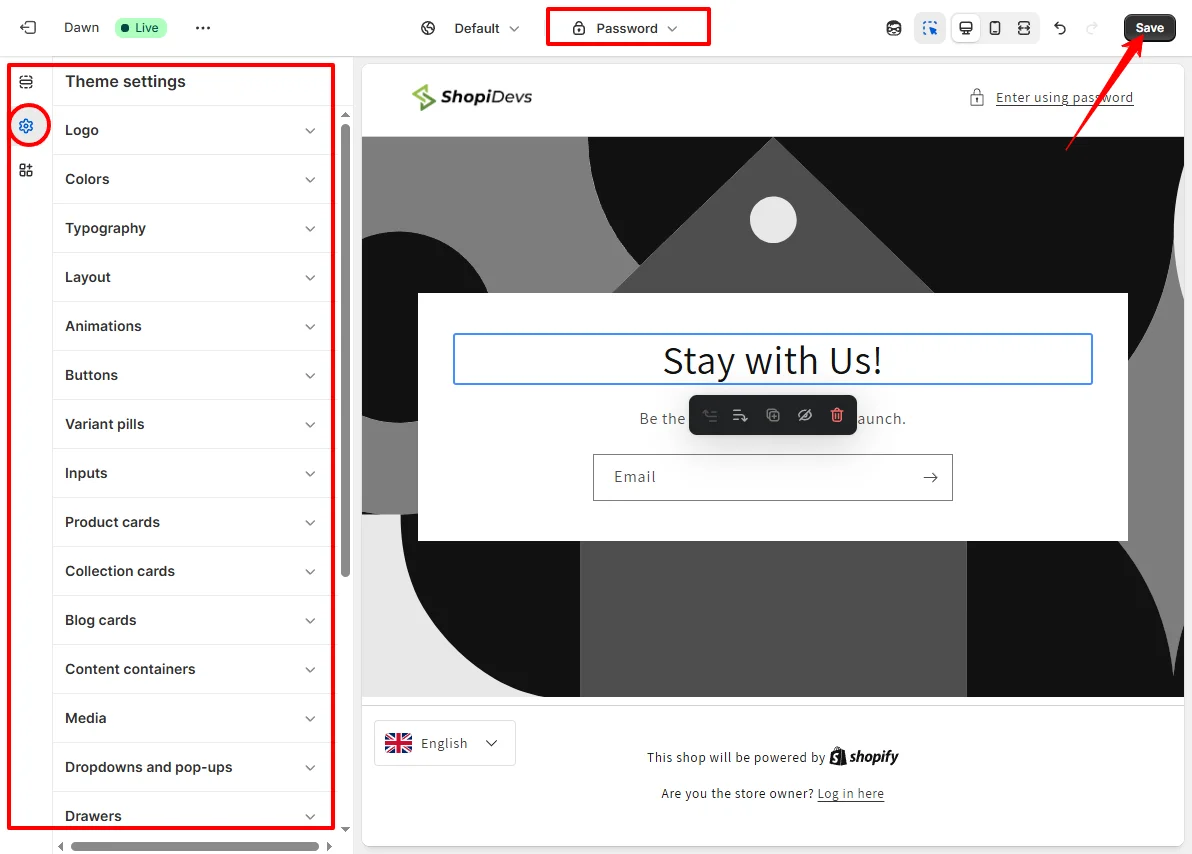
Click Theme Settings to change typography, color schemes, and social media links that apply site-wide including on the password page. Click Save when done.
Custom CSS for the Shopify Password Page
The theme editor covers the basics. For pixel-level control, add custom CSS directly in the theme. Go to Online Store → Themes → Edit code → Assets → base.css (or your theme’s main stylesheet) and add overrides at the bottom.
/* ===== Shopify Password Page Custom CSS ===== */

/* Change background color */
.template-password {
  background-color: #0d1b2a;
  color: #ffffff;
}

/* Larger logo on password page */
.password-header__logo img {
  max-width: 220px;
}

/* Center and constrain the password form */
.password-form {
  max-width: 420px;
  margin: 0 auto;
  text-align: center;
}

/* Style the submit button */
.password-form__submit {
  background: #00a650;
  color: #ffffff;
  border-radius: 8px;
  padding: 12px 28px;
  font-weight: 700;
}
The class names above apply to the Dawn theme. Other themes may use different selectors. Use browser DevTools (right-click → Inspect) on your password page preview to identify the correct class names for your theme.
Background image
Use
background-image: url('...')
on
.template-password
to set a full-bleed brand image behind the password form.
Countdown timer
Add a Liquid snippet with JavaScript to show a countdown to your launch date. Many Shopify banner apps support this natively.
Mobile optimization
Test your password page on mobile. Keep font sizes at 16px or above and touch targets at 44px or above for a professional experience.
Social links
Add social icon links so visitors can follow your brand before launch. Include them via theme settings or directly in the password page section code.
Add an Email Signup Form to the Password Page
Shopify’s default password page already includes a built-in email signup field. When a visitor enters their email, it saves to your Shopify Customers list under “Email subscribers.” You do not need a third-party app for basic collection.
Option 1: Use the Built-In Email Field
The signup field is visible on the password page by default. Collected emails appear under Shopify Admin → Customers → Email Subscribers. Export and import them into your email platform after launch.
Option 2: Connect Shopify Forms for Automation
Shopify Forms (a free native app) builds customizable signup forms that connect directly to your email marketing flows. Install it from the Shopify App Store, then embed a Form block inside your password page template via the theme editor.
| Method | Cost | Automation | Best For |
|---|---|---|---|
| Built-in password page signup | Free | None (manual export) | Simple pre-launch capture |
| Shopify Forms (native app) | Free | Connects to Shopify Email / Klaviyo | Automated welcome flows |
| Klaviyo embedded form | Free plan available | Full automation, segmentation | Serious pre-launch campaigns |
Page-Level Protection: Locksmith vs Easy Lockdown
Shopify’s built-in password locks your entire store. If you need to restrict only specific pages, products, or collections, you need a third-party app. Two dominate this space:
Locksmith
From $12/mo • 4.7 ★ (492 reviews)
Most flexible. Lock by customer tag, passcode, purchase history, geo, date/time, or secret link. Ideal for complex B2B gating.
Easy Lockdown
Free plan available • 4.6 ★
Simple page locking. Conditions include login required, customer tags, passcode. Good for locking a single collection without complexity.
LockOn: Restrict Store
Free plan available • 4.5 ★
Location or tag-based restrictions. Best for geo-gating (block or allow access by country) and IP-based restrictions.
Which One Should You Use?
How to Remove Password Protection and Go Live
When your store is ready to open, disabling the password takes 3 steps:
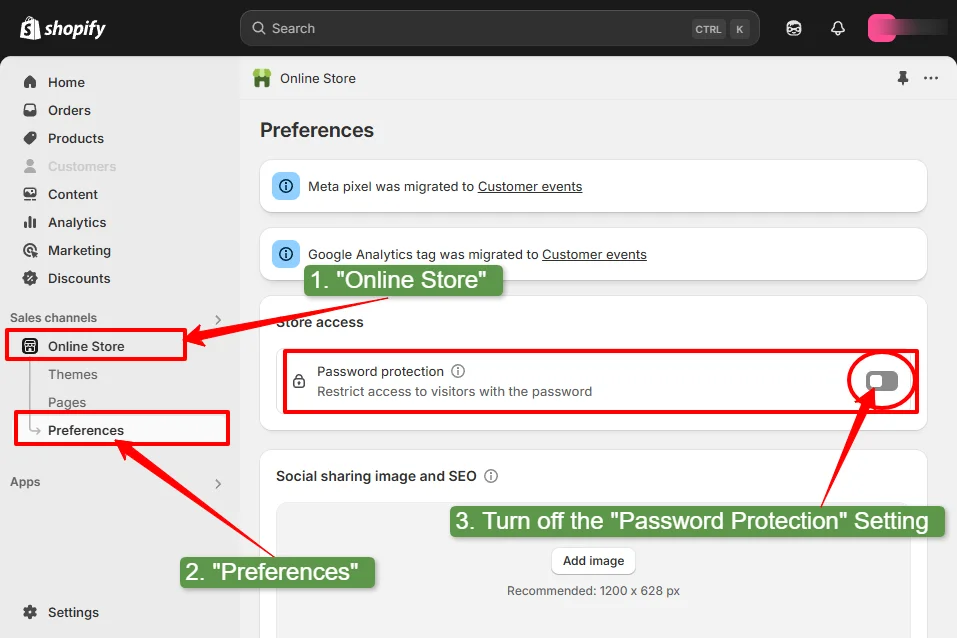
- Go to Online Store → Preferences: In your Shopify admin, click Online Store in the left sidebar, then click Preferences.
- Toggle off password protection: Scroll to Restrict store access. Toggle off Enable password (or uncheck Restrict access to visitors with the password).
- Save: Click Save. Your store is now publicly accessible. After going live, verify your SSL certificate is active. If your store shows HTTPS errors after launch, follow the SSL pending fix guide.
Troubleshooting Common Password Page Issues
| Problem | Likely Cause | Fix |
|---|---|---|
| Cannot disable password protection | No active paid plan | Subscribe to Shopify Basic or above, then disable. |
| Password page not showing in theme editor | Password not enabled yet | Enable password in Preferences first, then open the customizer. |
| Store still showing password after disabling | Browser cache | Clear cache or open in Incognito mode to verify. |
| Correct password rejected | Spaces or case mismatch | Re-enter the password in Preferences and save. Passwords are case-sensitive. |
| Custom domain still showing password after removal | DNS propagation lag | Wait up to 48 hours. Check SSL status at the same time. |
| Email signups not appearing in Shopify | Consent checkbox not enabled | Enable the consent checkbox in the password page signup form settings. |
Frequently Asked Questions
Can you password protect a Shopify store on the free trial?
Yes. Free trial stores are password-protected by default. You can customize the password page during the trial. However, you cannot remove the password and make the store public until you are on a paid plan.
Can you password protect a single Shopify page or product?
Not natively. Shopify’s built-in password locks the entire store. For page or product-level protection, use apps like Locksmith (from $12/month) or Easy Lockdown (free plan available). These apps let you set granular access conditions including customer tags, passcodes, and login requirements.
Where do I find my Shopify storefront password?
Go to Shopify Admin → Online Store → Preferences → Restrict store access. The current password is shown in the password field. You can update it at any time and save.
Does password protection affect my Shopify SEO?
Yes. While password protection is enabled, search engine crawlers including Googlebot cannot access or index your pages. SEO visibility resumes as soon as you disable it. Expect a few days for Google to re-crawl and index your pages after going live.
Can I password protect a Shopify collection?
Not natively. Use Locksmith or Easy Lockdown to restrict collection access. Locksmith’s customer tag condition is the most common setup: tag wholesale customers and only let tagged accounts view the collection.
Building Something Great on Shopify?
From Slider Revolution sliders to Essential Grid galleries, ShopiDevs builds the apps Shopify merchants rely on for standout storefronts.

Jakaria is an SEO Content Writer in Shopify, Ecommerce, WordPress, and Tech Industry with 5+ years of experience. He specialises in developing engaging, helpful content by simplifying complex topics into an amazing story for B2B, SaaS, and Shopify businesses. He’s also passionate about staying updated on growth marketing strategies and Shopify trends.