Shopify sub collections very important and helpful for online stores to organize products into a clear hierarchy. Unlike primary collections, sub-collections allow you to categorize items more efficiently. It makes navigation easier for customers and improves user experience.
You can add sub-collections on Shopify by creating a custom collection template, creating sub-collections, and assigning products. Then, create a navigation menu with sub-collections, customize your store using the theme editor, and save.
This is the easiest way to add sub-collections on Shopify that will help you to organize your products and improve your UX. Let’s dive into the step-by-step guide on how to achieve it without a single code.
Benefits of Implementing Sub-Collections in Shopify
Adding sub-collections in Shopify is a great way to organize products into smaller, focused categories. It makes shopping easier for customers and improves your store’s performance. Here’s how sub-collections benefit your Shopify store:
- Improve User Navigation: Customers can quickly find specific products, reducing frustration.
- Improved Search Engine Indexing: A clear site structure helps search engines to crawl and rank your product pages better.
- Better User Experience: Organized collections make browsing smoother and keep visitors engaged on your site.
- Targeted Keyword Optimization: You can use specific keywords for each sub-collection, which can boost SEO.
- Increase Conversion Rate: Better search rankings and easier navigation which lead to more sales.
Using sub-collections is a smart way to enhance your store’s usability and attract more customers.
5 Steps to Add Shopify Sub Collections – Complete Guide
You need to start creating Shopify subcollections by creating a custom template, creating subcollections, and assigning products. After that, create a navigation menu and design a Shopify store by customizing themes. Let’s dive deeper to add sub-collections on Shopify:
Step 1: Create a Custom Collection Template
The first step of creating a subcollection is creating a new custom collection template, which can appear in the body section. To create a custom collection:
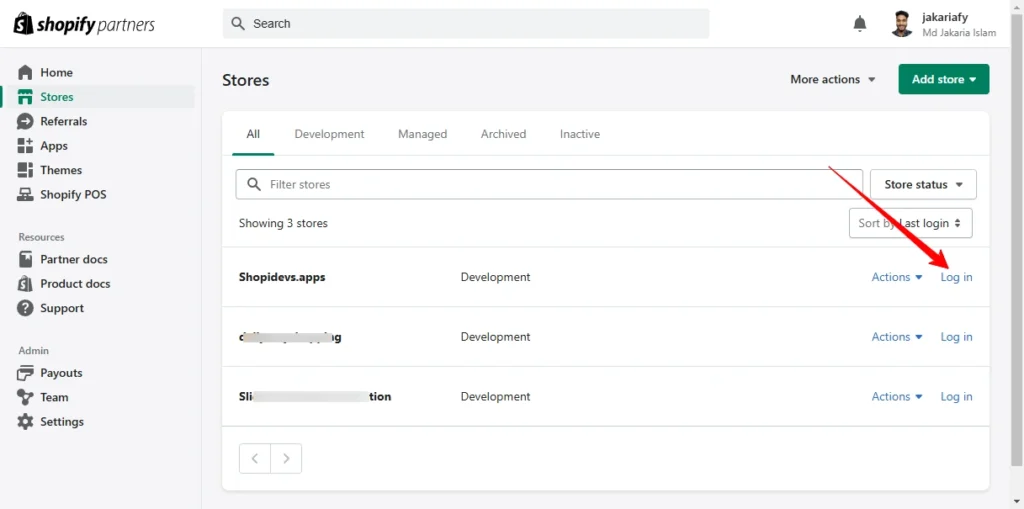
- First, you need to log in to your Shopify store to start your sub-collections.
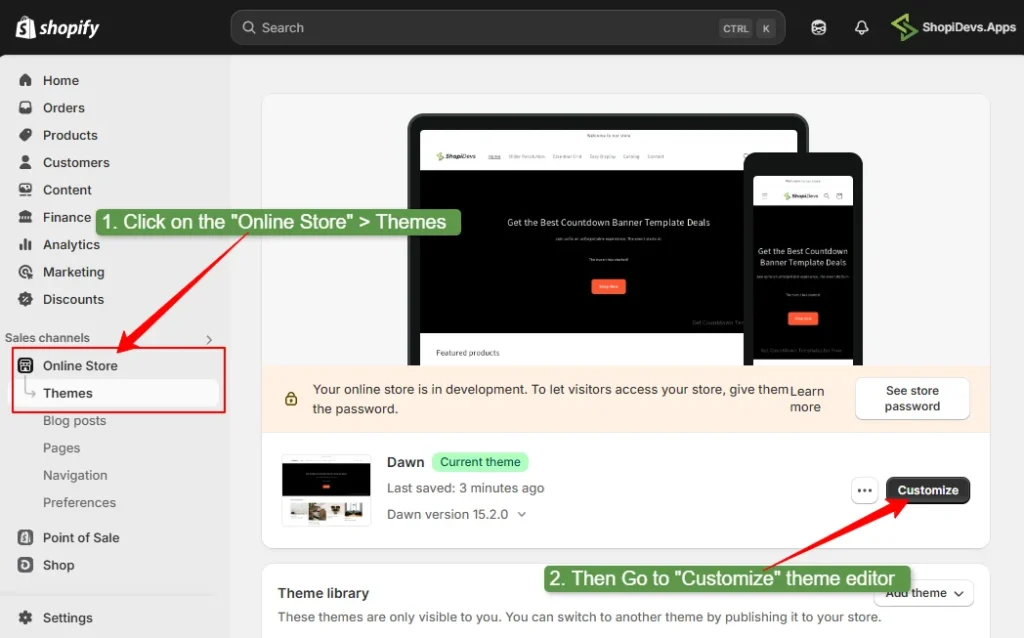
- Click on the “Online Store” > “Themes” > “Customize”.
- Click on the dropdown menu (Home page).
- Go to “Collections”.
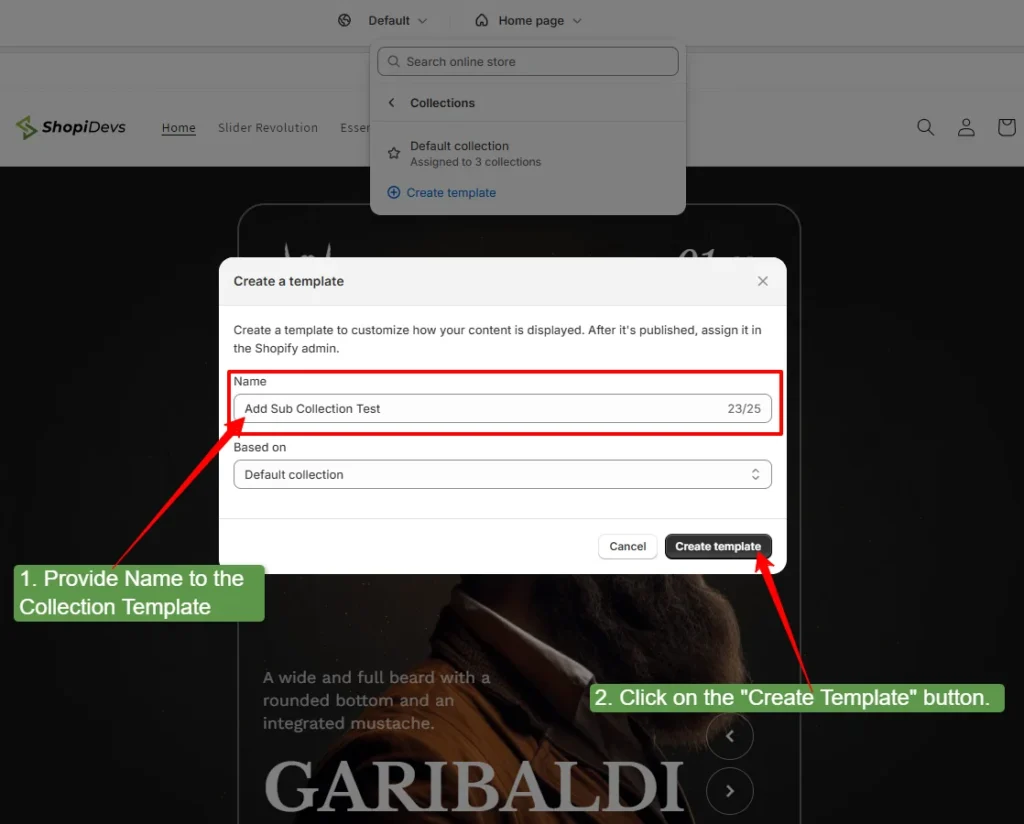
- Then, “Create Template” to create a new collection template with sub-collections.

- Provide the name of the custom collection template.
- Click on the “Create template” button.
- Save the store from the right side above the corner.
You have successfully created the collection template, now exit the theme editor and go to the next step.
Step 2: Create Parent Collection and Sub-Collections
In this stage, you need to create a parent collection and sub-collections under the parent one. To do it:
- Go to the “Product” section, then click on “Collections”.
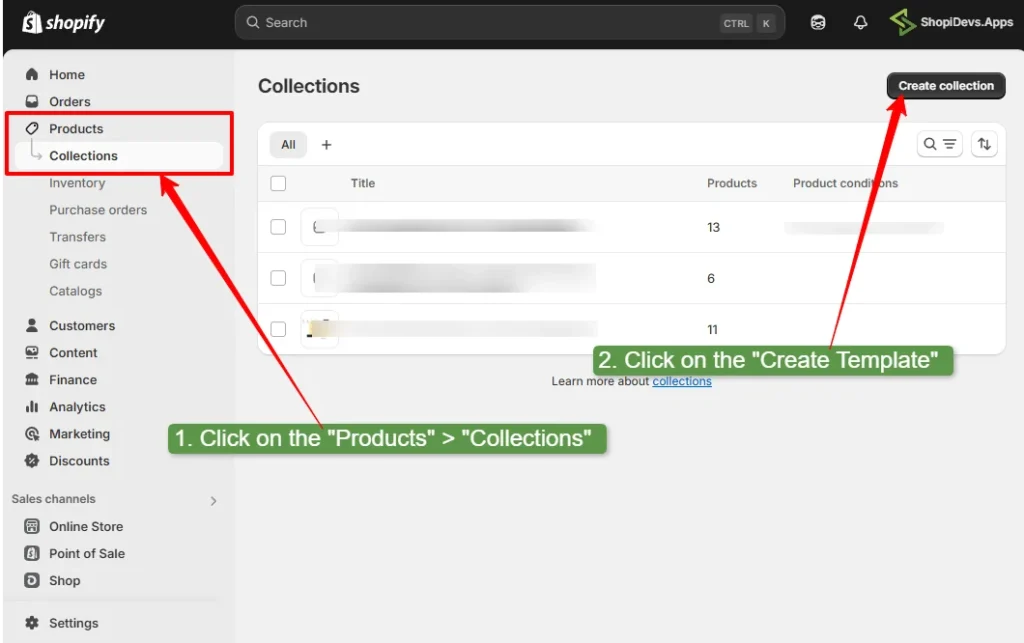
- Now create a parent collection where you will create sub-collections. For example, I have created the parent collection “Fashion & Sports”.
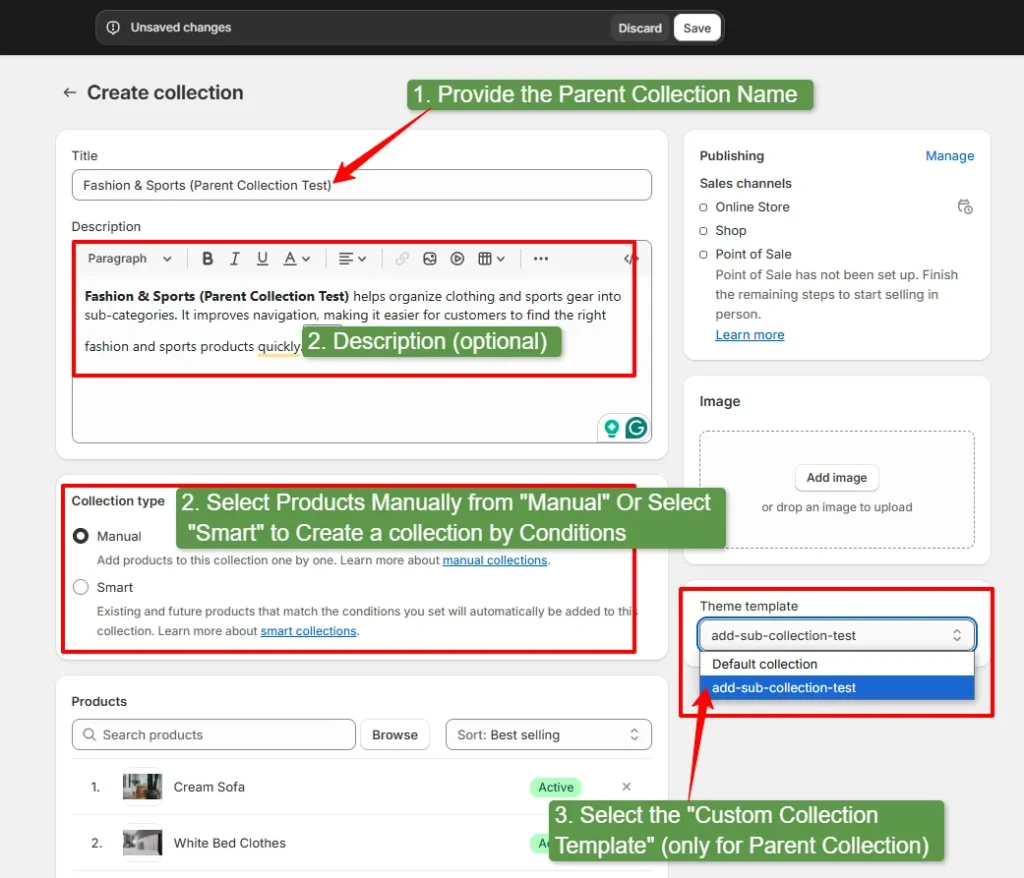
- Provide the name of the parent collection on the title field, and write a description to make it SEO-friendly.
- Besides sub-collections, if you want to showcase products in the parent collection, then select products. Otherwise, if you want to display only the subcollection list without products in the parent section, then don’t select products.
- After that, select the theme template to the “custom template” that you have created in step 1.
- Click on the “Save” button.
- Create Shopify sub collections sub-collections by following the same process as well as the parent collection.
- But remember to select the theme template “default collections” for sub-collections.
Note: Select the collection type “smart” and apply conditions like ‘tags’ ‘vendor’ etc., to make your sub collections dynamic. So that the sub-collection will automatically insert products by the tags when you launch a new product.

- Here, you can see that I have created 1 parent collection and 10 sub collections.
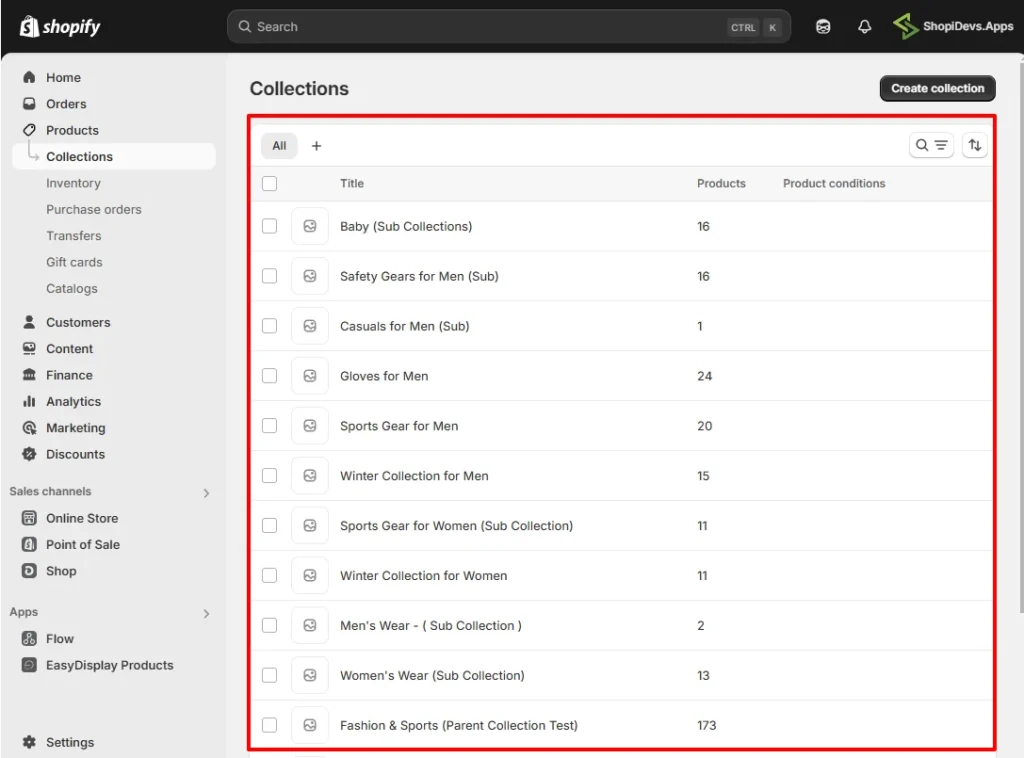
Create all sub-collections that you need for your store. Don’t worry, here you will see them as simple collections. But we’ll make them sub collections at the next step.
Step 3: Create a Navigation Menu with Subcollections
This is the easiest but most important stage that will help you to create sub collections in your store. Follow the process below to create the navigation menu with subcollections.
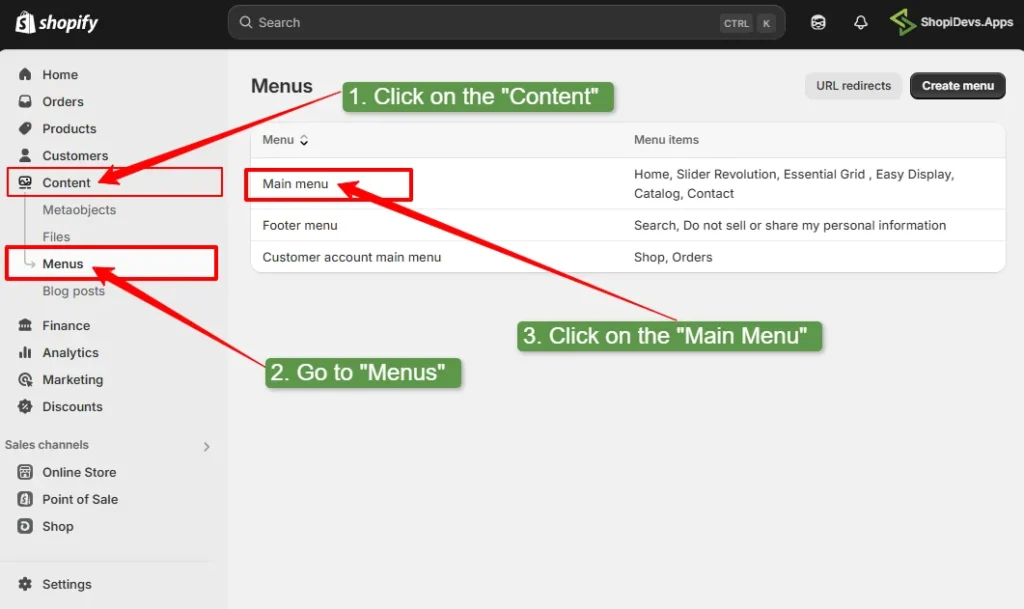
- Go to “Content > Menus” then click on the “Main Menu” to create a navigation menu with your sub collections.
- Also, you can do the same thing from “Online Store > Navigation”; it will redirect you to the “Menus”.
- Click on “Add Menu Item” to add the parent collection and subcollections.
- Add the name of the parent collection.
- Select the parent collection or paste the parent collection link in this field.
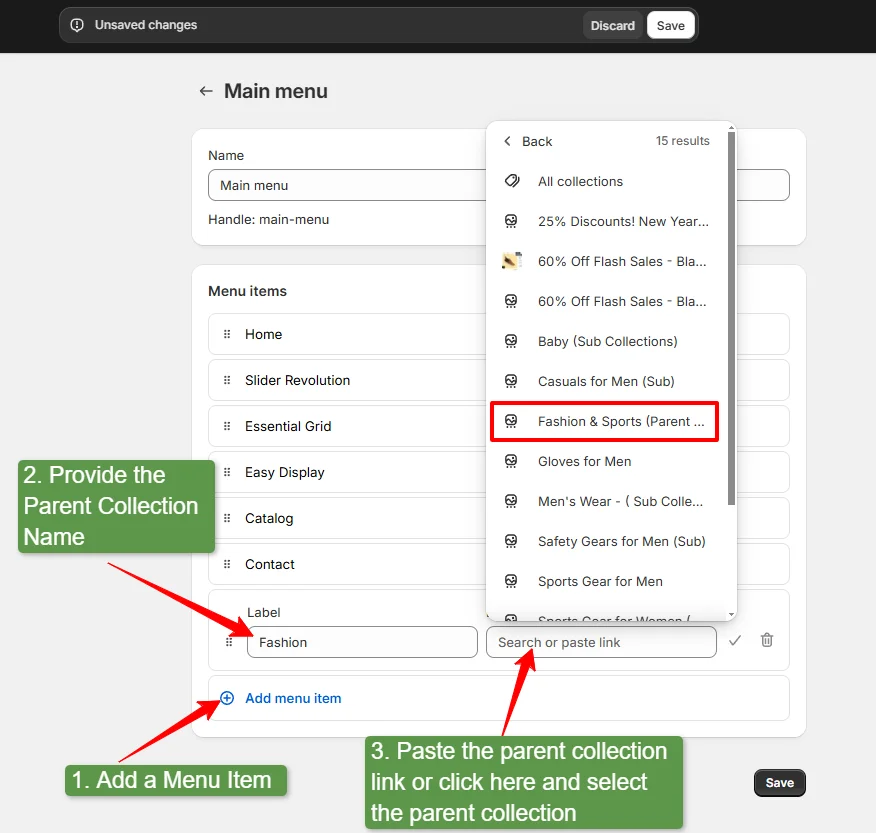
- Add a sub-collection by adding a new “menu item”.
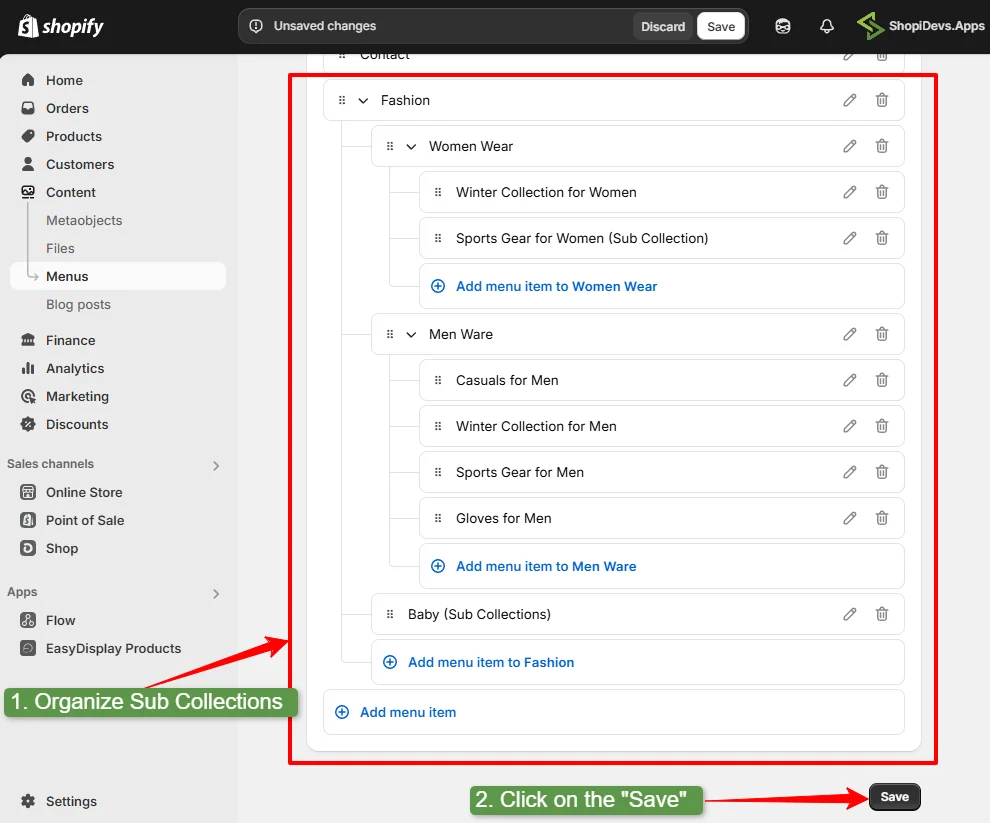
- Then, drag and move the subcollection under the parent collection.
- By following the same process, add all subcollections to this menu and organize all subcollections.
- Then click on the “Save” button.
Step 4: Customize Your Shopify Store Using Theme Editor
- Go back to the “Online Store > Themes > Customize”
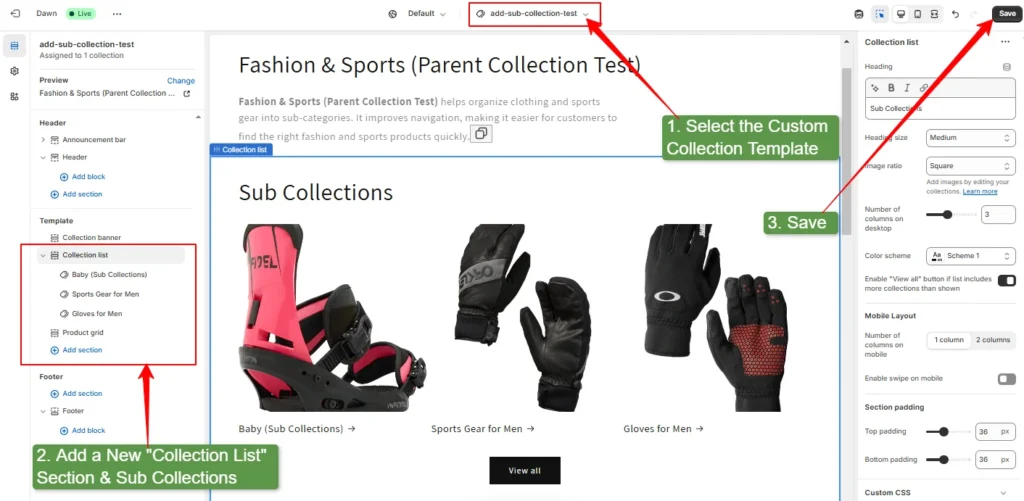
- Select the “custom collection template” from the drop-down ‘homepage’, that you have created in step 1.
- Click on “Add Section” and add a “Collection List” section.
- Add Shopify sub collections under this collection list.
- Then, you can customize them and click on the “Save” button.
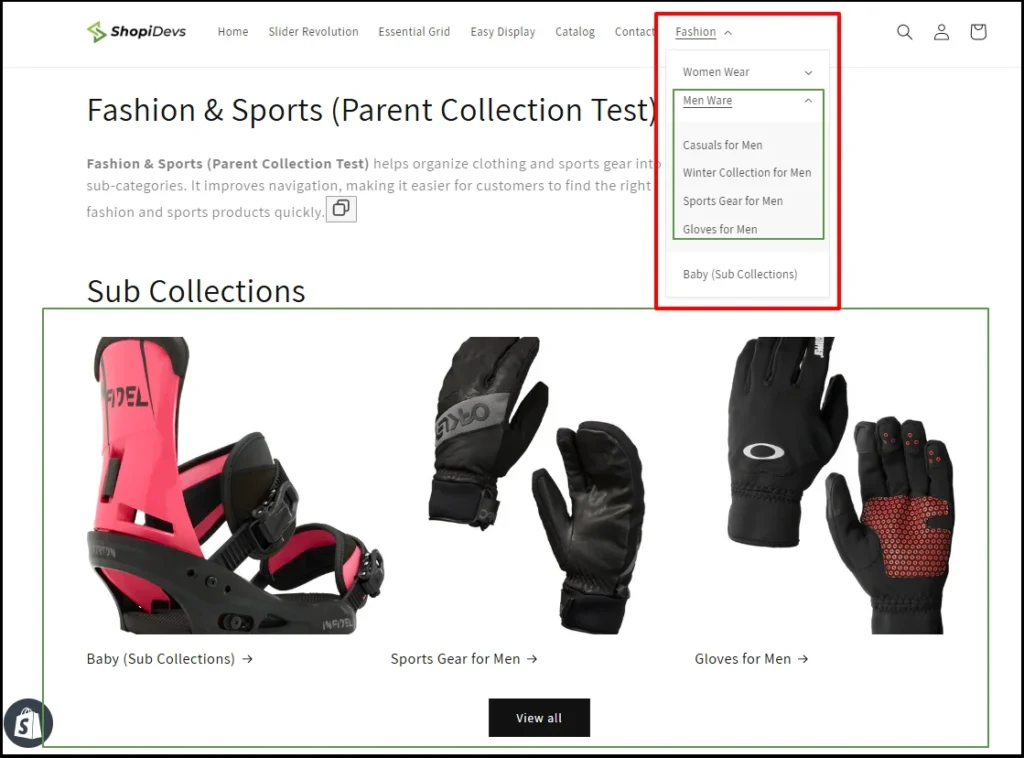
Step 5: Preview Your Store
You have completed everything successfully to add the sub collections on Shopify
Best Practices for Managing Sub-Collections
A well-structured collection system helps customers find products quickly and improves your store’s SEO. Follow these best practices to keep your store organized:
- Limit to 2-3 levels: Avoid too many layers that can confuse shoppers to keep navigation simple and fast. For example, (e.g., Home > Men > Shoes > Sneakers > Bata > White) follow this tip for small & mid-level businesses.
- Consistent Naming Conventions: Use clear, logical, and the same style for all sub-collection names so that customers understand categories easily.
- Dynamic Filtering: Provide options for shoppers to sort and filter sub-collections by price, color, or size.
- Seasonal Sub-Collections: Create collections for holidays or trends to boost sales at the right time.
By following these best practices, you can make your Shopify store stand out from a competitive market.
Pro Tips to Create Nested Collections on Shopify
A nested collection in Shopify is a way to organize products by adding multiple levels of product categories. It helps to create a structured shopping experience by grouping sub-collections under a main collection.
For example, in a clothing store:
- Parent Collection: Fashion
- Sub-Collection: Men’s Wear
- Sub Sub-Collection: T-Shirts
- Sub Sub-Collection: Jeans
- Sub Sub-Collection: Jacket
- Sub-Collection: Men’s Wear
Since Shopify does not support built-in nested collections, you can create them by following the ShopiDevs’s guide. But before creating nested collections, create a detailed plan for how you will categorize products.
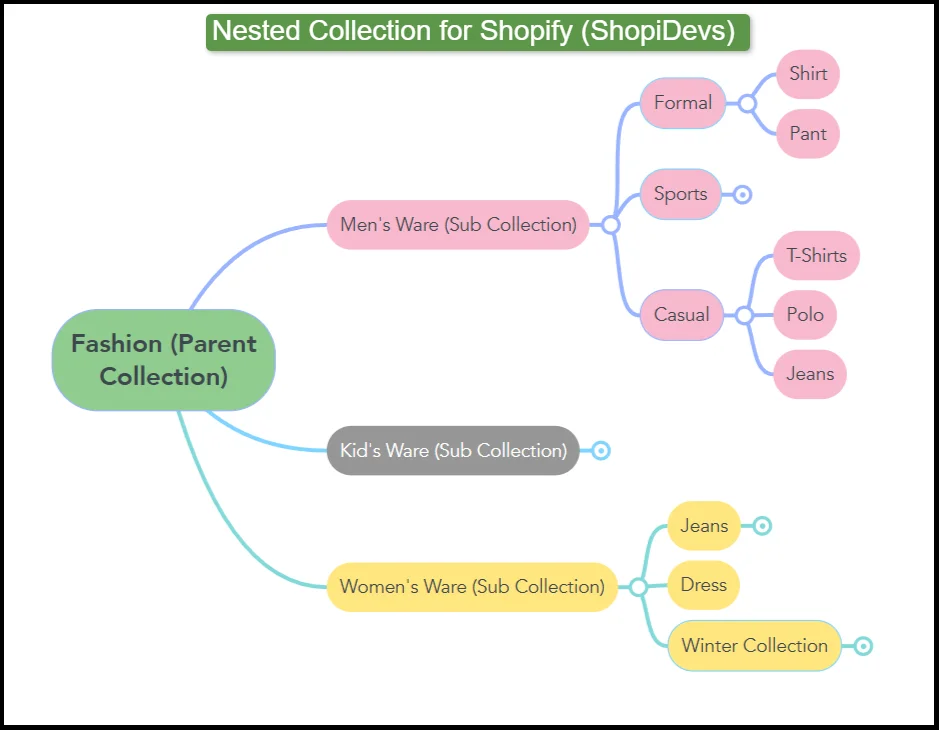
Here is how I made a proper plan before adding sub-collections and nested collections. I have used MindMeister, but you can do it with Google Sheets or Paperwork.
How to Delete Sub Collections From a Shopify Store
If you have moved all products to another collection, the sub-collection will become empty. Or, if you created a sub-collection by mistake, you can remove it. Here is the step-by-step process of how to delete a subcollection from a Shopify store:
- Log in to your Shopify store.
- Click on the “Products” > “Collections”.
- Go to the sub collection that you want to delete. (for example, ‘Casuals for Men’).
- Scroll down and click on the “Delete collection” button.
- Then it will show a confirmation popup; again, click on the “Delete collection” button.

Conclusion
Now you are at the end of the “creating a Shopify sub collections” blog. Creating a clear product structure with organized sub-collections will improve the shopping experience. Customers can find what they need quickly by navigating sub-collections on the menu bar.
Moreover, sub collections help to reduce confusion and keep shoppers engaged in your store longer. Also, search engines can easily understand your site structure with a clear navigation menu. It helps to rank higher on search engines > get more traffic > make more sales.
Adding sub collections on Shopify is not as complex as you think. In this blog, I have provided the easiest method with a step-by-step guide to create and display sub collections. You can simply add this feature to your store by following these 5 steps.
Start optimizing your Shopify store today and give your customers a seamless shopping experience!
FAQs
Can You Create Sub-Collections in Shopify?
No, you can’t create sub-collections on Shopify using built-in features and themes. But there are possible ways to add sub-collections using the navigation menu, custom template, or custom code. In this post, I have provided the easiest way to add sub-collections on Shopify without apps or code.
How Many Collections Can a Shopify Store Have?
There is no strict limit on the number of collections in Shopify. You can create as many as needed to organize your products. However, keeping collections well-structured ensures better navigation and faster site performance.
What Is the Difference Between Pages and Collections in Shopify?
Pages in Shopify are for static content like About Us or Contact pages. On the other hand, collections are groups of products that help customers browse specific categories. You can create a collection by adding products manually or select products dynamically by conditions.
Jakaria is an SEO Content Writer in Shopify, Ecommerce, WordPress, and Tech Industry with 5+ years of experience. He specialises in developing engaging, helpful content by simplifying complex topics into an amazing story for B2B, SaaS, and Shopify businesses. He’s also passionate about staying updated on growth marketing strategies and Shopify trends.