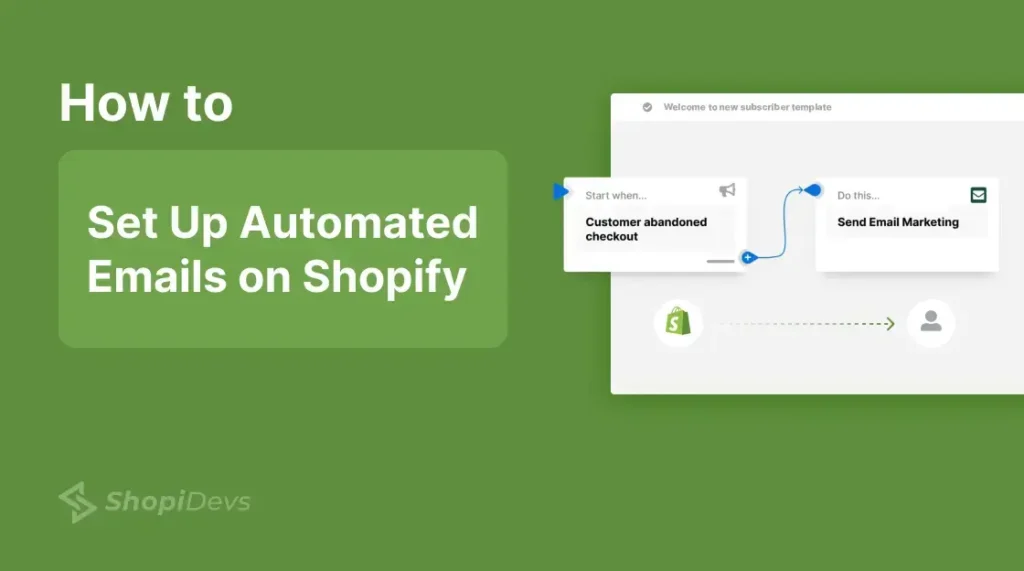
Want to get rid of the hassle of sending emails by yourself throughout your customers’ journey on your Shopify-powered e-commerce website? Well, with Shopify automated emails, you can save more time and effort to send those important emails manually and focus more on your business instead. But how can you do it as a site owner? The good news is there are several ways available to set up automated emails on Shopify it with ease on Shopify. In this article, we’ll walk you through how to send Shopify automated emails with ease using various methods. So, without further ado, let’s get started.
What is a Shopify Welcome Email?
A Shopify automated welcome email is an integrated feature in Shopify. It is used to send a warm and welcoming message to new customers automatically, eliminating the need for manual intervention.
It operates within Shopify’s system, allowing merchants to set up a series of welcome emails that are automatically sent when customers take specific actions, like making their first purchase.
Why Should You Use Automated Emails on Shopify?
Before diving into the setup process, let’s point out why automating your emails on Shopify is vital for your business.
Time Sensitive: Because automated emails are triggered in response to a particular time circumstance (i.e. you create them once and they do the work) This allows business owners time to dedicate towards other critical aspects of their enterprise.
Get Personalized Customer Experience: Try automation to send personalized emails such as cart abandoned or purchased email and keep your customers satisfied
Consistent Communication: Automation keeps your customers abreast of any updates and changes in a repeatable format that increases brand trust.
Boost Sales: Automated emails such as welcome emails, recommended products, and cart abandonment reminders may result in greater conversion rates which will help you grow your turnover.
Manually Creating Custom Automation
In order to create Shopify email automation in this process, we require:
i) Basic or higher Shopify plan.
ii) Installing the Shopify flow app To leverage full functionality of automation.
iii) The staff member’s permission to use Marketing section and Flow app.
Let’s move on to the steps:
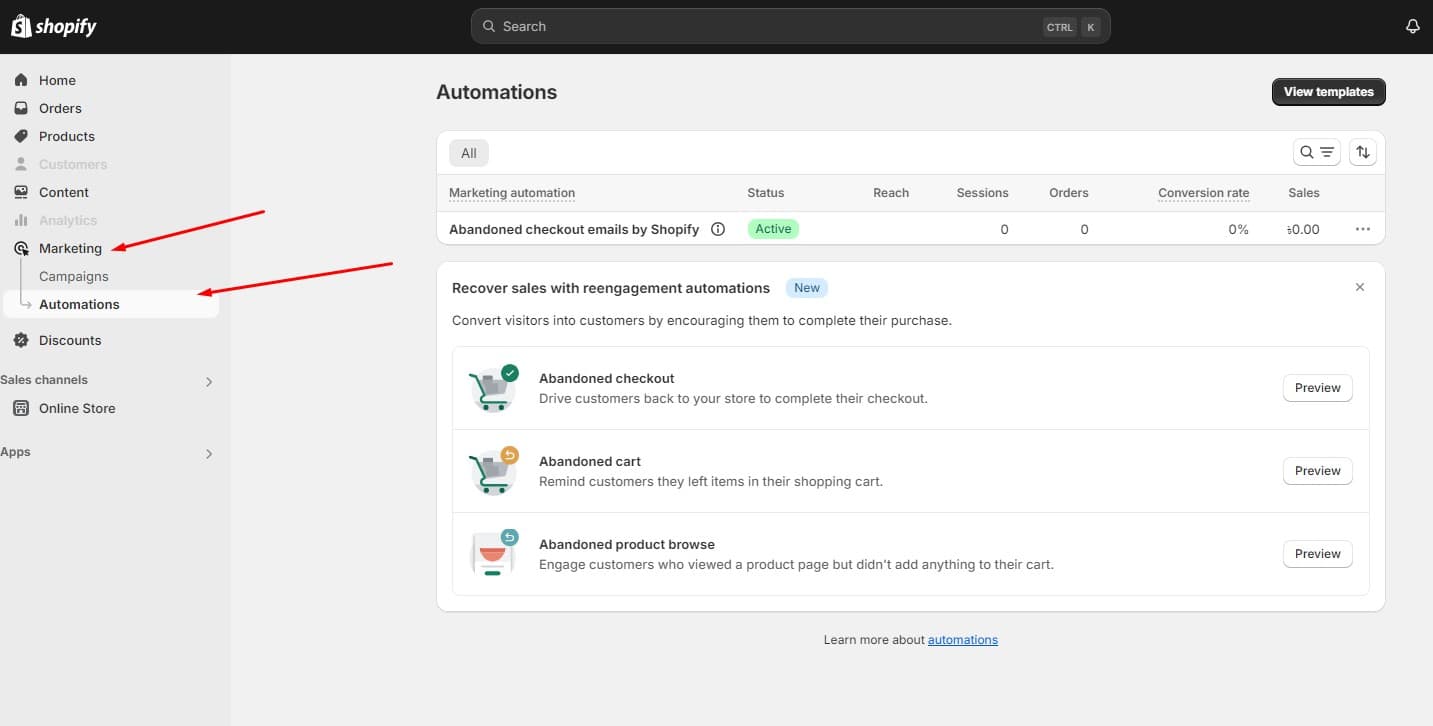
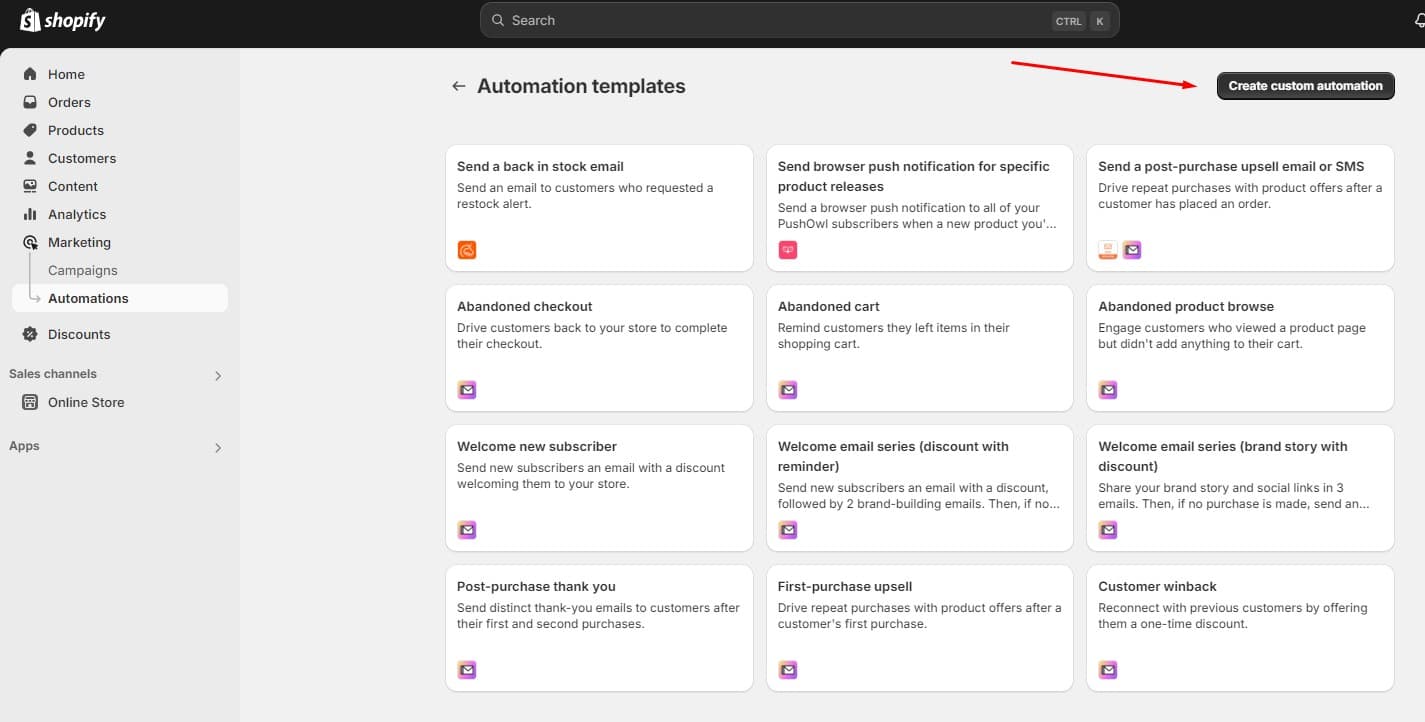
Step 1: Accessing the Automation Templates
- Log in to Your Shopify Admin: Start by logging into your Shopify admin account.
- Navigate to Marketing: From the main dashboard, navigate to the “Marketing” section on the left-hand side.
- Go to Automations: Now click on “Automations” within the Marketing section and start setting up your automated emails.
- View Templates: Click “View templates” to see the available email automation templates offered by Shopify.
Step 2: Creating and Editing Automated Emails
If you want to set up an Abandoned checkout, Abandoned cart, or Abandoned product browse email, click on the particular template of your choice.
Click “Edit” and head to “Edit email” to customize the template using the Shopify Email editor.
Target Your Audience:
If you’re working on an Abandoned checkout automation, choose your audience by using the “To:” drop-down menu. You can send the email to “All customers” or a specific group.
Other Automation Templates:
For other types of email automation, select the preferred template, click “Use workflow,” and then review and adjust the workflow actions as per your needs.
Step 3: Creating Custom Automation
Create Custom Automation:
If the templates aren’t suitable, you can create a custom automation by clicking “Create custom automation.”
Configure Your Workflow:
Set up the workflow by deciding the triggers and actions that will determine how and when your emails are sent.
Step 4: Activating Your Shopify Automated Emails
Turn On Automation:
After setting up your template or custom automation, activate it by clicking “Turn on automation” or “Turn on workflow,” depending on what you’ve created.
Follow these steps to set up all the Shopify automated emails manually and be closer to your consumers so that they can buy more from your store. Using Shopify automated emails saves time, but more importantly, your customers receive the appropriate communications exactly when they should, which improves their experience in your store.
How to Set up Email Automation to Welcome New Customers Using Shopify Email App
Shopify Email is a free-to-use app for sending emails that enables the creation of branded emails with use through its drag-and-drop editor. Let’s explore a step-by-step procedure on how t use it to create email automation on Shopify:
Step 1: Go to the “Automations” Section
For this, first off, go to Shopify admin and click on Marketing in the sidebar menu. Navigate to the Marketing page and select Automations.
Step 2: Start Automation Setup
After heading to the Automations section, find and click the “Create automation” button to start the process.
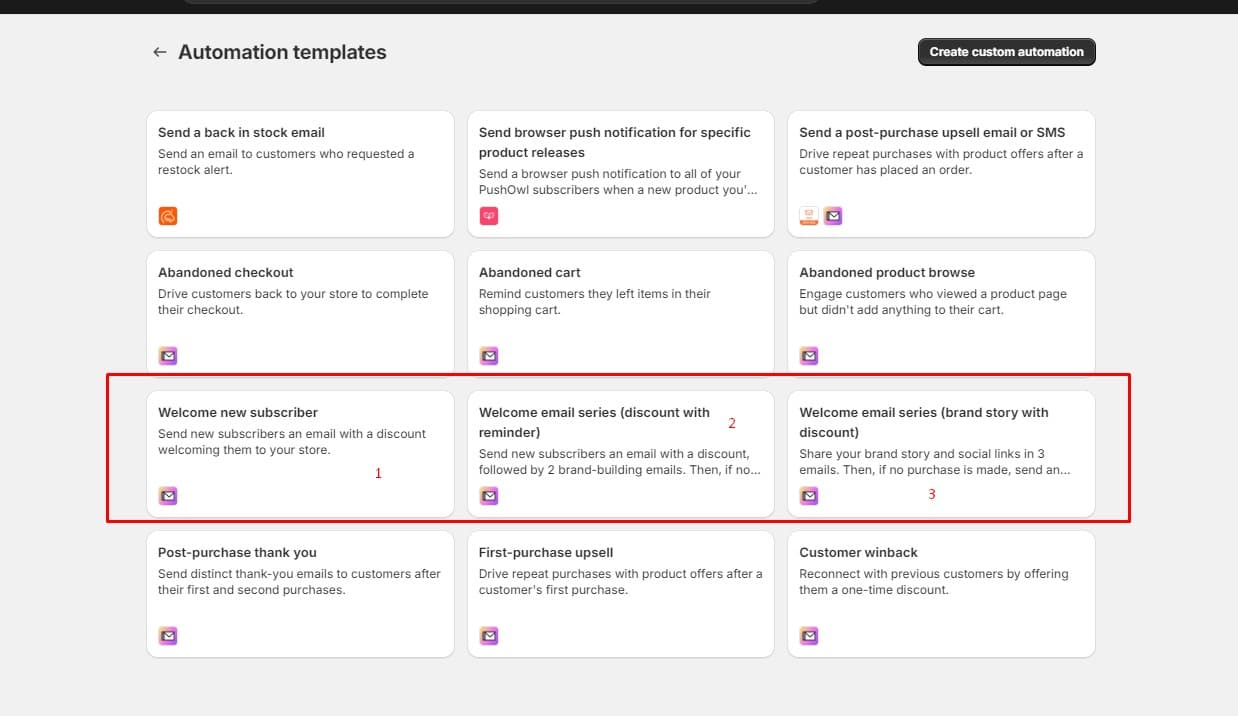
Step 3: Choose the Welcome Email Template
Shopify comes with 3 different available templates for the automated welcome email series. You have the option to try any of these and then suit them to your needs. These 3 available templates include:
1. Welcome New Subscriber
2. Welcome Email Series (Discount with Reminder)
3. Welcome Email Series (Brand Story with Discount)
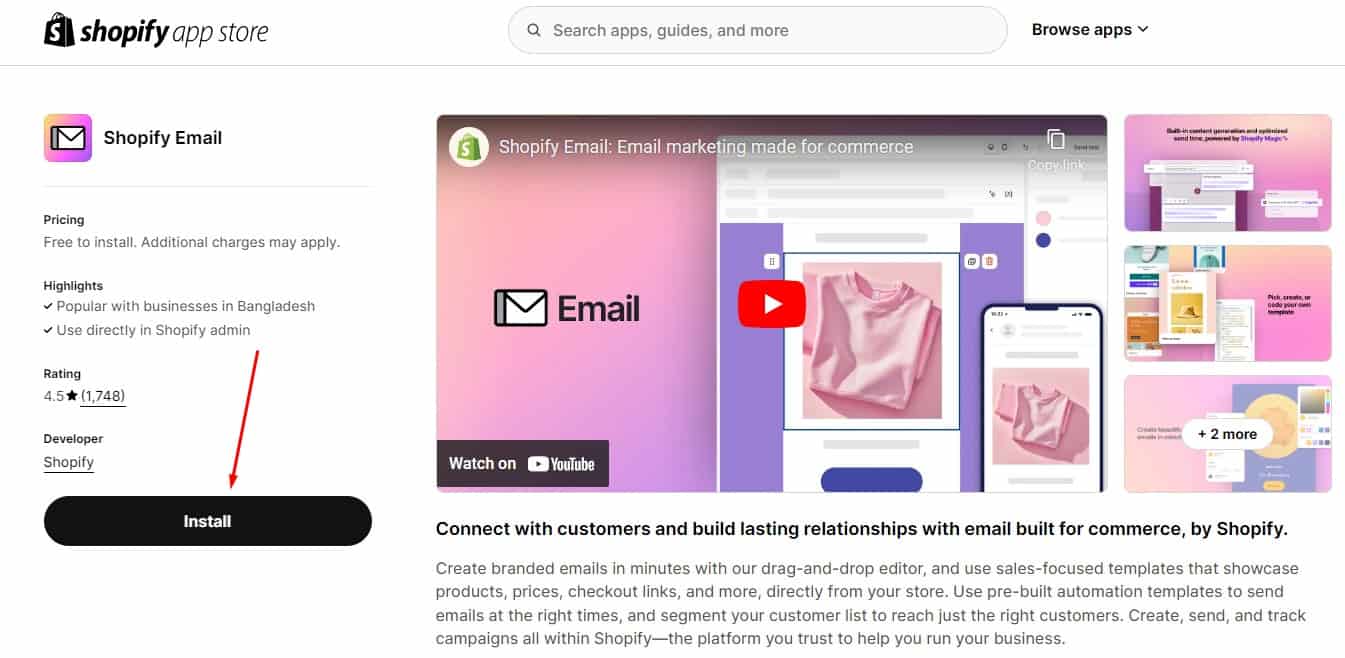
Step 4: Install the Shopify Email App
Now that you’ve selected the template, it’s time to turn on the automation. For this, you need to install the Shopify Email App.
Read more: Shopify email marketing vs mailchimp
Step 5: Apply the Desired Workflow
When you have the Shopify Email app ready, return to chosen welcome email flow. After that click “Use workflow”.
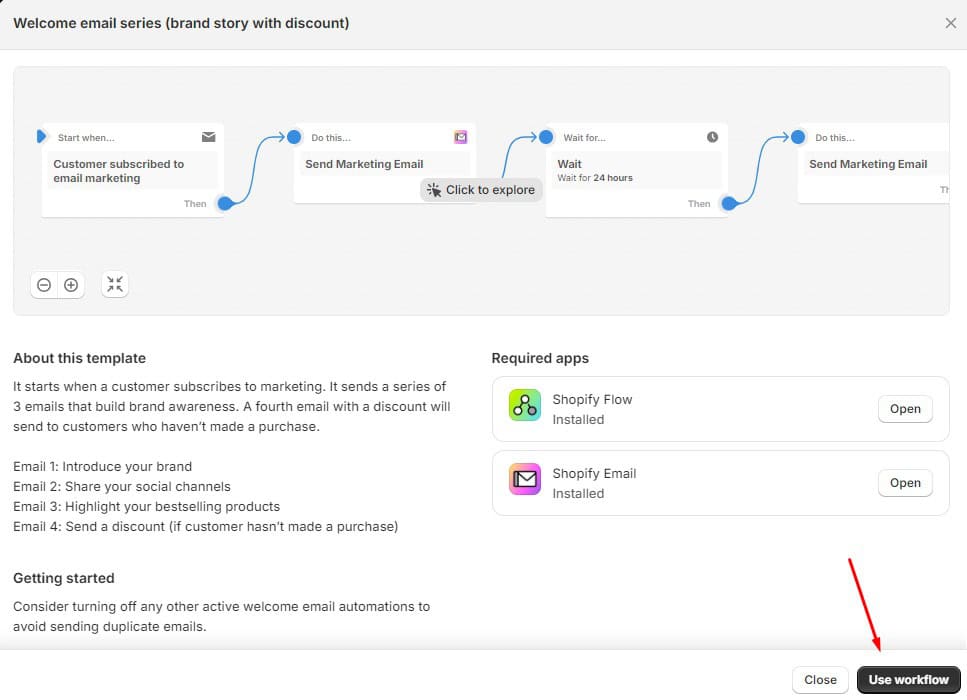
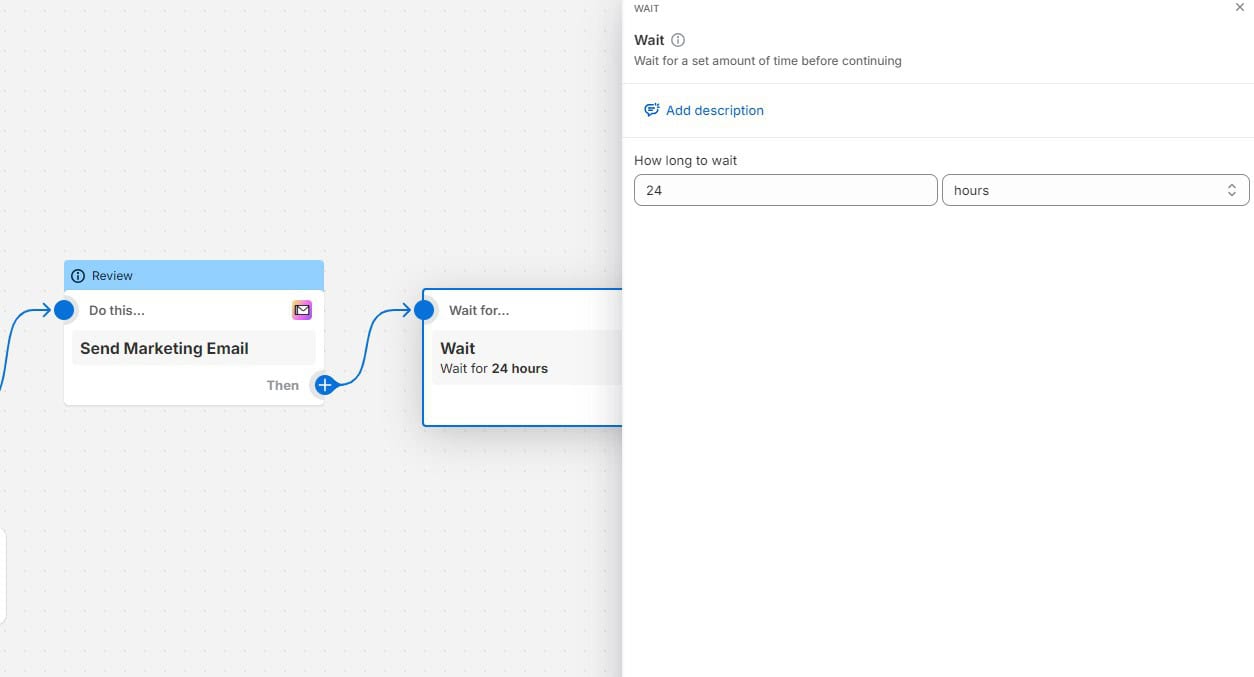
Step 6: Set up the Flow (Triggers & Wait Times)
Make changes to the triggers, such as subscription actions, and establish waiting periods between emails to create a paced communication sequence similar to the one depicted in the image below:
Step 7: Modify the Welcome Email Content
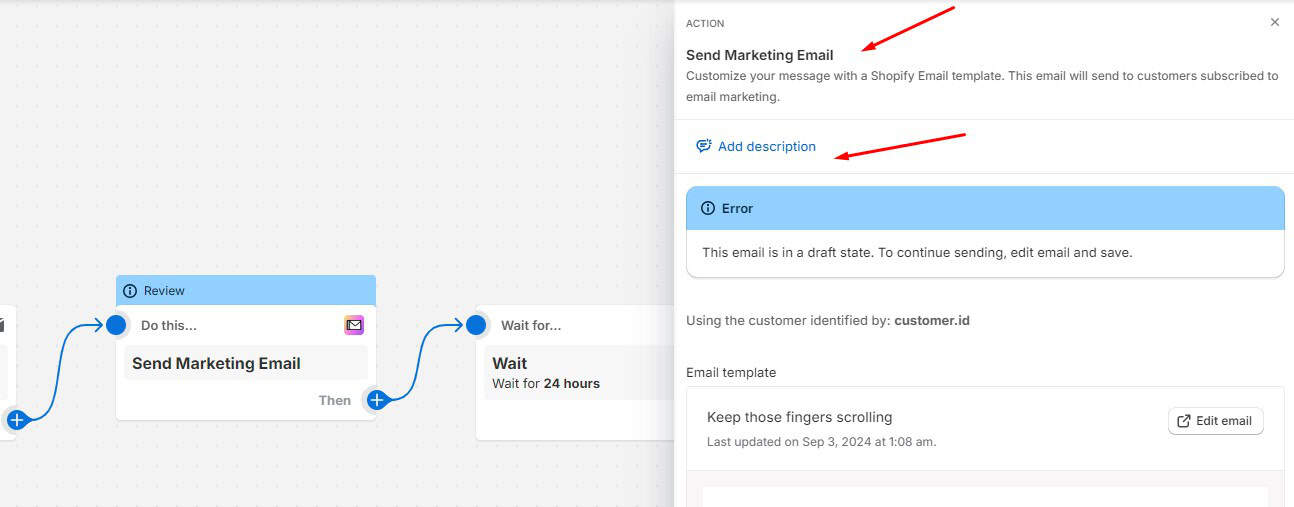
You should see an “Edit email” option on the workflow page. Click on this option to modify the draft email.
Besides, you have the ability to edit each email. For instance, after 24 hours have passed, you can send a community builder email to your customers containing your social media account information.
Step 8: Edit the Email Details
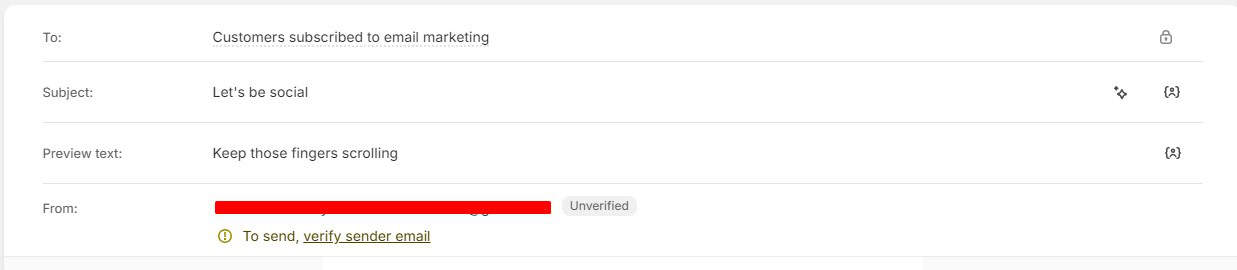
Please take note of the following details:
To: Shopify will only send emails to “customers subscribed to email marketing.”
Subject Line: Change the line from “Welcome aboard! Enjoy an exclusive discount” to “Cheers to new beginnings! Claim your welcome discount now!”
Preview Text: Include a teaser such as “Discover your complimentary shipping on us.”
From: Adjust the sender’s email address for brand consistency.
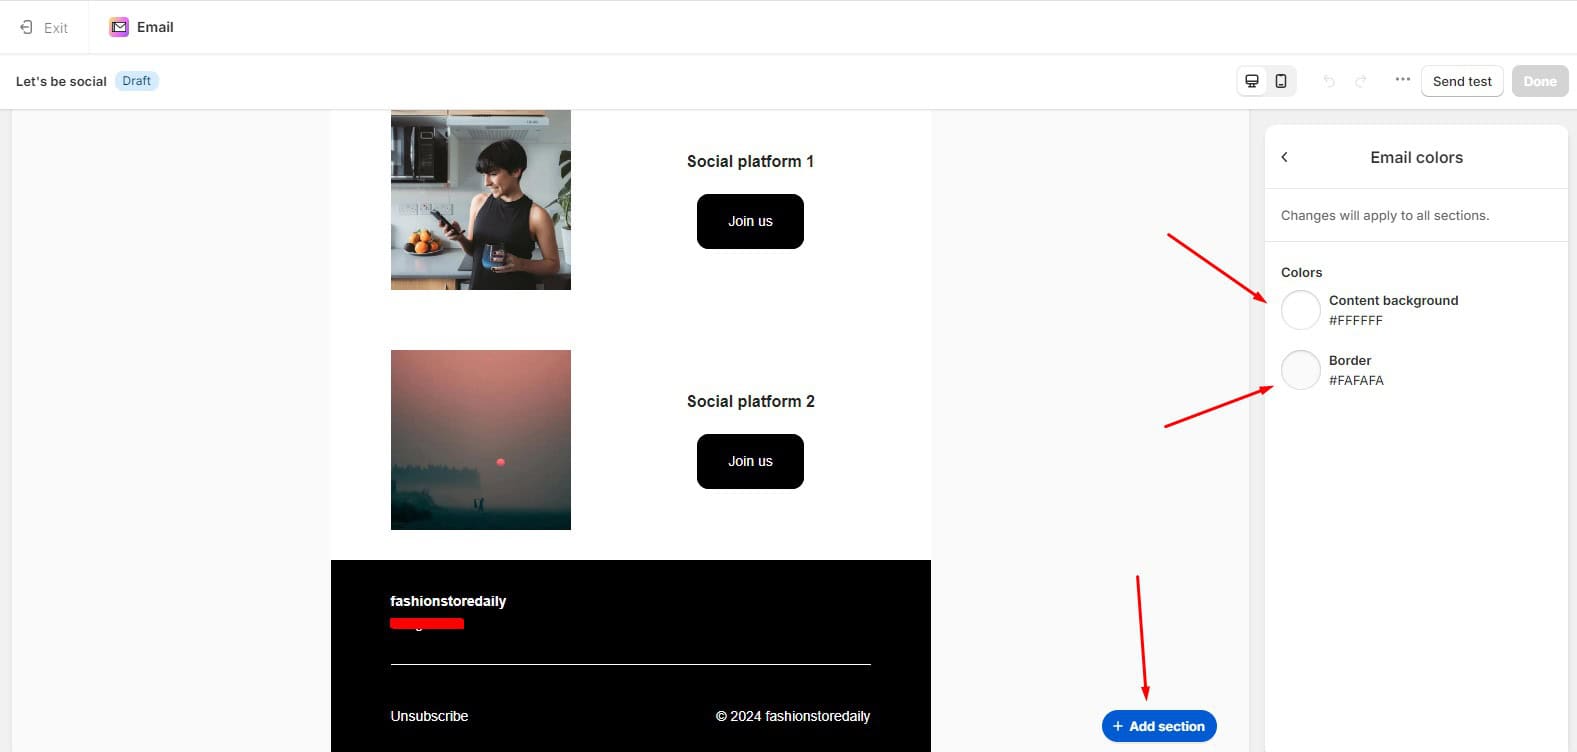
Step 9: Customize the Email Design
In the email editor, customize design elements to match your brand’s identity. Rearrange sections, update colors, and modify fonts.
If desired, expand your email by adding a new section.
Step 10: Preview and Save
Use the “Send test email” option to preview the email in your own inbox. If everything looks good, click “Save” to apply the changes.
Step 11: Turn on the Automated Emails
Finalize the process by activating the automation. Locate the toggle switch or button labeled “Turn on workflow” and switch it on.
Using Apps to Improve Your Automated Emails
Shopify Email is great, but you can make your emails even better with apps from the Shopify App Store.
Klaviyo: This app comes with advanced features like detailed segmentation and in-depth analytics. Thus you can send more targeted emails.
Omnisend: Omnisend allows you create automated emails. Plus, it offers SMS marketing and other features to improve your communication.
Privy: Privy helps you with capturing more emails with popups and exit-intent forms. After that you can then sends automated emails to your subscribers.
Mailchimp: Mailchimp is a well-known email marketing tool that you can integrate with Shopify for sending automated emails like product recommendations or abandoned cart reminders.
Frequently Asked Questions
What are Shopify Automated Emails?
Shopify automated emails are emails that you can set up to trigger in certain conditions such as when a customer makes a purchase or abandons the cart. Automated emails make it way easier to keep in touch with your customers without having to email every single one of them yourself.
Can I set up automated emails on Shopify without knowing how to code?
Coding skills is not mandatory to set up automated emails on Shopify as it has resources for easily creating your own email automation using tools and templates.
Can I customize the emails?
Yes, you can customize everything from the content to the design of your emails, so they match your brand and feel personal to your customers.
What’s the best time to send automated emails?
The best time varies, but for most emails like abandoned cart reminders, sending them within a few hours is ideal. For other emails, test different times to see what works best for your audience.
To Wrap Up
Shopify automated emails are a great way to stay in touch with your customers aside from not having much time managing email marketing. Using these simple steps you can write powerful emails that generate sales and keep your customers happy. Remember to track your email performance regularly and optimize it accordingly. But with automated emails, you have more time to run your store and keep your customers engaged.
Read More: