Looking to convert visitors into customers on your Shopify store? Great visuals are key. A well-designed photo gallery fosters attraction to your brand, creates trust , and increases your shop’s conversion rate.
For products, you definitely should use a photo gallery. And that goes for anyone who’s a fashion brand, artist, food vendor, photographer, or lifestyle seller.
This guide explains three ways to create a Shopify photo gallery in your store. We’ll also offer tips on how to make it mobile-friendly, SEO-friendly, and fast.
Why You Should Add a Photo Gallery to Your Shopify Store?
| Benefit | Description |
| Showcase Products Beautifully | Let shoppers see product angles, zooms, lifestyle shots, and collections. |
| Improve User Experience | Keep visitors engaged longer with interactive galleries. |
| Tell a Visual Story | Highlight your brand’s journey or product use through visuals. |
| Build Credibility | Include customer photos, testimonials, or behind-the-scenes shots. |
| Boost SEO & Conversions | Optimize image alt texts for search engines to increase click-through rates. |
Studies show people remember 65% of visual content, compared to only 10% of text. This makes galleries a powerful selling tool.
How to Create a Shopify Photo Gallery (3 Easy Methods)
Method 1: Use a Shopify Photo Gallery App (Fastest & Most Flexible)
The easiest way to add a gallery is by using an app like the Essential Grid Gallery by ShopiDevs from the Shopify App Store.
Step-by-Step

- Go to the Shopify App Store and search for “Essential Grid Gallery”.
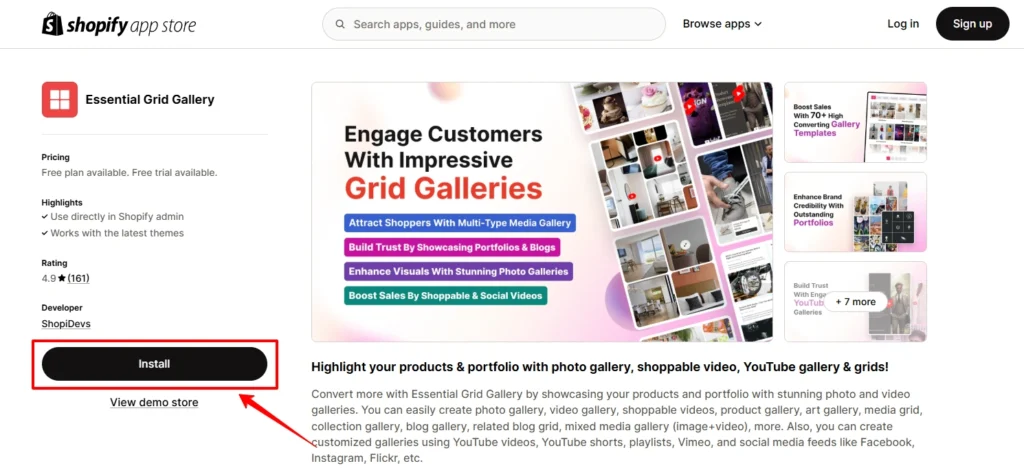
- Install Essential Grid Gallery in your Shopify store.
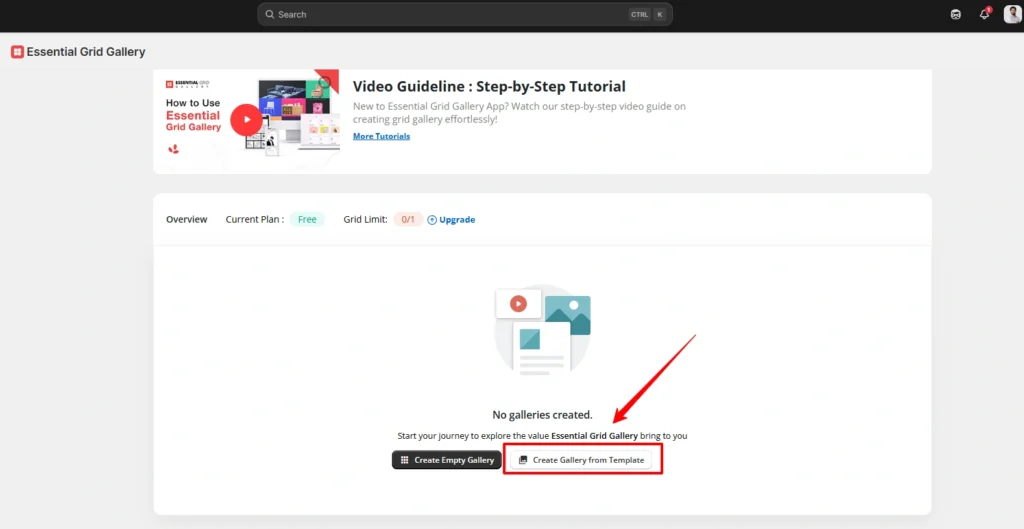
- Open the app dashboard and click on Create Gallery from Template.
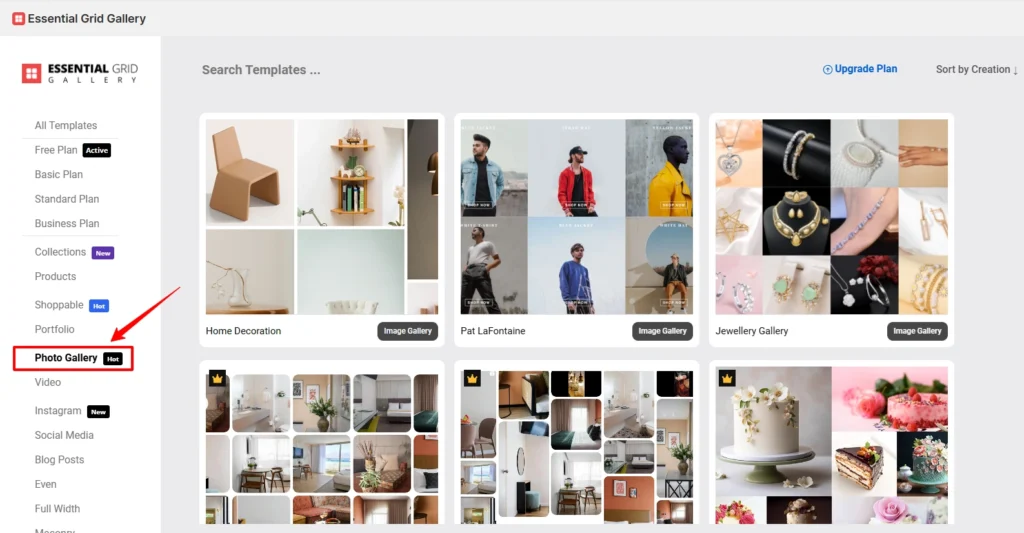
- Click on the Photo Gallery

- Choose your gallery template and click on the Install Grid button
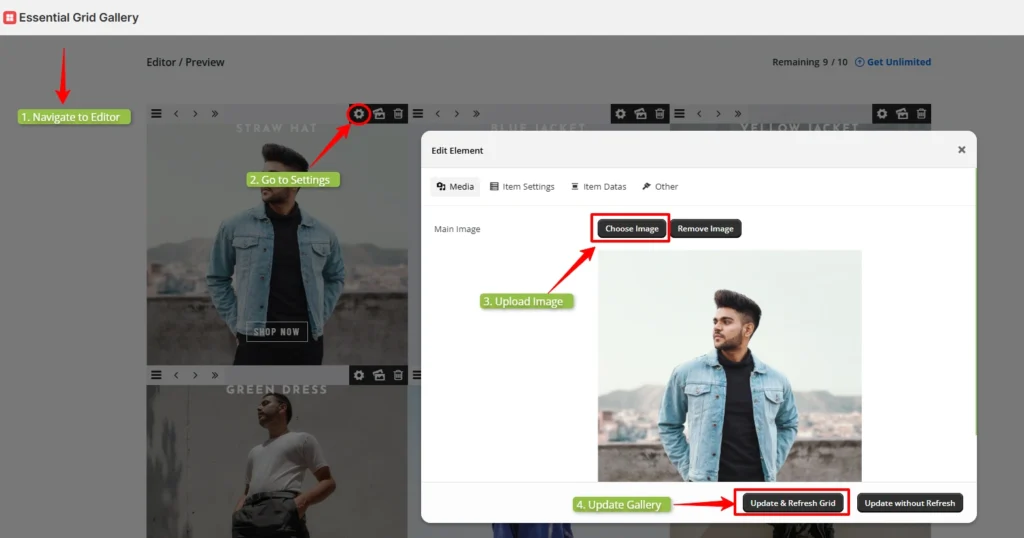
- Go to the settings of each image and upload a new image. Then update your gallery.

- Copy the Gallery ID
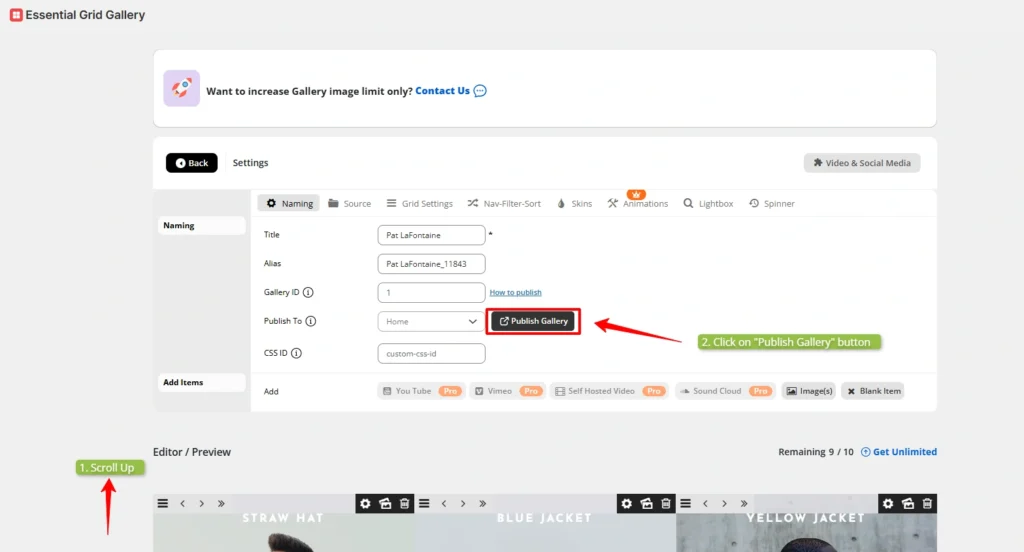
- Click on the Publish Gallery button.
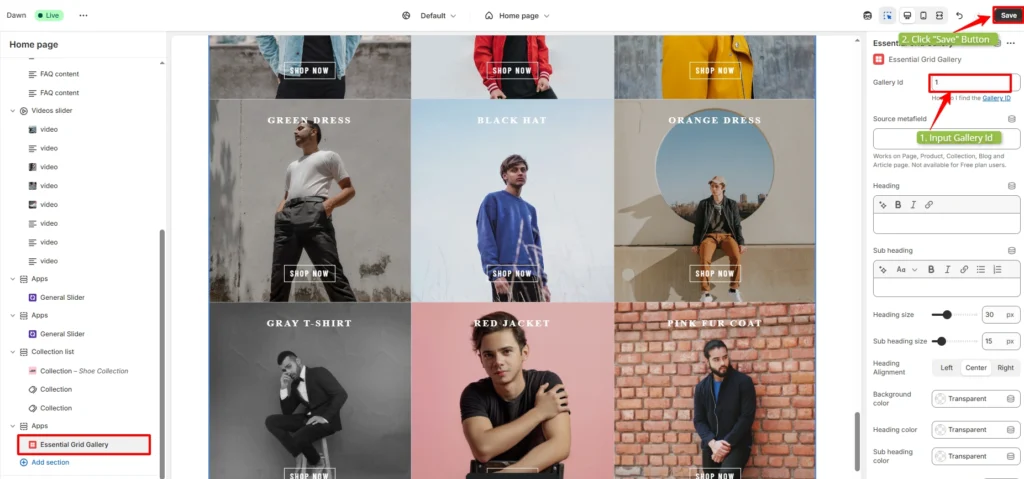
- Paste the Gallery ID on Shopify and click on the Save button.
Method 2: Use Your Shopify Theme’s Built-In Gallery Section
If you’re using a modern premium Shopify theme, it may already have a gallery section.
How to Use:
- Go to Online Store > Themes in your Shopify admin.
- Click Customize beside your live theme.
- In the theme editor, click “Add section” and look for Image gallery, Slideshow, or Custom content.
- Upload images to the gallery block and reorder as needed.
- Adjust layout (number of columns, image ratio, text overlay, etc.).
- Click Save to publish changes.
Pros
- Simple, native solution
- No extra cost
- Integrates well with your existing theme
Cons
- Limited design options
- No filtering, lightbox, or advanced interaction
- Cannot reuse galleries across pages
Best for: Basic image displays like a 3-column gallery or homepage highlights.
Method 3: Create a Custom HTML Gallery (For Developers or Advanced Users)
If you know HTML/CSS, you can create a gallery manually using custom code.
Steps
- Go to Online Store > Pages and open a page.
- Click on Show HTML in the editor.
- Paste your gallery code using CSS Grid or Flexbox.
- Style with inline CSS or through theme files.
This method is not beginner-friendly and may affect theme performance if not done correctly.
Drawbacks
- Time-consuming to manage
- Not scalable for large galleries
- No backend UI to manage media
Only recommended for those with web development experience or if you’re creating a custom feature for your store.
Bonus Tips for High-Impact Shopify Galleries
Here’s how to optimise to ensure high levels of engagement and conversion:
- Make It Mobile First: Make sure your gallery looks great on all devices. More than 70% of shoppers are already browsing from mobile devices.
- Compress & Optimize Images: Find a tool like TinyPNG, that can downsize the images for your site without sacrificing quality. The faster the load time, the lower the bounce rate.
- Add Alt Text for SEO: Use the alt attribute to explain the picture. This is to improve Google Images visibility and organic traffic.
- Use Filters & Categories: For bigger galleries, give the possibility to filter the thumbnails by collection, style, or tag.
- Add Captions or Hover Text: Drive visitors to click into products and prices or quick details when hovering over an image.
- Include CTAs: Gallery views to go into action. Link pictures to product pages, blog posts, or special pack deals.
Where to Display a Gallery on Shopify?
Places where you should put a photo gallery that converts very well:
- Homepage: Showcase your newest collections or moments with your customers.
- Product Pages: Include lifestyle photos and close product shots.
- About Us: Highlight your company’s brand history in a visual timeline.
- Blog: Made an awesome gallery blog post for an event, testimonials, and tutorials.
- Lookbook Page: Create seasonal or content-related image galleries.
Final Thoughts
It has never been easier to add a photo gallery to your Shopify store. These days, you can create an awesome, responsive gallery using the Essential Grid Gallery App. This Shopify app can mirror your brand while turning website visitors into long-term fans. It is the fastest, most stylish, most user-friendly, and most intuitive Shopify photo gallery app. Create infinite galleries, include social content, and enable carousels that convert with the Essential Grid Gallery app.
I’m a digital marketing expert and mobile app developer with a deep understanding of Shopify App Store optimization. I contribute insightful articles on Shopify to help businesses thrive online.