If you’re running an e-commerce business on Shopify, tracking and analyzing your website’s data is crucial to making informed decisions about your online store’s performance. Setup Google Analytics 4 Shopify: Google Analytics 4 (GA4) is the latest version of Google’s powerful analytics tool, offering new features and capabilities to help you gain deeper insights into your customers’ behavior and improve your online business.
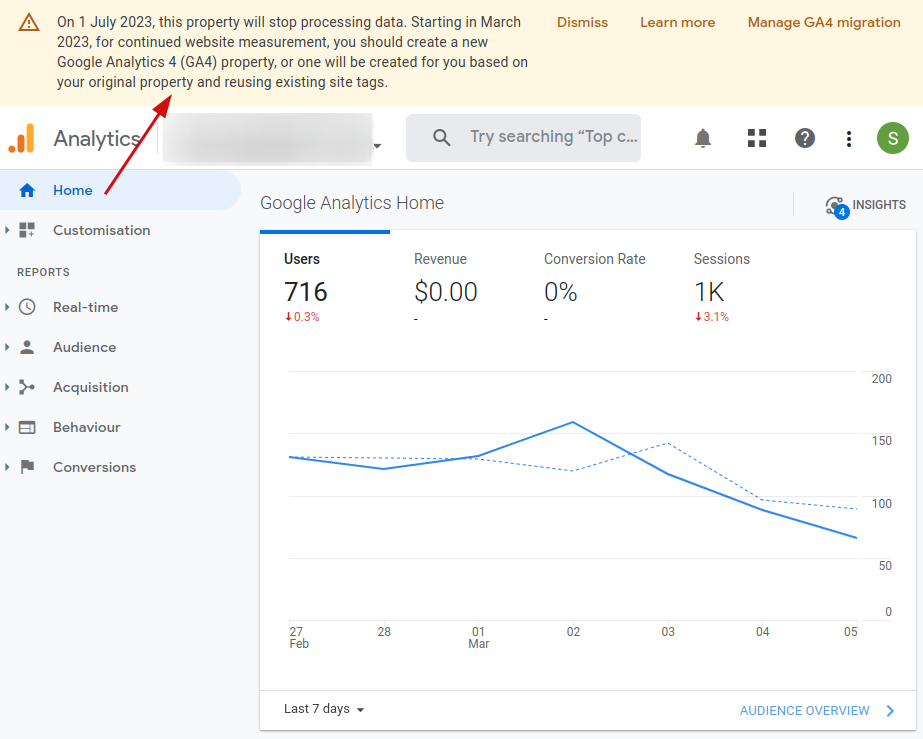
Google has announced that it will be phasing out its Universal Analytics tool in July 2023, and replacing it with the newer Google Analytics 4. This move is aimed at providing users with a more advanced and comprehensive measurement solution that can better track and analyze customer behavior across different devices and platforms. Universal Analytics will continue to collect data until its sunset in July 2023. Shopify users will be able to switch to Google Analytics 4 and start leveraging its advanced features and capabilities to gain deeper insights into their e-commerce business.
It’s important to note that making the switch to Google Analytics 4 is not mandatory, but it is highly recommended for users who want to stay ahead of the curve and take advantage of the latest tools and technologies to optimize their online stores. The process of Setup Google Analytics 4 Shopify is relatively easy and straightforward, and there are plenty of resources available to guide users through the process. By making the switch, users can unlock a whole new world of data and insights that can help drive growth and success for their e-commerce business.
In this article, we’ll guide you through the process of Setup Google Analytics 4 Shopify store step-by-step, so you can start collecting and analyzing data to drive growth and success for your e-commerce business. Whether you’re new to GA4 or a seasoned pro, this guide will provide you with all the information you need to get started with GA4 on your Shopify store easily and effectively.
Setup Google Analytics 4 Shopify
First, you have to create an account for google analytics to Setup Google Analytics 4 Shopify. Then you have to create a tracking ID for your google analytics 4 account. Let’s start step by step with this.
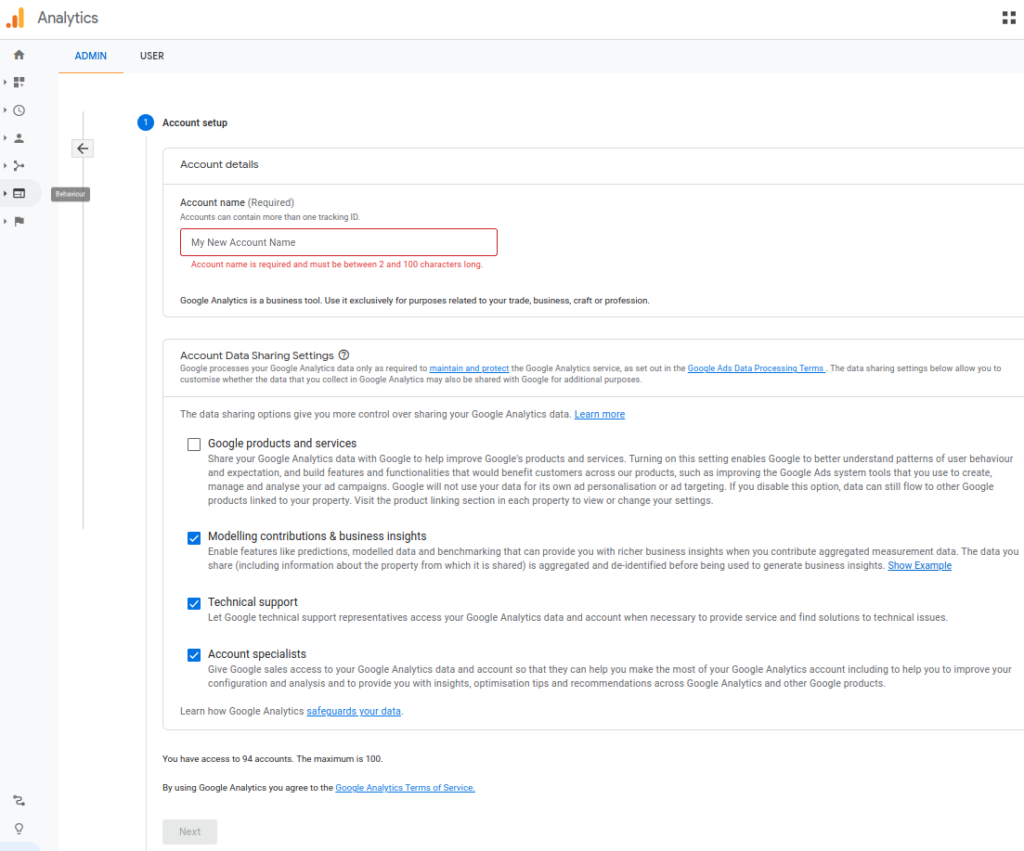
Create GA4 Account:
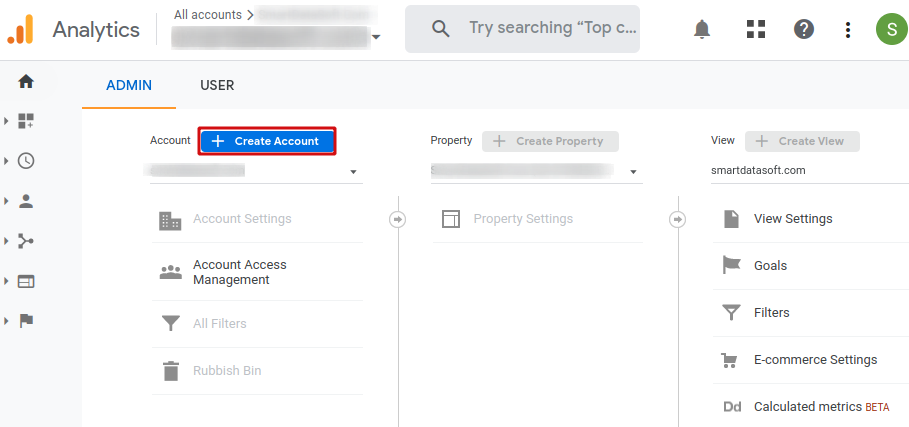
Click the Create Account button. Then you will see the page with text field. Fill the text field and click Next.
Create GA4 Property:
We have already created the account name test. Now we have to create a GA4 property.
To create a GA4 property, go to your Google Analytics account’s Admin section if you haven’t already done so. Then click Create Property button. After creating the property, you will get the property item.
We have created the property name TEST
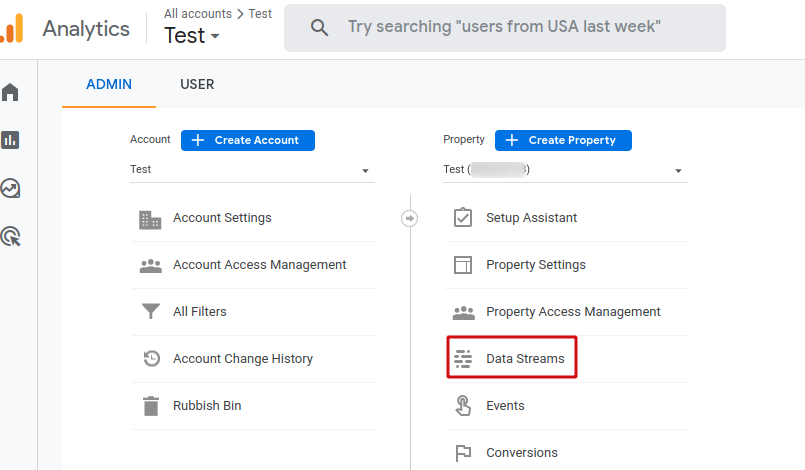
Now click the Data Streams
When you click the Data Streams, you will see the following windows:
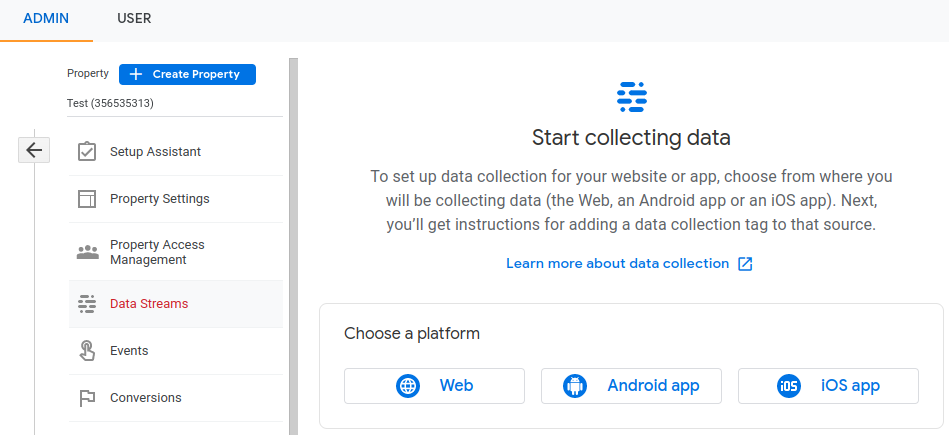
Now click the Web button from Choose a platform.
There you have to set up your data stream. You have to provide the website URL and stream name and click on “Create Stream”
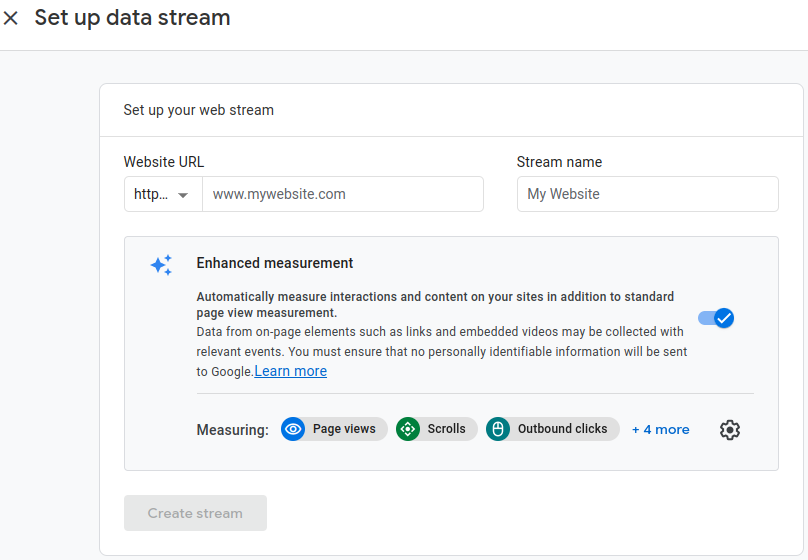
When the stream is created, you will see the web stream in the details shown below:
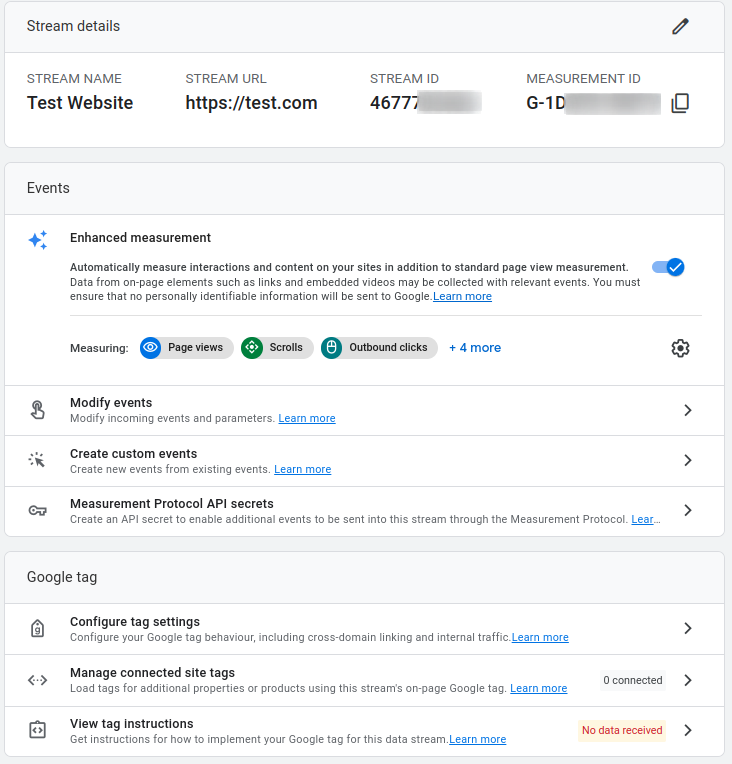
Now Click the View tag instructions > Install Manually click
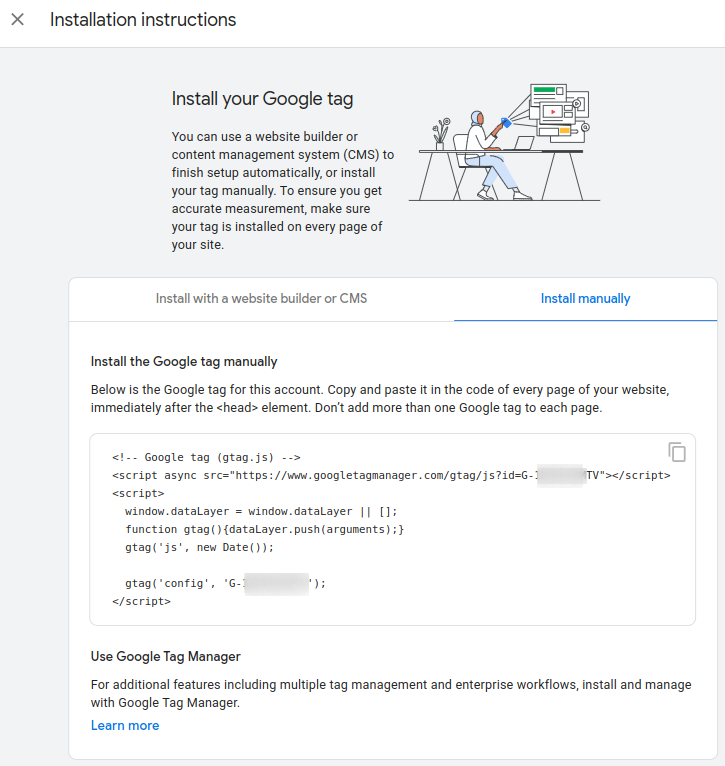
Now Copy the script
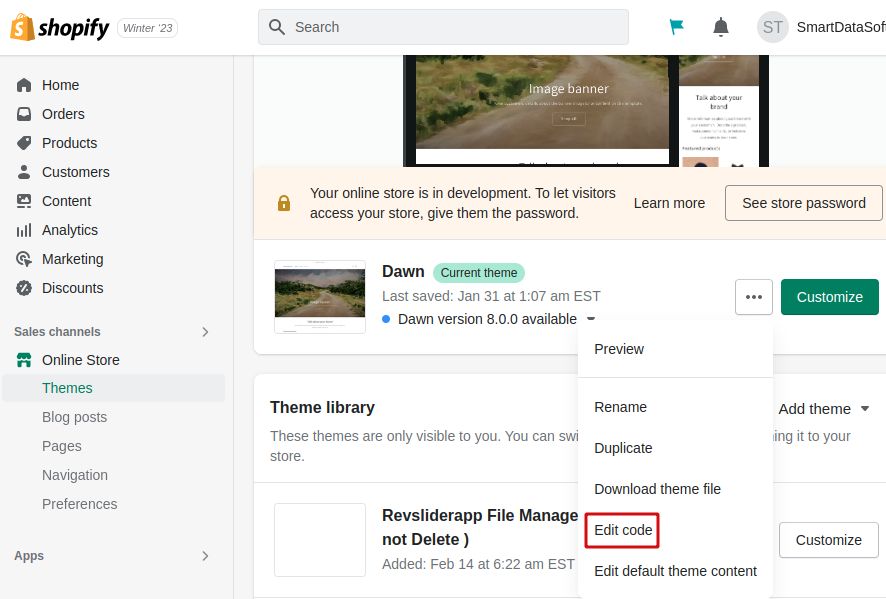
Implement the Google Analytics 4 Tracking code in Shopify
First, log in to the Shopify account. Then paste the code inside the <head> tag.
Now go to Online Store > Themes > Edit Code > theme.liquid
Now paste the google tag code inside the <head> tag on theme.liquid file.
After code placing:
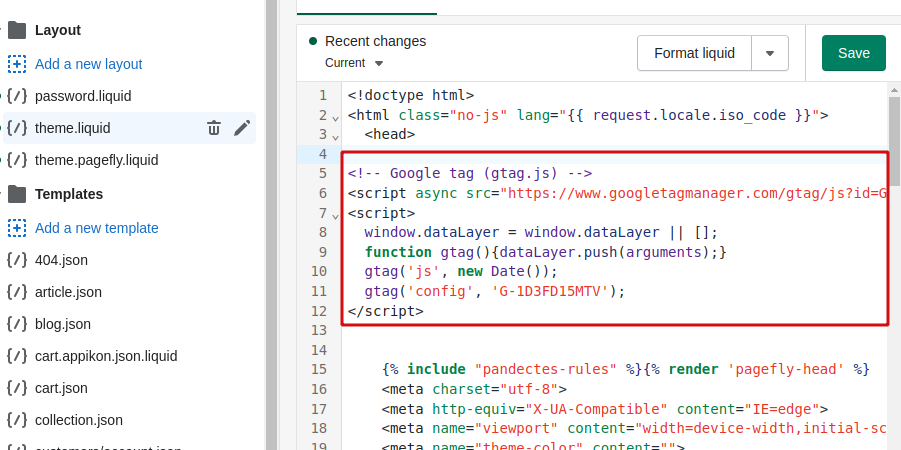
Now click the Save button.
Setup is finish. It’s time to validate data in google analytics.
How to Validate Google Analaytics Data
To validate that your Google Analytics 4 tracking code is properly installed and collecting data on your Shopify store, follow these steps:
- Go to your Google Analytics 4 account and select the property that you created for your Shopify store.
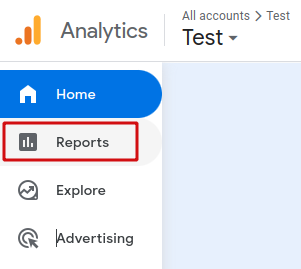
- Click on the “Realtime” tab in the left-hand menu.
- Open a new tab in your browser and go to your Shopify store.
- Browse through your store and perform some actions such as adding items to your cart, navigating to different pages, and checking out.
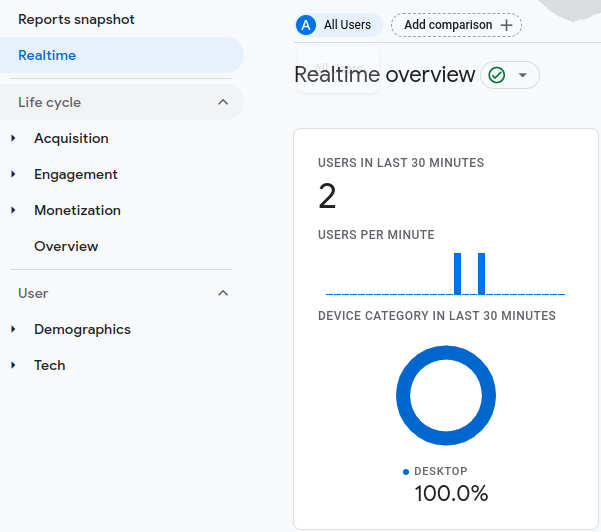
- Go back to your Google Analytics 4 account and refresh the “Realtime” tab.
- You should see your actions reflected in the “Realtime” report, indicating that your tracking code is successfully installed and tracking data.
If you do not see any data in the “Realtime” report, wait for a few minutes and try again. It may take some time for data to start flowing into your Google Analytics 4 account.
Process:
Set Realtime data:
You will see the users realtime report in the GA4 account.
This is how you can verify the analytics setup. If you don’t get the data, then wait for sometimes. You will see data. If still data not show then make sure that you have correctly installed the tracking code in the <head> section of your Shopify store’s theme.liquid file.
Setting up Google Analytics 4 on your Shopify store is a straightforward process that can provide valuable insights into your e-commerce business’s performance. By creating a Google Analytics 4 account, setting up a GA4 property, and implementing the tracking code in your Shopify store’s theme.liquid file, you can start collecting and analyzing data to optimize your online store and drive growth.
Remember to validate that your tracking code is properly installed by checking the “Realtime” report in your Google Analytics 4 account after performing actions on your Shopify store. By following these steps, you can easily set up Google Analytics 4 on your Shopify store and gain a better understanding of your customers’ behavior to make informed decisions for your e-commerce business. If you have any question regarding Setup Google Analytics 4 Shopify, then leave a comment.
Read More:
5 Best Shopify Fonts For Your Store
I’m a digital marketing expert and mobile app developer with a deep understanding of Shopify App Store optimization. I contribute insightful articles on Shopify to help businesses thrive online.