How to Create a Shopify Collection with the Tab Feature
This guide explains how to create a tab-based product collection using the EasyBoost app, allowing you to display multiple collections under organized tabs on your store.
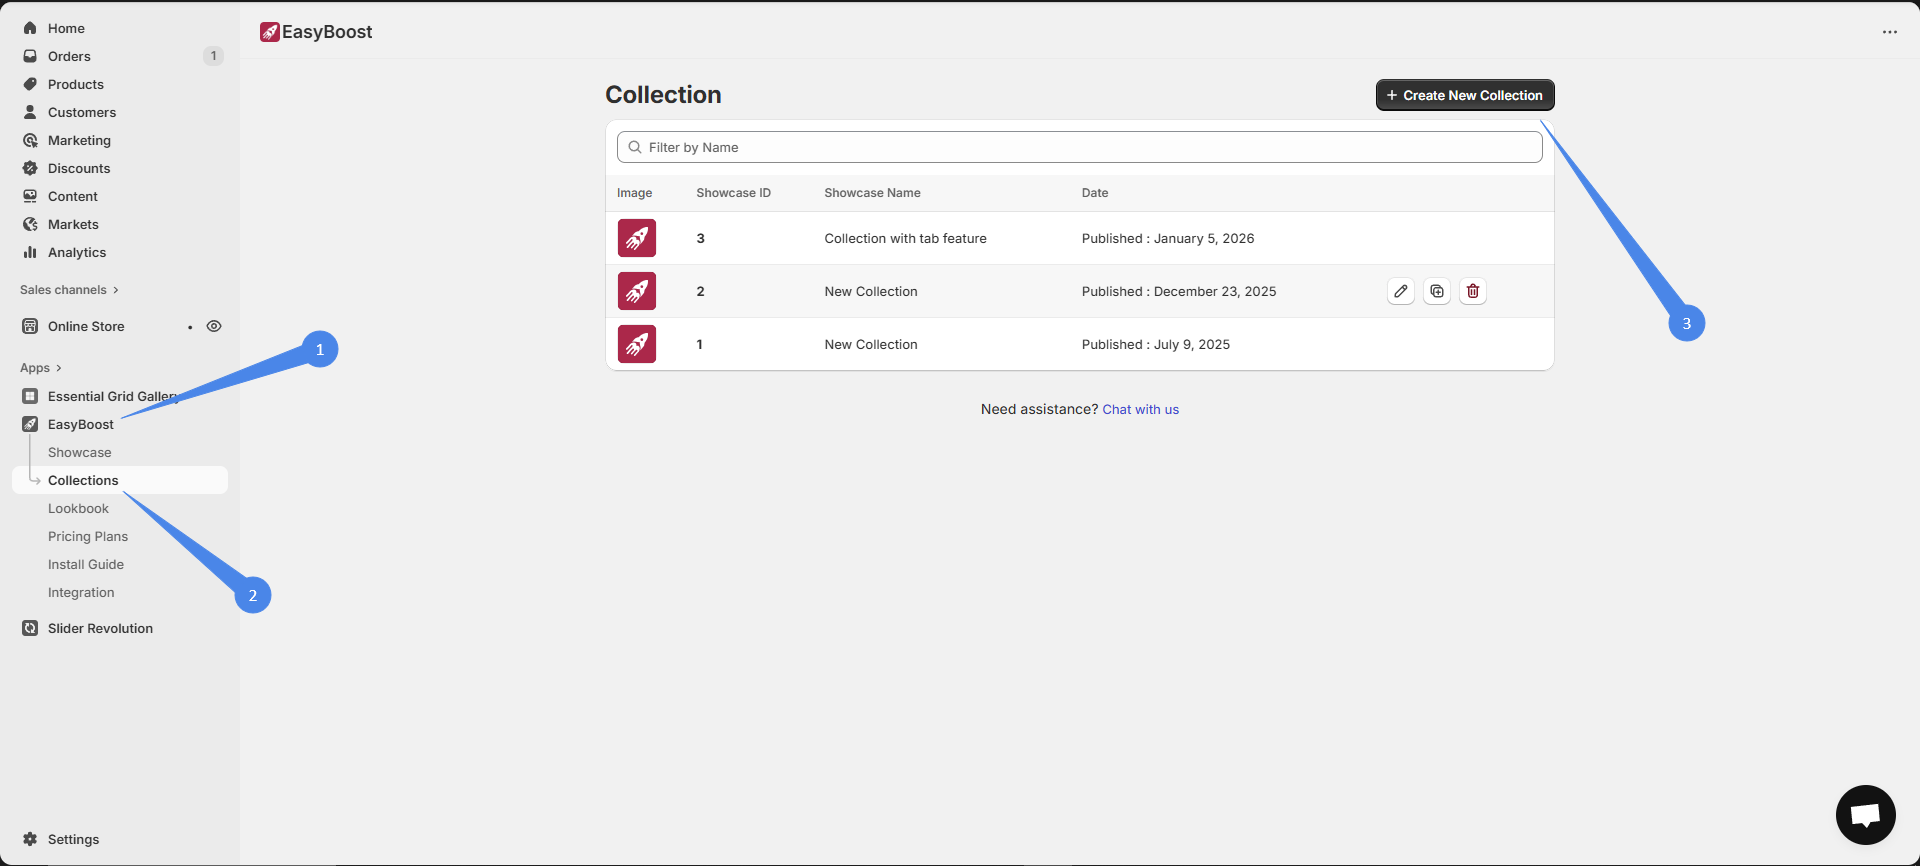
Step-1: Create a New Collection
Open your EasyBoost App from the Shopify admin.
Navigate to Collections.
Click Create New Collection to get started.
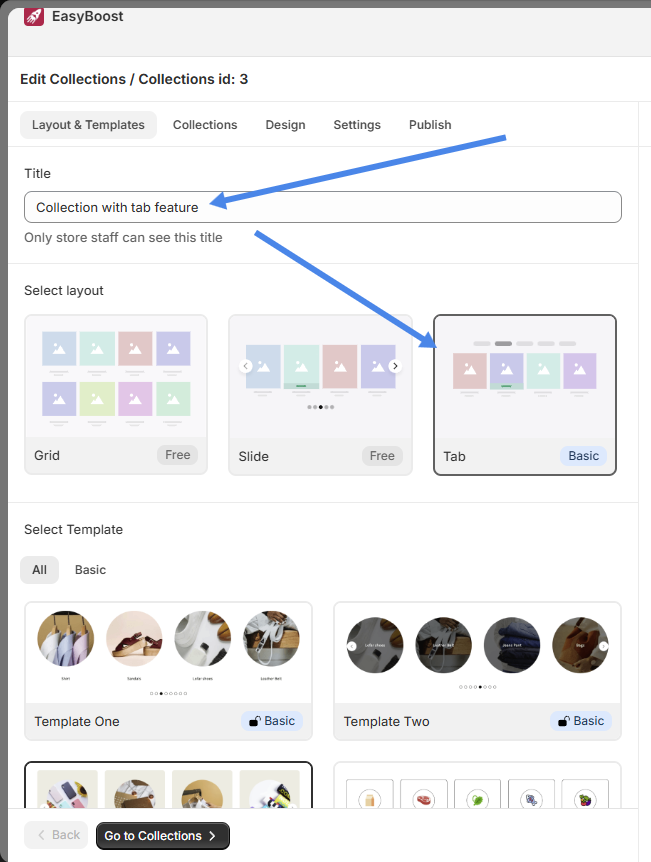
Step 2: Name the Collection and Select Tab Layout
Enter a Collection Name (this is for internal reference).
From the layout options, select Tab Layout.
This layout enables multiple collections to be displayed under tabs on the storefront.
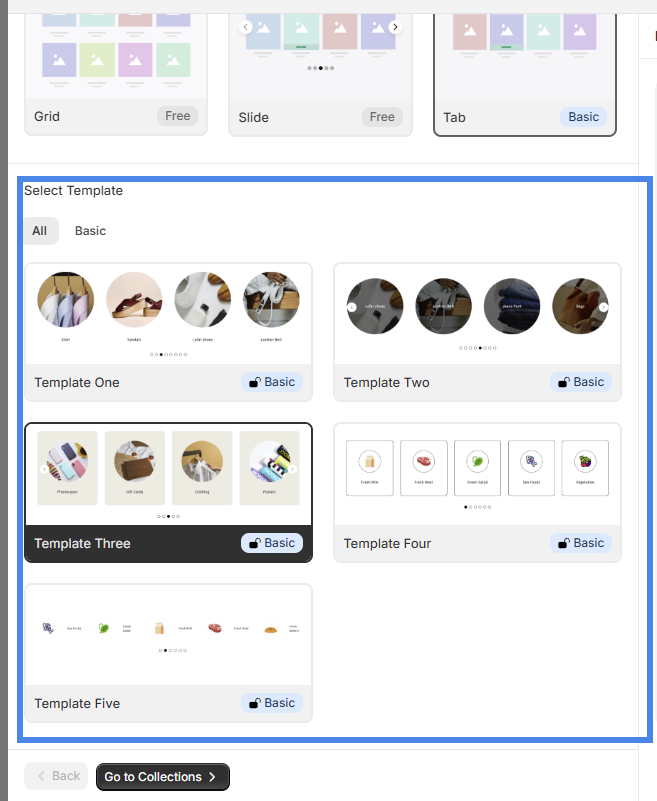
Step 3: Choose a Template
Browse through the available templates.
Select the template that best fits your store design.
Templates control the visual style of your tabbed collection.
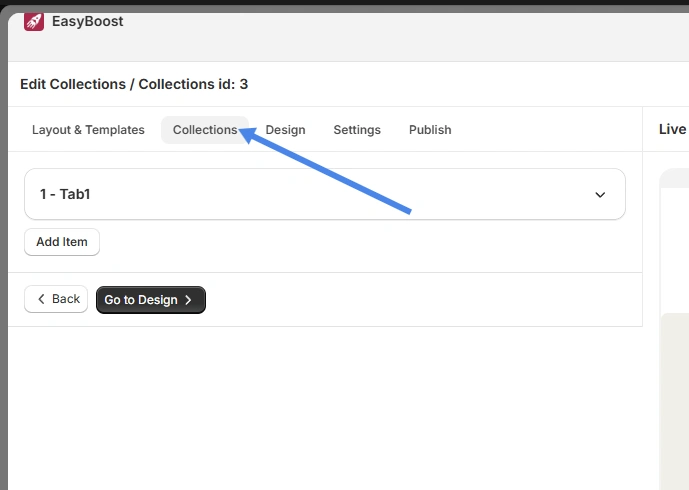
Step 4: Open the “Collections” Tab
Go to the Collections tab inside the collection editor.
Here, you’ll manage all tabs and assign collections to them.
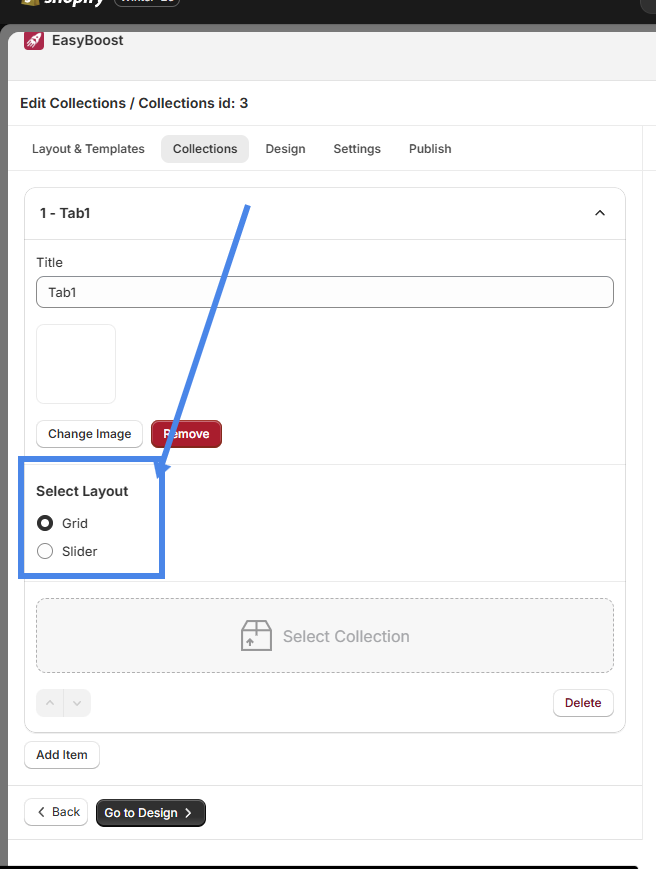
Step 5: Configure Each Tab
For each tab, you can:
Enter a Tab Name
(Optional) Add an image for the tab
Select a Shopify collection to display inside the tab
You can add multiple tabs as needed.
Step 6: Choose a Layout for Each Tab
Select how products should appear inside the tab:
Grid
Slider
Each tab can have its own layout style.
Step 7: Design, Settings, and Publish
Go to the Design tab to customize styles (spacing, colors, product layout, etc.).
Use the Settings tab to configure behavior and display options.
Click Publish to make the tabbed collection live on your store.